Welcome to this fourth part of the Zinnia Sewalong. We're so happy that some of you are already posting comments; it's great to hear how you've been getting along with the prep stages. Keep your questions coming. And soon we will be opening up a Facebook page where you can post photos of your work in progress and exchange comments.
In this post we are going to start sewing, yay! Some of the fundamentals we’ll be covering include seam allowances, button plackets (version 1), stitch length and width, pressing a seam, and staystitching. We will also explain how to use fusible interfacing, sew a basic seam, and finally how to do gathering and pleats.
As mentioned in the previous post, we will be referencing the different versions of the skirt throughout, so be sure to watch closely for the instructions on the version you have chosen.
A Crash Course in Sewing

Stitches Used in the Zinnia Pattern
- Straight Stitch - Is a row of stitching, which is straight, having no width. The stitches are sewn at a specific stitch length appropriate to what you are sewing. It is the stitch used most often.
- Backstitch – Is used to secure the start and finish of any permanent straight stitched seam. It consists of 3-5 straight stitches that are backstitched using a reverse button or lever on the sewing machine.
- Basting or tacking stitch – Throughout the Sewalong I am going to use the North American term basting, as this is what it is referred to in the pattern. Basting is a temporary stitch used in many different techniques, such as basting a seam together, gathering stitches and easing a sleeve. It consists of long stitches (4-5mm) and does not include backstitching. Basting stitches are most often removed from the garment once the permanent stitches are sewn.
Zigzag stitch – Is a specific stitch setting on the machine that causes the needle to move from left to right, creating a zig-zag pattern. It is often used for sewing knits, as it has elasticity, whereas a straight stitch does not. If your sewing machine doesn't have an overlocking stitch, then the zigzag stitch is used as a standard seam finish.
Overlock stitch – Is a stitch used specifically to finish seams, or the raw edge of the fabric. It can be done on a domestic sewing machine, when the specific function is provided; otherwise an overlocking machine (known as a serger in North America) is necessary. We’ll chat more about overlockers in a later post.

Edgestitch – is a row of straight stitching that is sewn parallel to the edge of a seam or a fold of fabric. It is often sewn at 1/8 inch from the edge, although sometimes closer. It should always be sewn from the right side of the fabric.
Topstitch – Is a row of stitching sewn parallel to the edge of a seam or fold of fabric at a distance of 1/4 inch. A topstitch should be sewn from the right side of the fabric and through all layers of the seam allowance.
Stitch Length and Width
Using the correct stitch length is fundamental to creating a strong seam. Too long and the stitch will be weak; too short and it may cause puckering. The standard stitch length is 2.5mm or 10-12 stitches per inch If your sewing machine setting will not go exactly to 2.5 (like my computerised Janome CXL301) then either 2.4mm or 2.6mm is fine. 0.1mm difference will not noticeably affect the stitch.
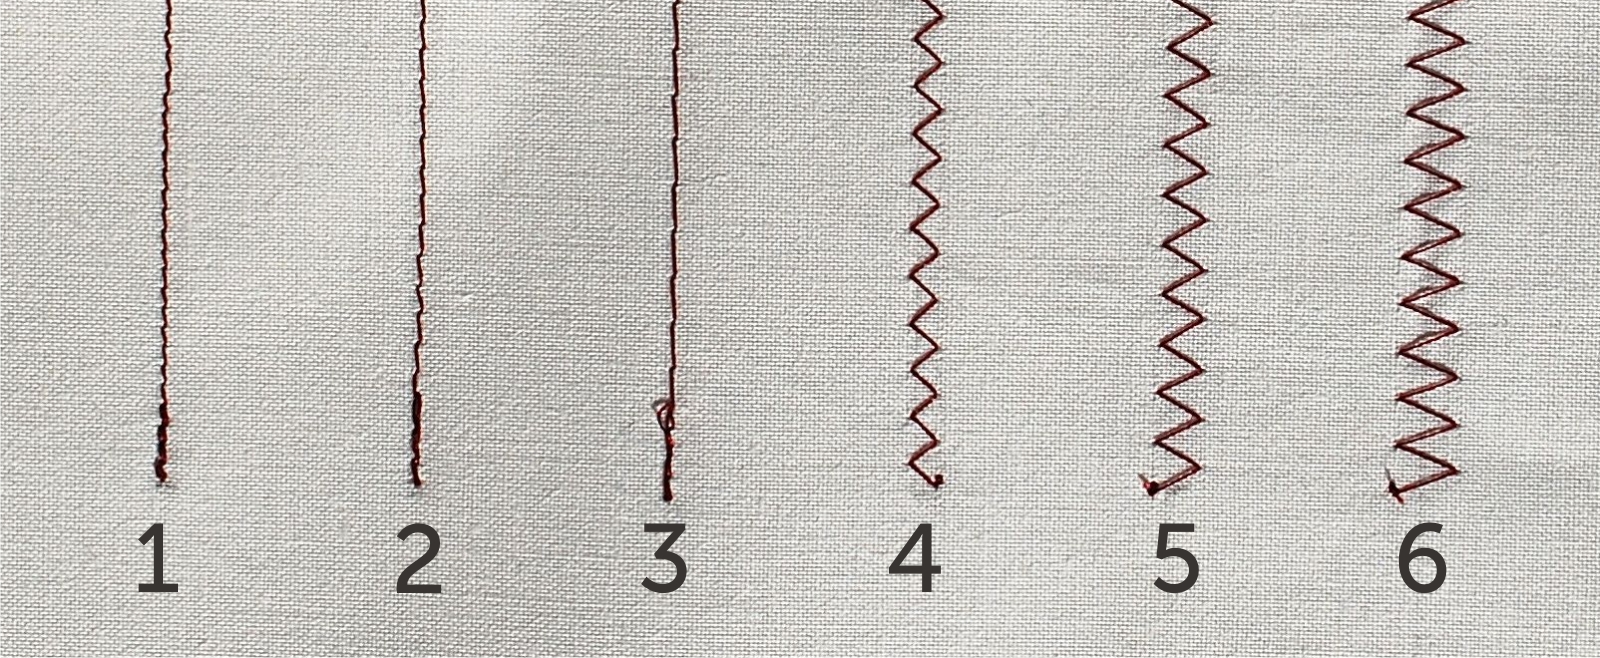
Pictured above are examples of different stitch lengths and widths. See below for a description of each.
- Straight stitch, 2.4mm stitch length (standard stitch length)
- Straight stitch, 3mm stitch length (stitch length for machine quilting)
- 5mm stitch length (stitch length for basting)
- 3.5mm stitch width, 2.5mm stitch length
- 5mm stitch width, 2.5mm stitch length
- 7mm stitch width, 2.5mm stitch length
Tension
Tension is another important setting on your sewing machine; it's important that your tension is correct in order to get a strong seam. The correct tension for different fabrics varies from machine to machine. For my machine, the ideal setting for medium weight cottons (the fabric I am using for version 1) is 4.
To help figure out the tension that you need, take a scrap of your garment or toile fabric and stitch a length of straight stitching for each number on your tension gauge. The lower the number, the looser the tension. Then compare the different tensions to decide what’s best. As a rule, you should not be able to see your bobbin thread from the top side of your fabric or your spool thread from the the underside of your fabric. Using contrasting thread colours will help assist you in setting the perfect tension.
Two types of Sewing Machines
Most domestic sewing machines can be categorised as either mechanical or computerised. Generally speaking, mechanical sewing machines are basic in functionality and can sew through standard materials. Although it’s fair to say that the cheaper models tend to be limited to light to medium weight fabric. If you're interested in purchasing your first sewing machine, have a wee read of this sewing machine buyers guide and check out some of the Janome machines on our very own website.
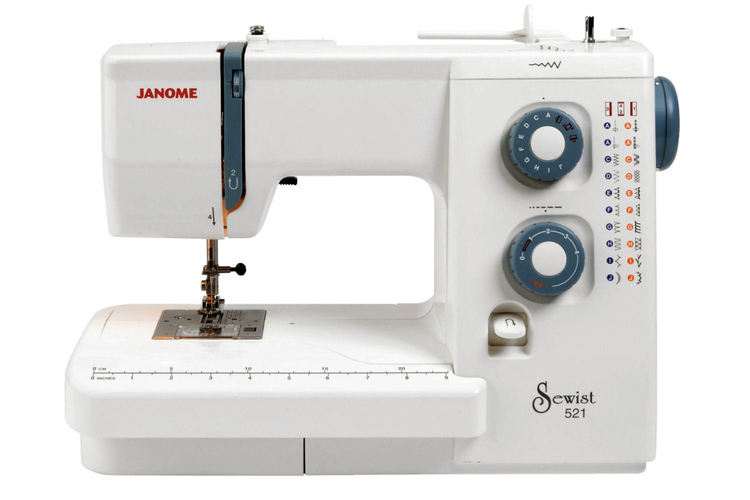
Janome Sewist 521, a mechanical sewing machine model.
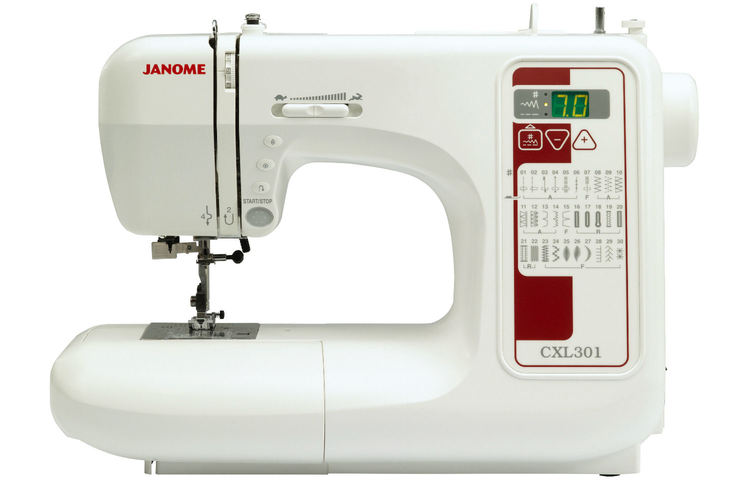
Janome CXL301, a entry level computerised sewing machine.
Computerised machines usually come with fuller functionality and can handle thicker fabrics. They tend to offer multiple stitch options, which are selected by pressing a button or (on recent models) by tapping a touchscreen.
A Standard Seam – Seam Allowance
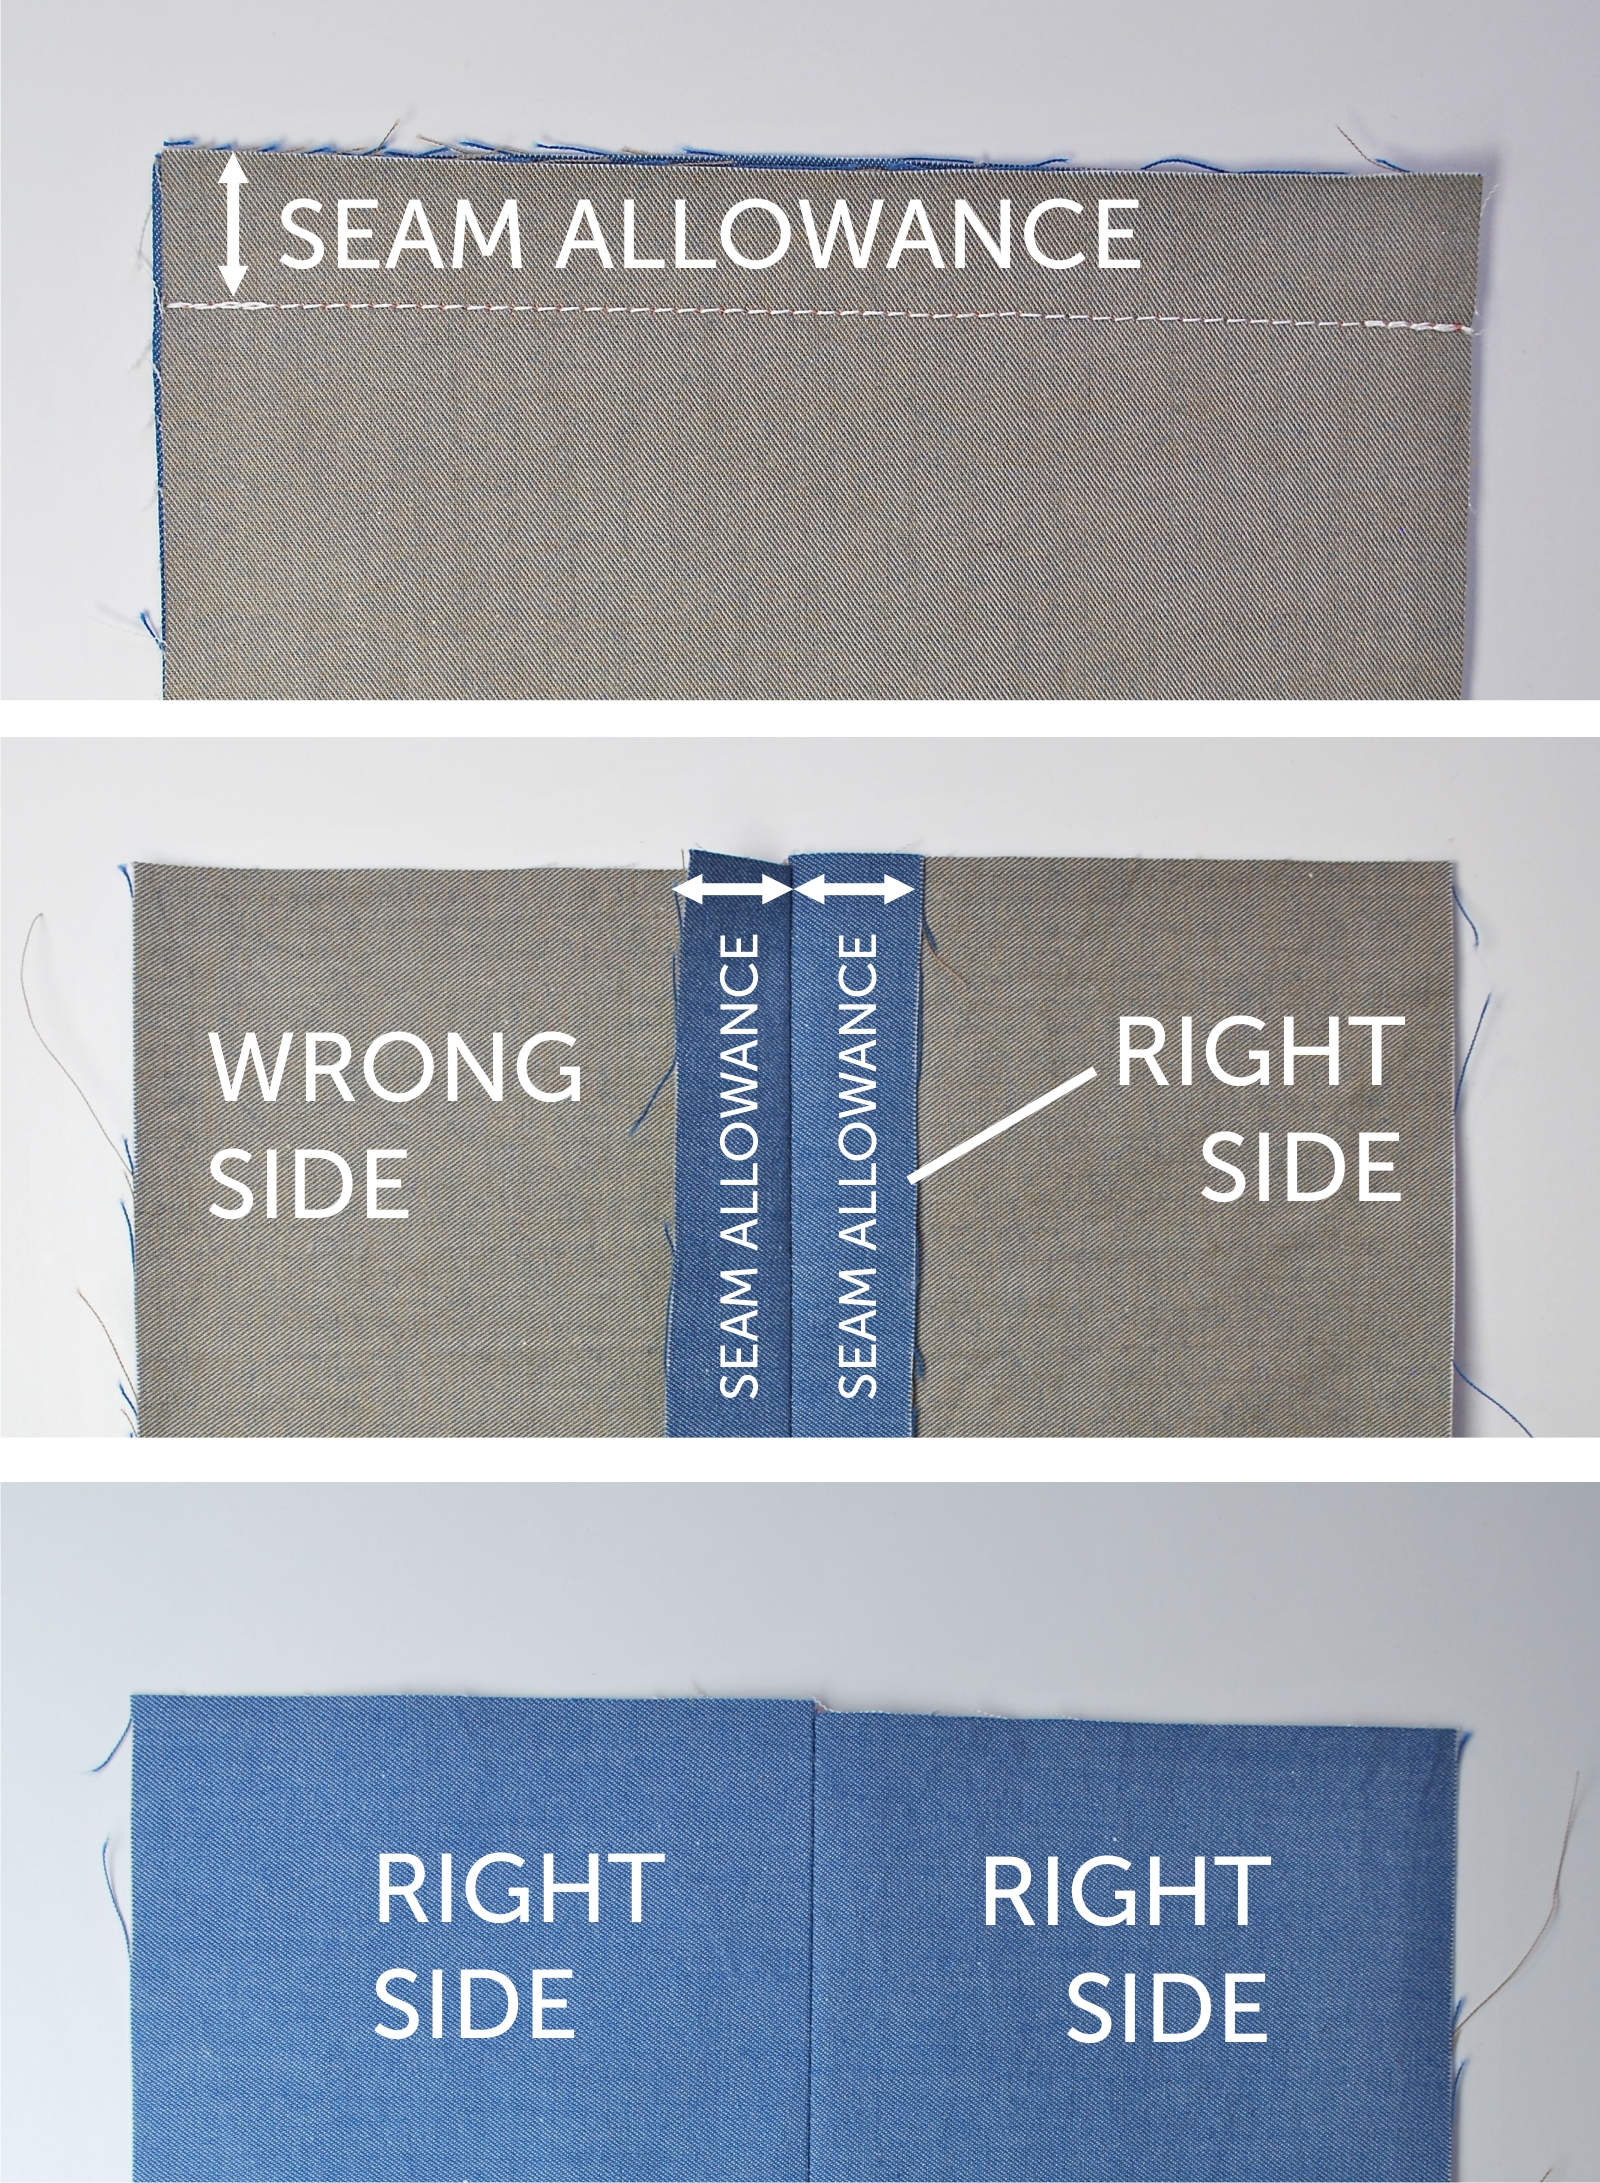
The first step in understanding how to sew a standard seam is to grasp the meaning of seam allowance. Put in simple terms, the seam allowance is the distance between your stitch and the raw edge of the fabric. In commercial patterns the standard for this is 5/8inch (1.6cm), but it can sometimes vary.
Most patterns will have one general seam allowance, which will be listed at the start of the pattern instructions. But there may also be other seam allowances stated for specific parts of the pattern. These will be noted in relevant pattern instruction sections.
The seam allowance in the Zinnia Skirt pattern is the industry standard 5/8inch. It’s worth noting that a lot of patterns use inches instead of centimetres. So if you’re used to the metric system, you might like to familiarise yourself with some of the standard imperial measurements used in commercial patterns. In this pattern we will also be using 4/8, 3/8, 1/4 and 1/8inch measurements. Helpfully a lot of these are marked on our tools, such as the quilting ruler mentioned in Post 3.
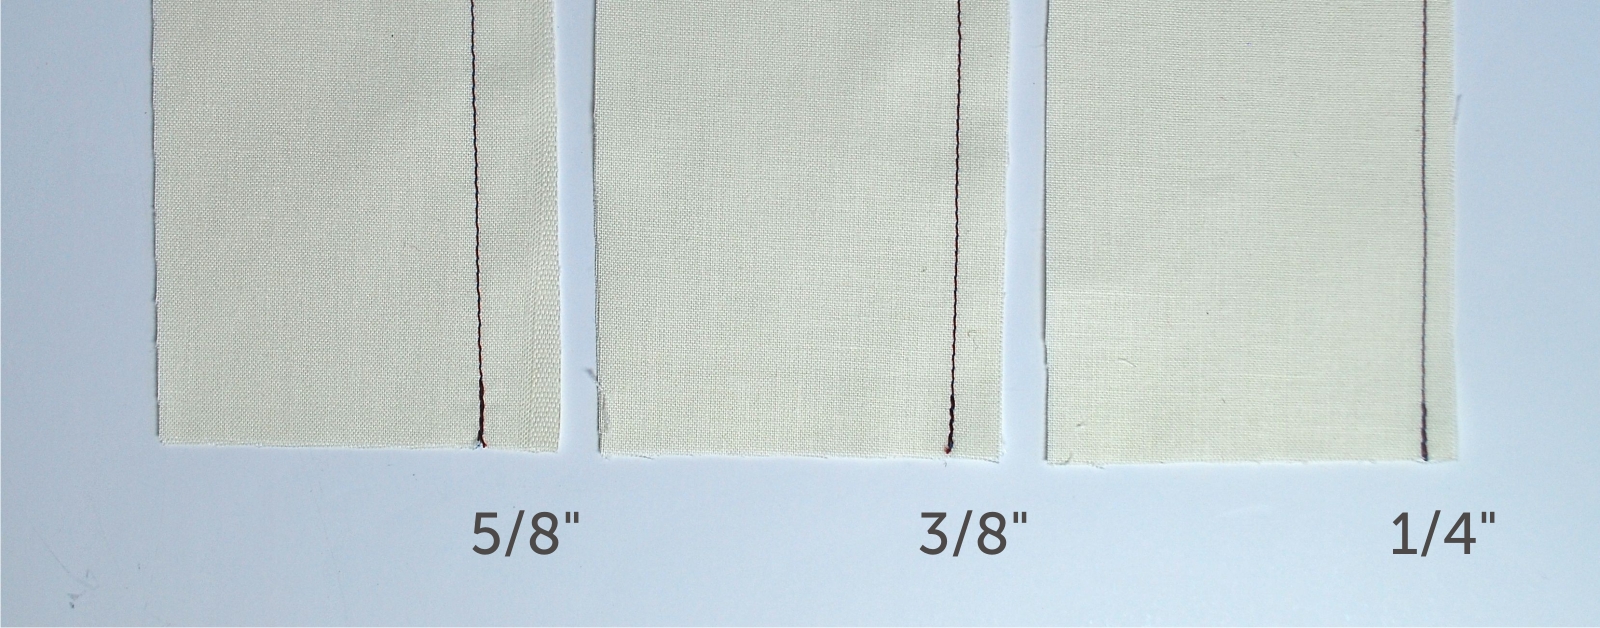
Above is an image showing different seam allowances. 5/8 inch = 1.6cm, 3/8 inch = 1 cm, and 1/4 inch = 0.6cm
Pressing a Seam
“Press as you sew” my Grams (who taught me to sew) always used to say. And it’s good advice too. After sewing a seam you should always use a good steam iron to press it. Just make sure you set the heat and steam to an appropriate setting for your fabric.

First Press - Pressing your seams to the a side.
The first step in doing this is to press the seam allowance to one side. This sets the stitches into the fabric, which strengthens the seam. Next you want to open the seam and give it a good press from the wrong side of the garment. Then press again from the right side of the garment, making sure that there are no unwanted folds along the seam. I like to use the steam release button and give it a couple of good puffs. This sets the seam quite well.

Second Press- Pressing the seam open from the wrong side.
It’s also important to press, not iron your fabric. Technically speaking, ironing involves the motion of moving the iron back and forth over the fabric. This can have the unwanted effect of distorting your fabric; especially if it has stretch in it. You can avoid this by pressing your fabric instead, which just means that you hold your iron in one spot for a short period, applying light pressure.

Third Step - Press again from the right side.
If you’re using delicate or sheer fabric, as in Version 3 of the Zinnia pattern, I would recommend using a press cloth. This protects the fabric from the intensity of the iron and any sheen that may result from the heat. For my press cloth I use silk organza in a white or off-white colour. This is a highly heat resistant fabric and it’s also translucent, which is really helpful when pressing. It is expensive, but you don’t need much to make your own press cloth (around 0.2m, which will cost around £4.00).
What is Staystitching?
Let me start by saying that staystitching is very important and should not be skipped. Many of my students have confessed to me that they’ve missed this step out as they weren’t even sure why it was necessary.

This is the staystiching along the waistline front of version 2. See step one (page 23) in the paper pattern.
The primary purpose of staystitching is to increase the longevity of your garment by preventing stretch. It does this by adding strength to your fabric along the seam. And hence it is most often used on curved seams that are vulnerable to stretching, such as the neckline or waistband.
Staystitching is achieved using a permanent (hence ‘stay’) straight stitch, usually set at the standard 2.5mm stitch length, with a backstitch at the start and finish of the stitch, which secures it. I usually sew staystitching at 1/8 inch inside the seam allowance. So for the Zinnia Skirt, or any other pattern with an industry standard 5/8 seam allowance, this would be at 4/8inch from the raw edge.
In case it's not clear, a staystitch is only applied to strengthen a single piece of fabric. It is not used to stitch two pieces together ( a common misunderstanding). I'd also like to add that it's not necessary to add staystitching to your toile, unless you wish to practice or are thinking of making a wearable toile. And as a final note, since your staystitch is sewn inside the seam allowance, it should not be visible from the right side of your fabric; nor should you clip it or notch into it.
How to Use Fusible Interfacing
Interfacing material is either fused or sewn to the wrong side of your fabric in order to give it strength and structure. Most garments you make will require interfacing of one kind or another (in a collar for example).
Interfacing comes in a variety of different weights and is usually black or white in colour. I tend to use white interfacing for most things, as black can cause a coloured fabric to look darker than it should. I only use black interfacing for black or very dark coloured fabrics.
For the Zinnia skirt lightweight fusible interfacing is called for by the pattern. You may however need medium weight interfacing if you’ve chosen a medium weight fabric, such as I have for Version 1. Generally speaking you want to match the interfacing weight with the weight of the fabric you are using. Although it’s not unusual to use interfacing that is slightly lighter than your main fabric.
I like to use ultra soft fusible interfacing as it leaves the fabric with a nice hand after applying. For more information about interfacing, read our handout.
Step One
Cut out your interfacing pieces as instructed in the cutting layouts for your specific version.

Step Two
Place the piece that you are going to interface right side down on the ironing board. Then place the interfacing’s fusible side to the wrong side of the fabric. You can identify the fusible side of the interfacing as the one with either a bumpy texture or sheen to it, where the resin has been applied.
As you do this, make sure your fabric has been pressed flat. Trying to fuse your interfacing to a fabric that has creases will generally not have a great outcome.
CASSANDRA'S TIP
Make sure that you don’t place your iron on the fusible side of the interfacing. You’ll get a less-than-pleasant surprise when you lift your iron and find it stuck to the bottom!

Step Three
Set your iron to medium/high heat or the cotton setting if you have one (you might want to test a wee swatch of your fabric with some interfacing first, just to get the temperature and timing right).
Place your iron onto the the interfacing and press, without moving your iron, for about 8 – 10 seconds (your test swatch may have told you longer than this). If you’re unsure of how long to fuse it, ask at the fabric shop at the time of purchase and they should be able to give you some pointers.
If you have a large or long area to interface, always start fusing from the centre and work your way out. If your interfacing happens to overlap the edge of your fabric, just trim it down until it matches.
Version 1 - Sewing the Button Placket
Did you see Episode 6 of The Great British Sewing Bee? Plackets may just have been the undoing of one particular contestant. They can be a tricky technique, even for the most skilled sewers. Luckily, the button placket on this skirt is actually quite simple and I'm going to do my best to make it even more simple with some step-by-step photos and instructions.

A Wee Bit About Plackets
In the Zinnia Skirt, the left-hand-side placket, where the buttons are sewn on, is formed by folding the raw edge of the fabric over on itself (wrong side to wrong side). The right-hand-side placket, where the buttonholes are applied, is formed using a separate strip of fabric. This gives you the opportunity to use a contrasting fabric, which is what I've chosen to do using a lovely plaid print.
I should also mention that my button plackets might look a little bit wider than yours. Don't be put off by this. The buttons I want to use are much wider than the ones recommended on the pattern, so I've widened my button placket.
Step One - Establish Your Trim and Fold Lines
When you originally cut out your fabric pieces, you will have cut two of Pattern Piece A, the Skirt Front. The same pattern piece is used for the left-hand-side (LHS) and right-hand-side (RHS) of your skirt. But as we mentioned above, the difference is in how we use this piece to form the placket.

Referring to the image above, you'll notice that the placket area has two dotted fold lines. On the LHS placket these are both used for folding. But on the RHS placket the innermost line is used as our trim line.
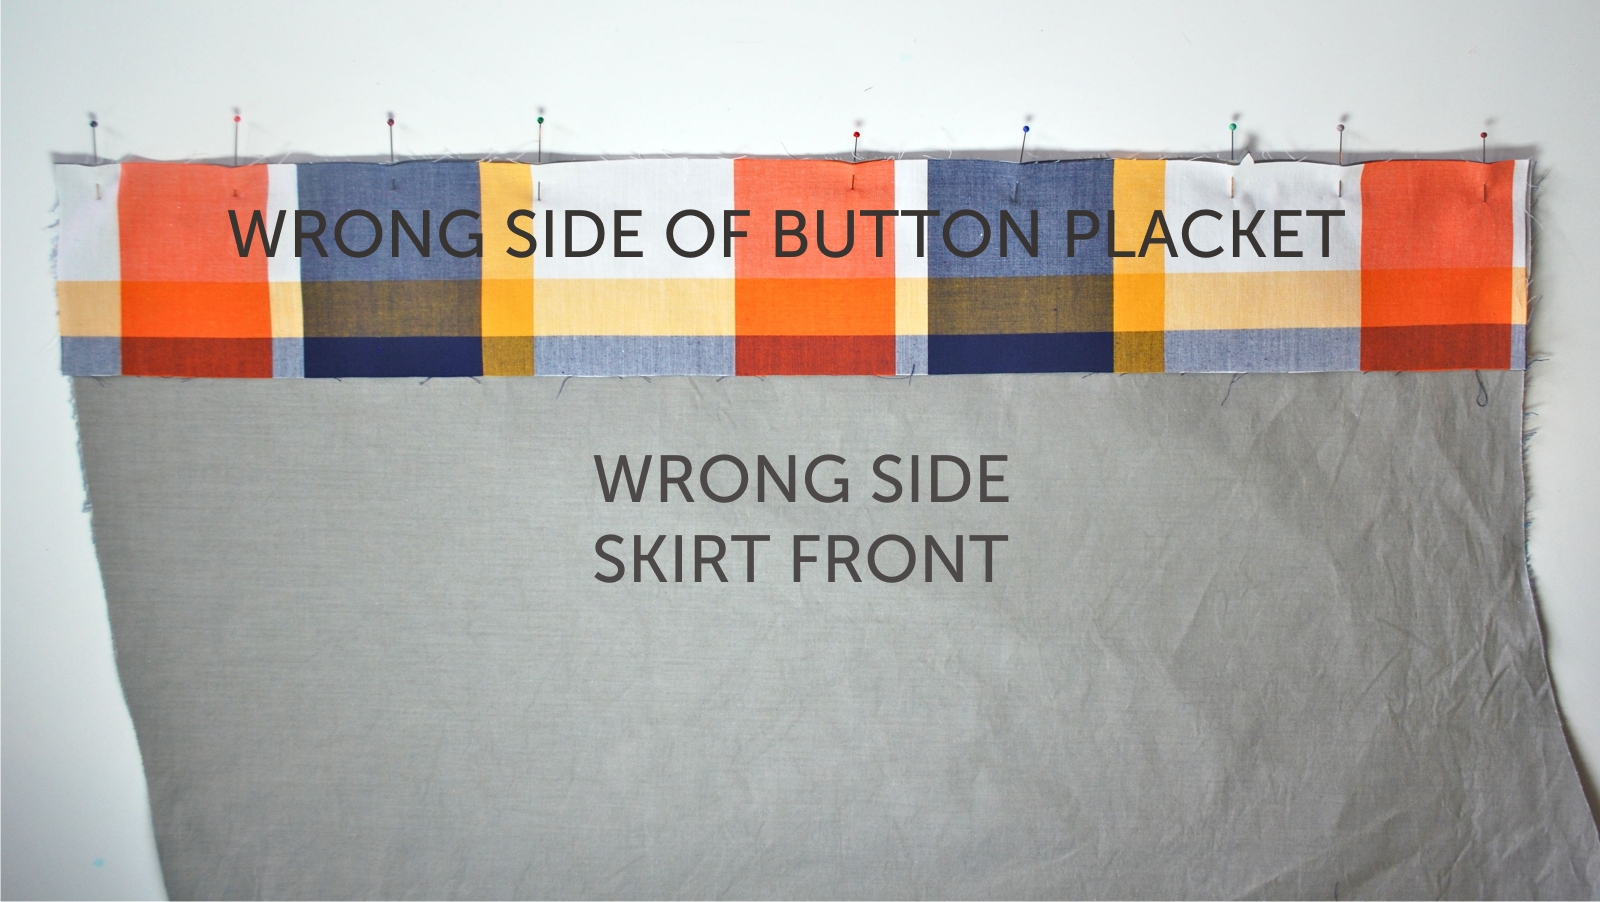
Step Two - Trim and Pin Right-Hand Placket
Starting with the right-hand-side placket, trim the skirt piece to the trim line marked on the pattern. This is around 1 1/4 inches from the front edge.
Lay the skirt piece out so that the wrong side of the fabric is facing up. Then take the button placket (piece L) and pin it along the trimmed edge with the wrong side facing up. It should look like the photograph below, with the wrong sides of both fabrics facing upwards. This can be confusing at first, but it will make more sense in a minute.
Step Three - Stitch Button Placket
Stitch the button placket in place using the standard 5/8inch seam allowance (see image below). Remember to backstitch at the start and finish of the seam.
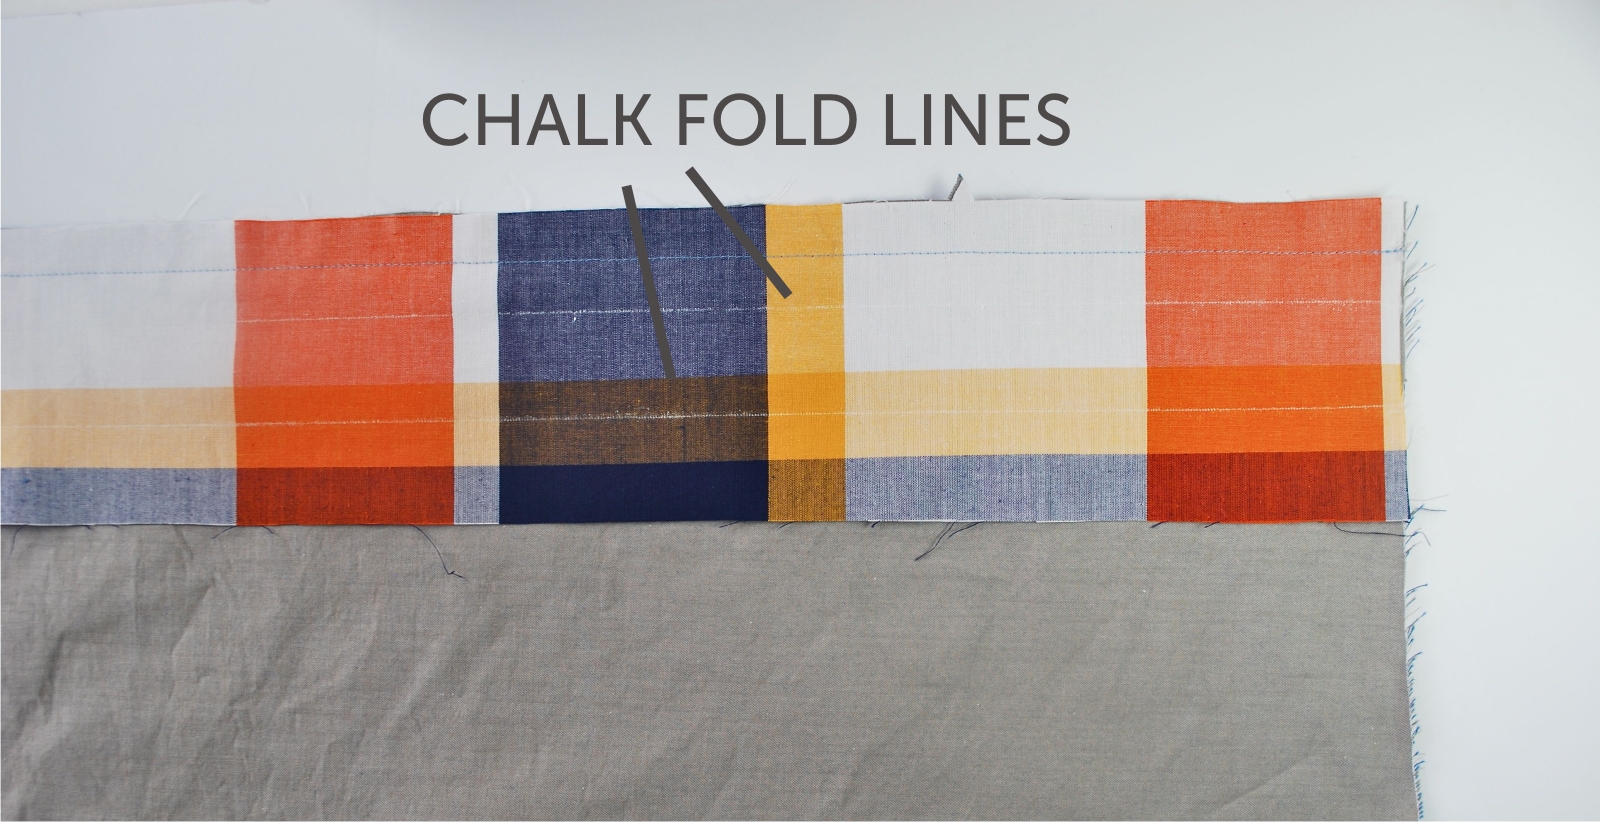
Hopefully you will have seen Post 3 where we instructed you to transfer your markings from the pattern to your fabric. If you haven't already, make sure you've transferred the fold lines onto the button placket (see image above). These can be found on pattern piece L, called placket. I tend not to mark the buttonholes until I'm finished my garment as the accuracy of their position can be lost through the process anyway.

Step Four
Step Four - Turn and Press
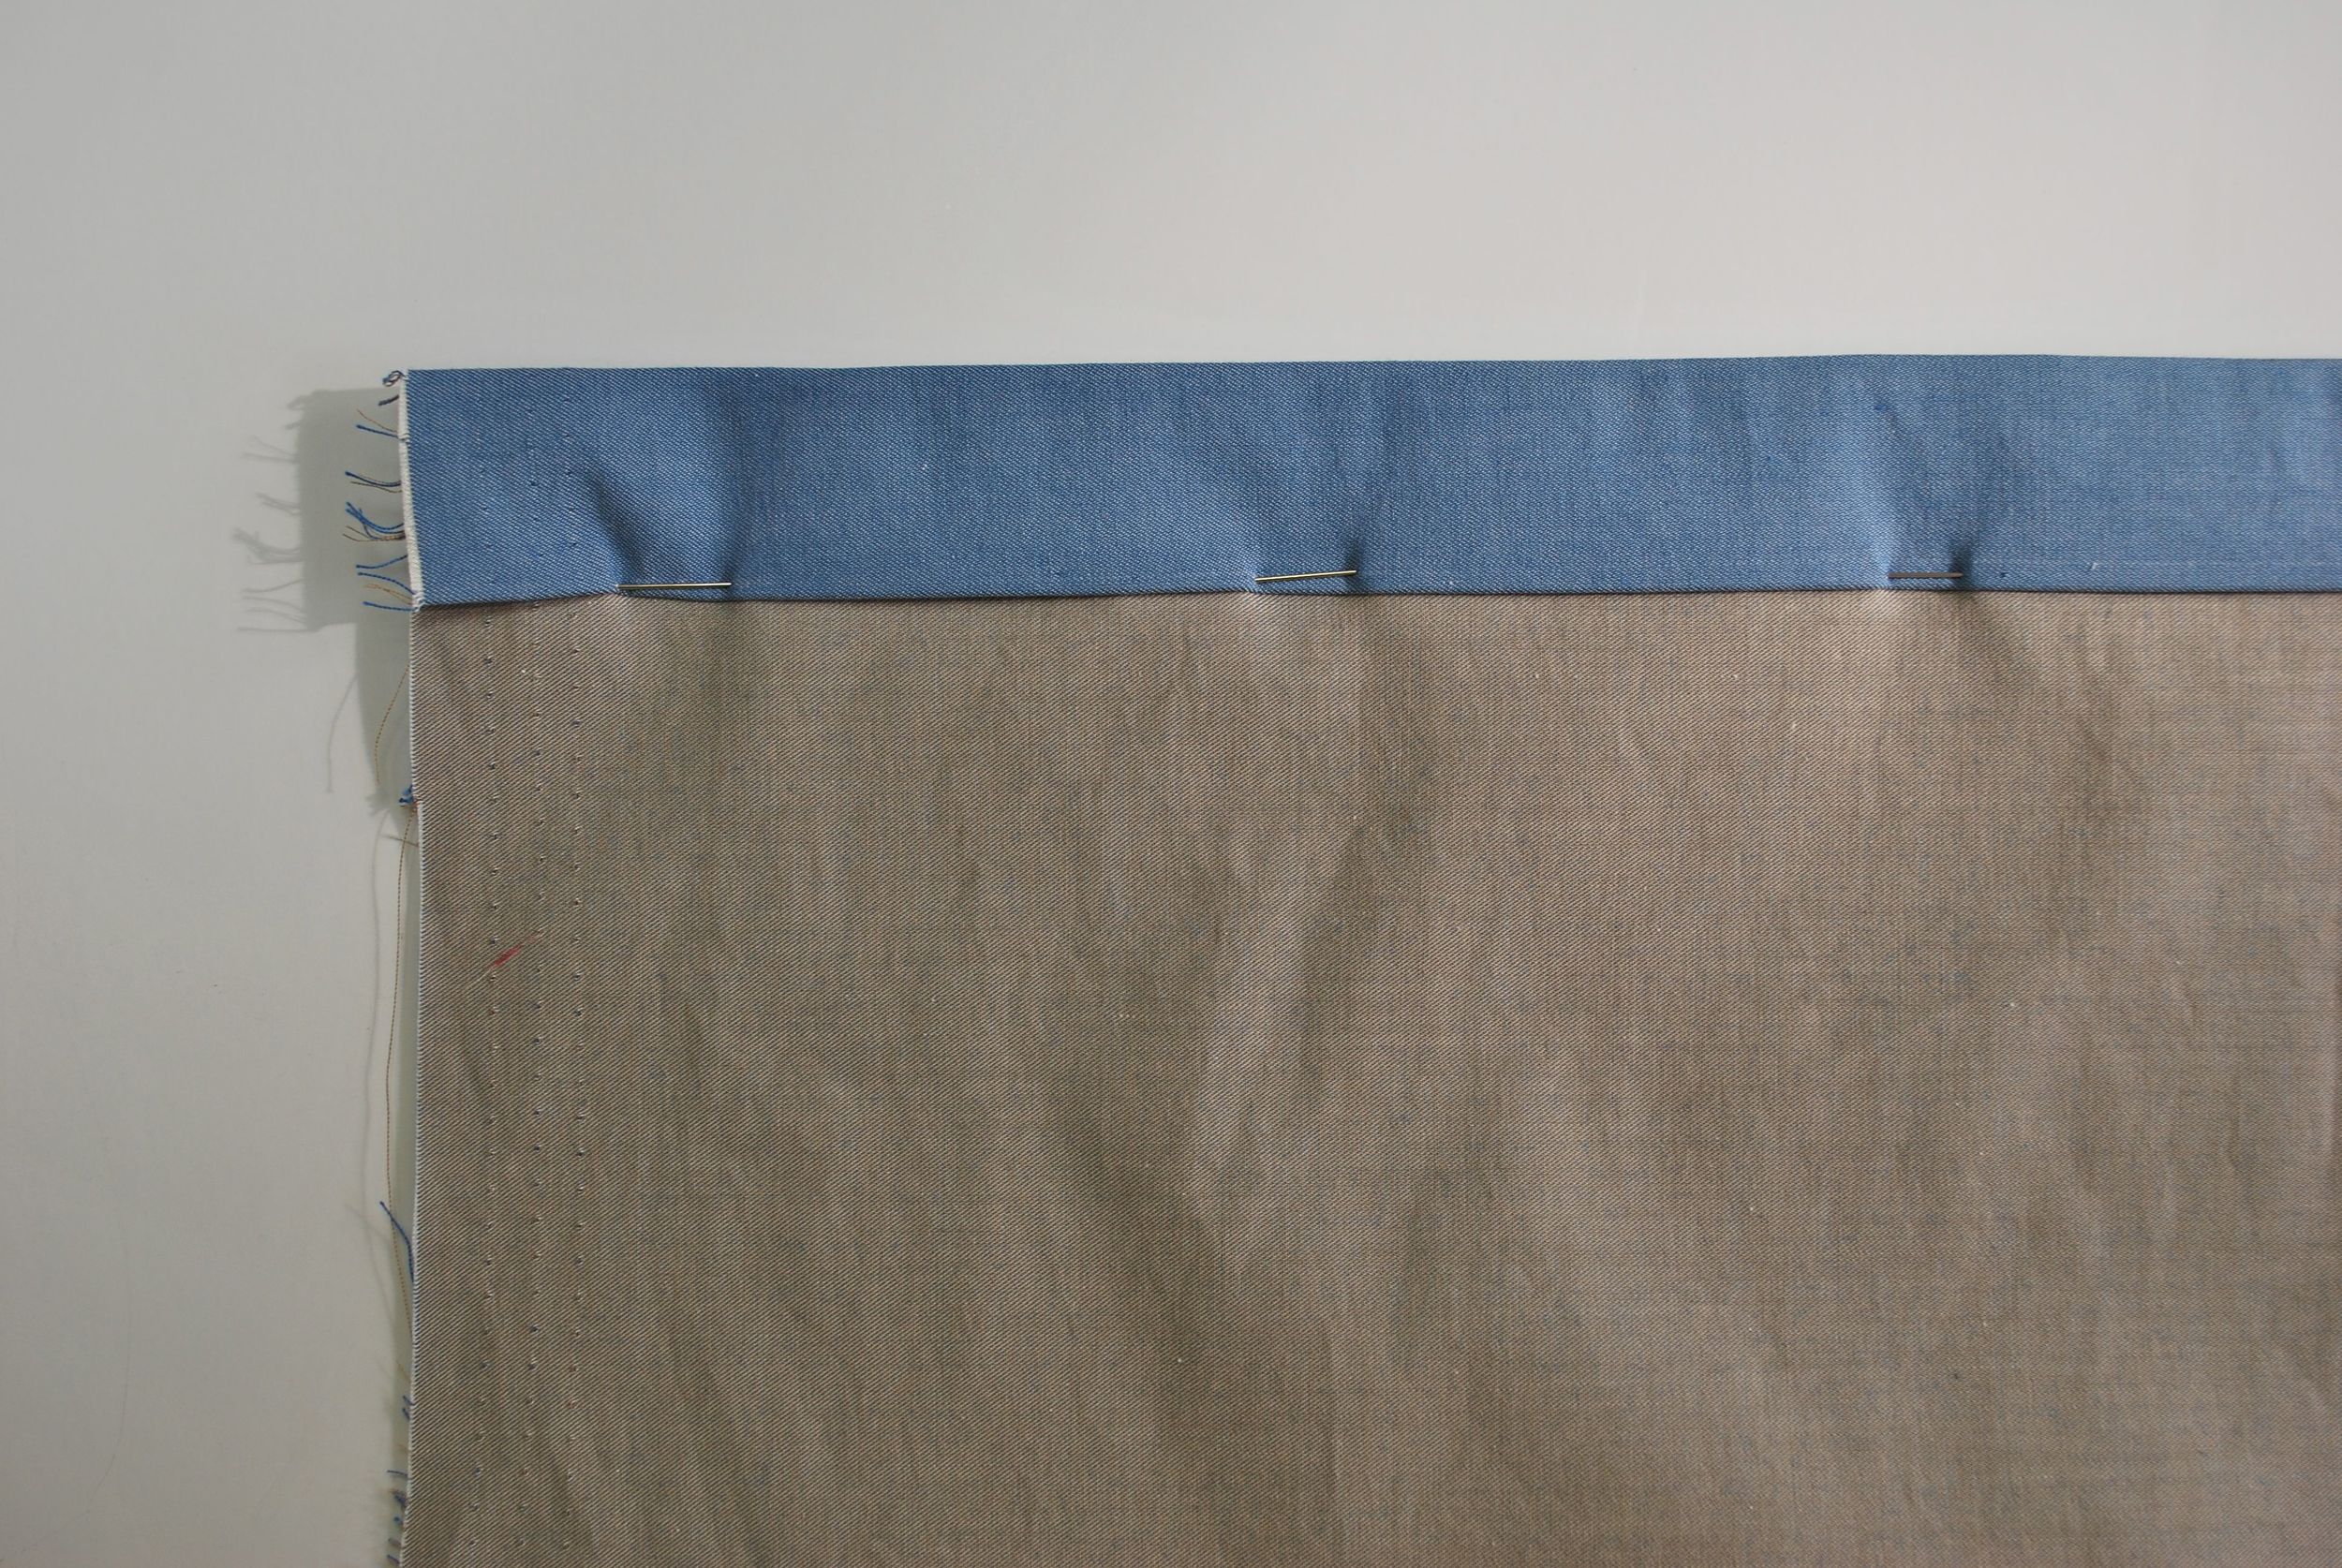
Keeping the placket with the wrong side facing up, turn your skirt piece over so that the right side is facing up. Press the seam allowance out towards the placket.
Then press the placket towards the skirt along the outermost fold line. At this point it should look like the image to the left.

Step Five
Step Five - Fold and Pin
Fold the placket along the inner fold line and press. The raw edge of the placket fabric should now be enclosed.
The third and last fold you make should enclose everything and seal the deal. Fold the button placket along the edge of the seam allowance and into the right side skirt front. Pin in place, close to the edge of the fold.
Step Six - Stitch
Edgestitch the placket in place along both edges (image below).


Step Seven - Left Button Placket
Next we are going to work on the left-hand button placket, which is made by folding the skirt fabric in on itself.
Lay the skirt fabric out so that the wrong side is facing up. Fold the placket along the outermost fold line towards the wrong side of the skirt, then press.
Step Eight - Fold and Pin
Now fold again along the innermost fold line and onto the wrong side of the skirt front. Press.
Turn your fabric over so that the right side is facing up and pin the folds in place from this side (image below left). When pinning, check the wrong side of your skirt to make sure that your pins are hitting the edge of the button placket (image below right). Since you will effectively be stitching this edge blind (i.e. from the right side of your fabric), this will ensure that your pins are an accurate guide for your edgestitch.

The right side of the skirt (left placket).
The wrong side of the skirt (left placket).
Step Nine
As with the right-hand button placket, edge stitch along each side of the fold.

The left-hand button placket being edgestitched.

Both button plackets edgestitched.
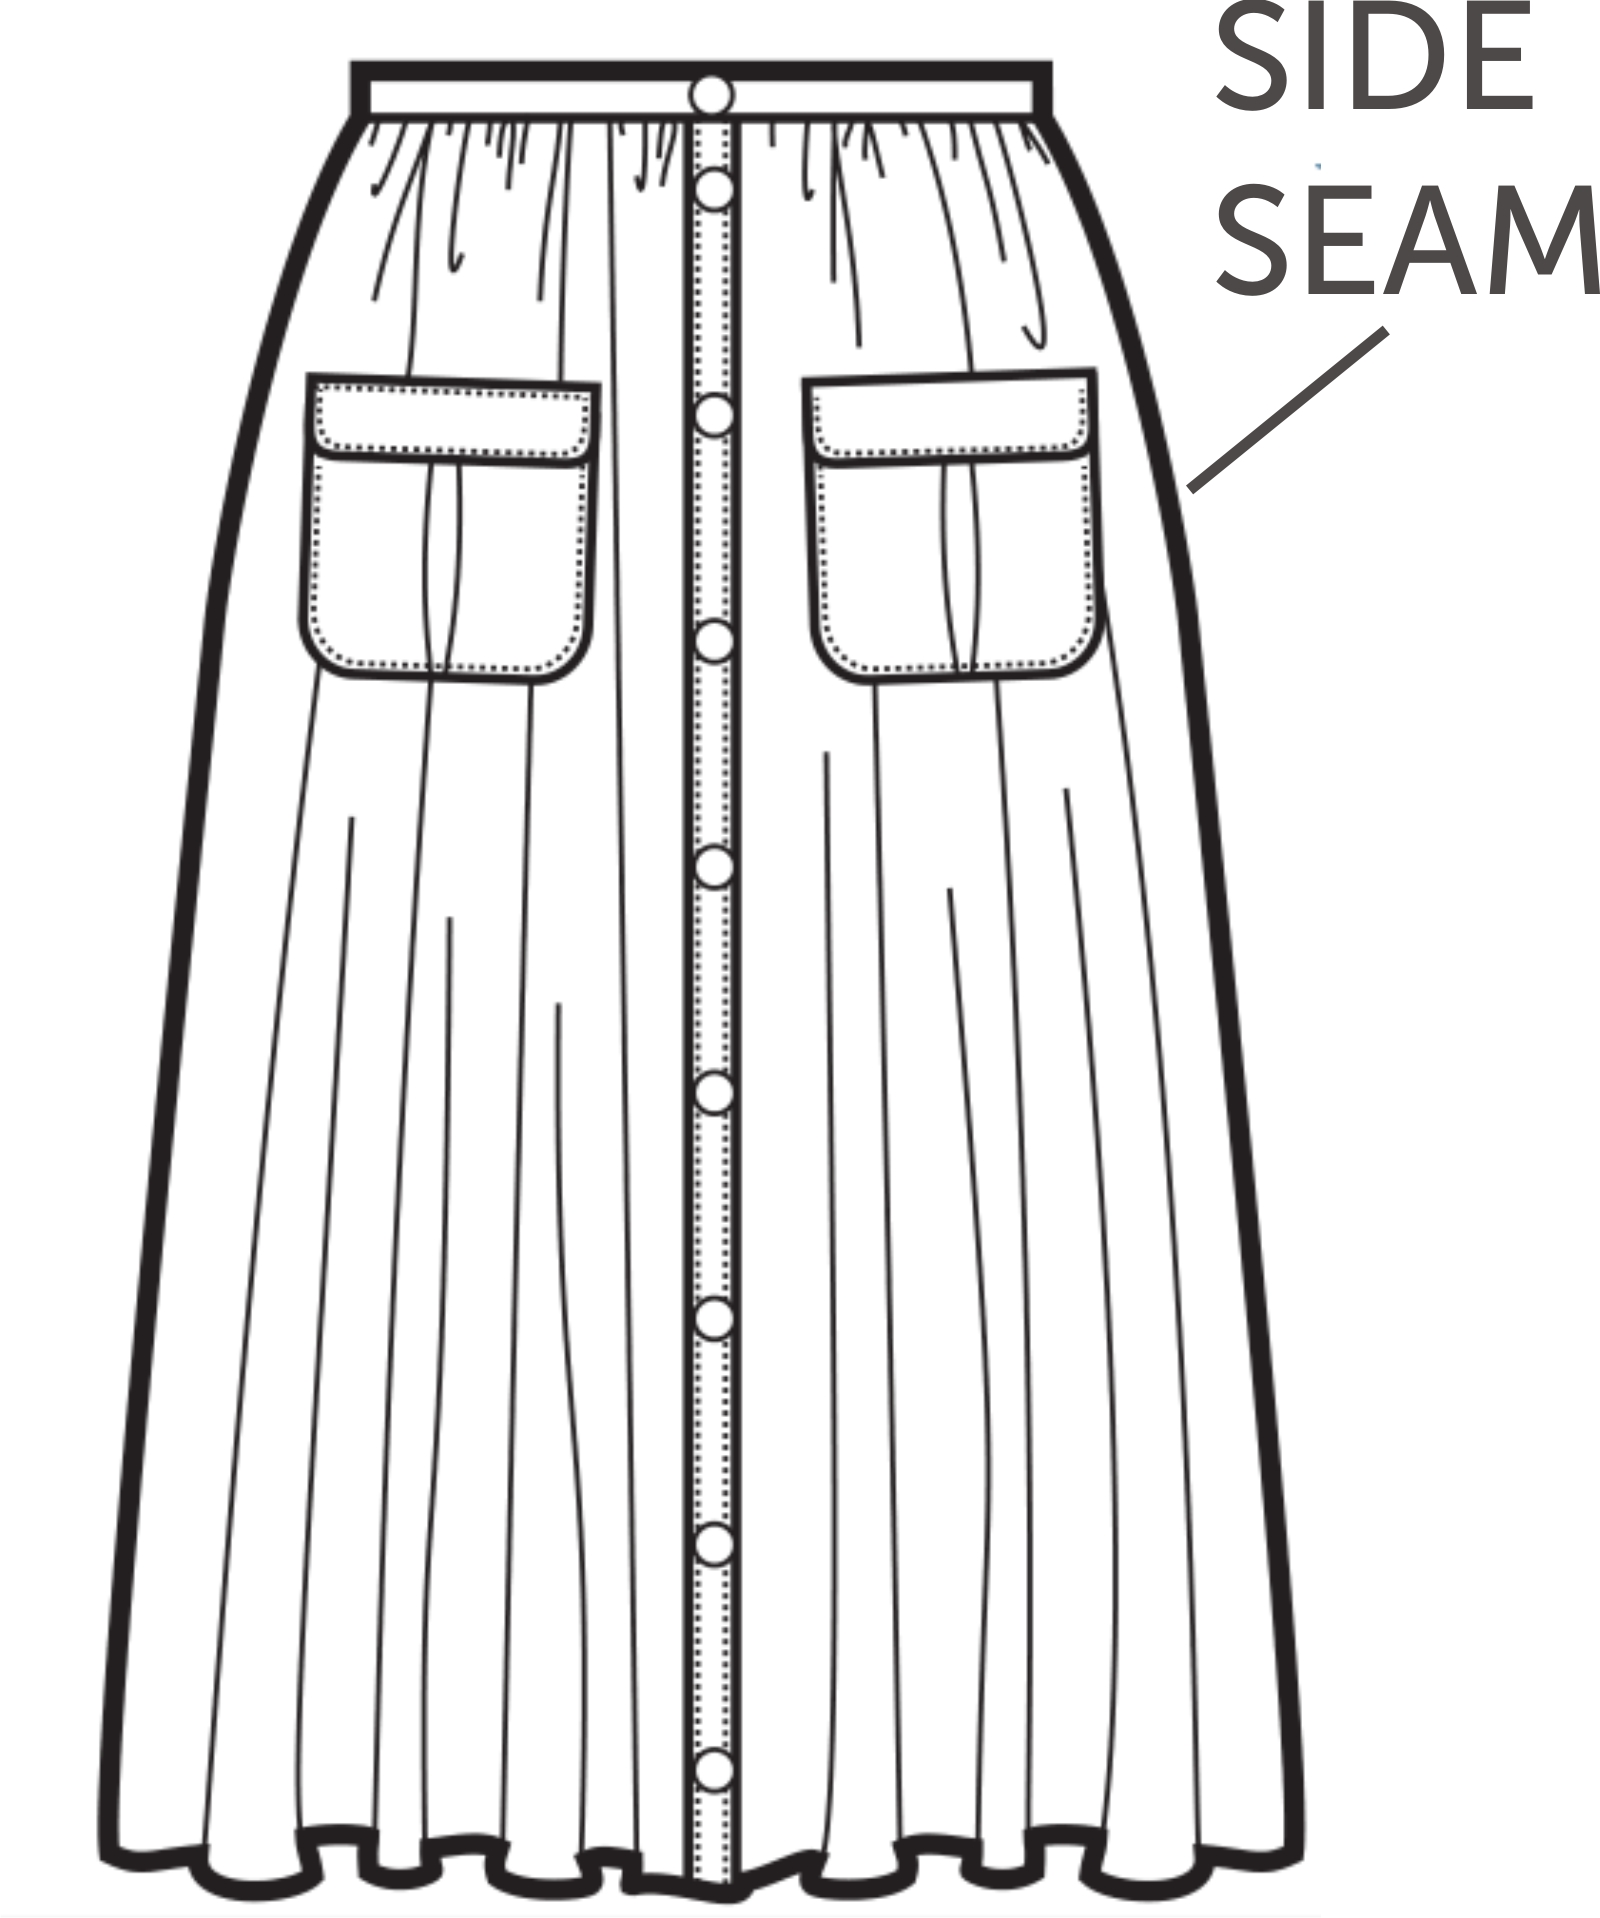
Sewing the Side Seams
Before we are ready to gather the waist, we need to join the side seams of the skirt. These are the seams on the left and right-hand side where your skirt front meets your skirt back. And fortunately there are some handy dandy notches to help you match them up. But if, for some reason, your notches don't match up and your side seams do, go with the seams. The notches are just there as a guide.
And if you find that, actually, your seams are a wee bit off to, then it's better to have the uneven edge at the hem than at the waistband. You can easily trim down the hem later but it's pretty important for the waistband to be even.
Seams – Opened or Closed?
Did you know that there are actually two types of seams most often used in sewing? They look the same from the right side of the garment, but the difference lies in how they are constructed on the wrong side.
Open seams are the more common of the two types. The seam is stitched at it’s given seam allowance, pressed to the side, and then pressed open.
But closed seams, the second type, are also a good option as they allow you to sew and finish the seam all in one go. We’ll cover this a bit more in a future post when we look at French Seams. For an informative article about open and closed seams, read The Cutting Class article Fundamentals of Sewing.

Sewing the Side Seams
To sew a standard open seam, match any notches along the seam and pin in place. The raw edges of the fabric should be perfectly aligned.
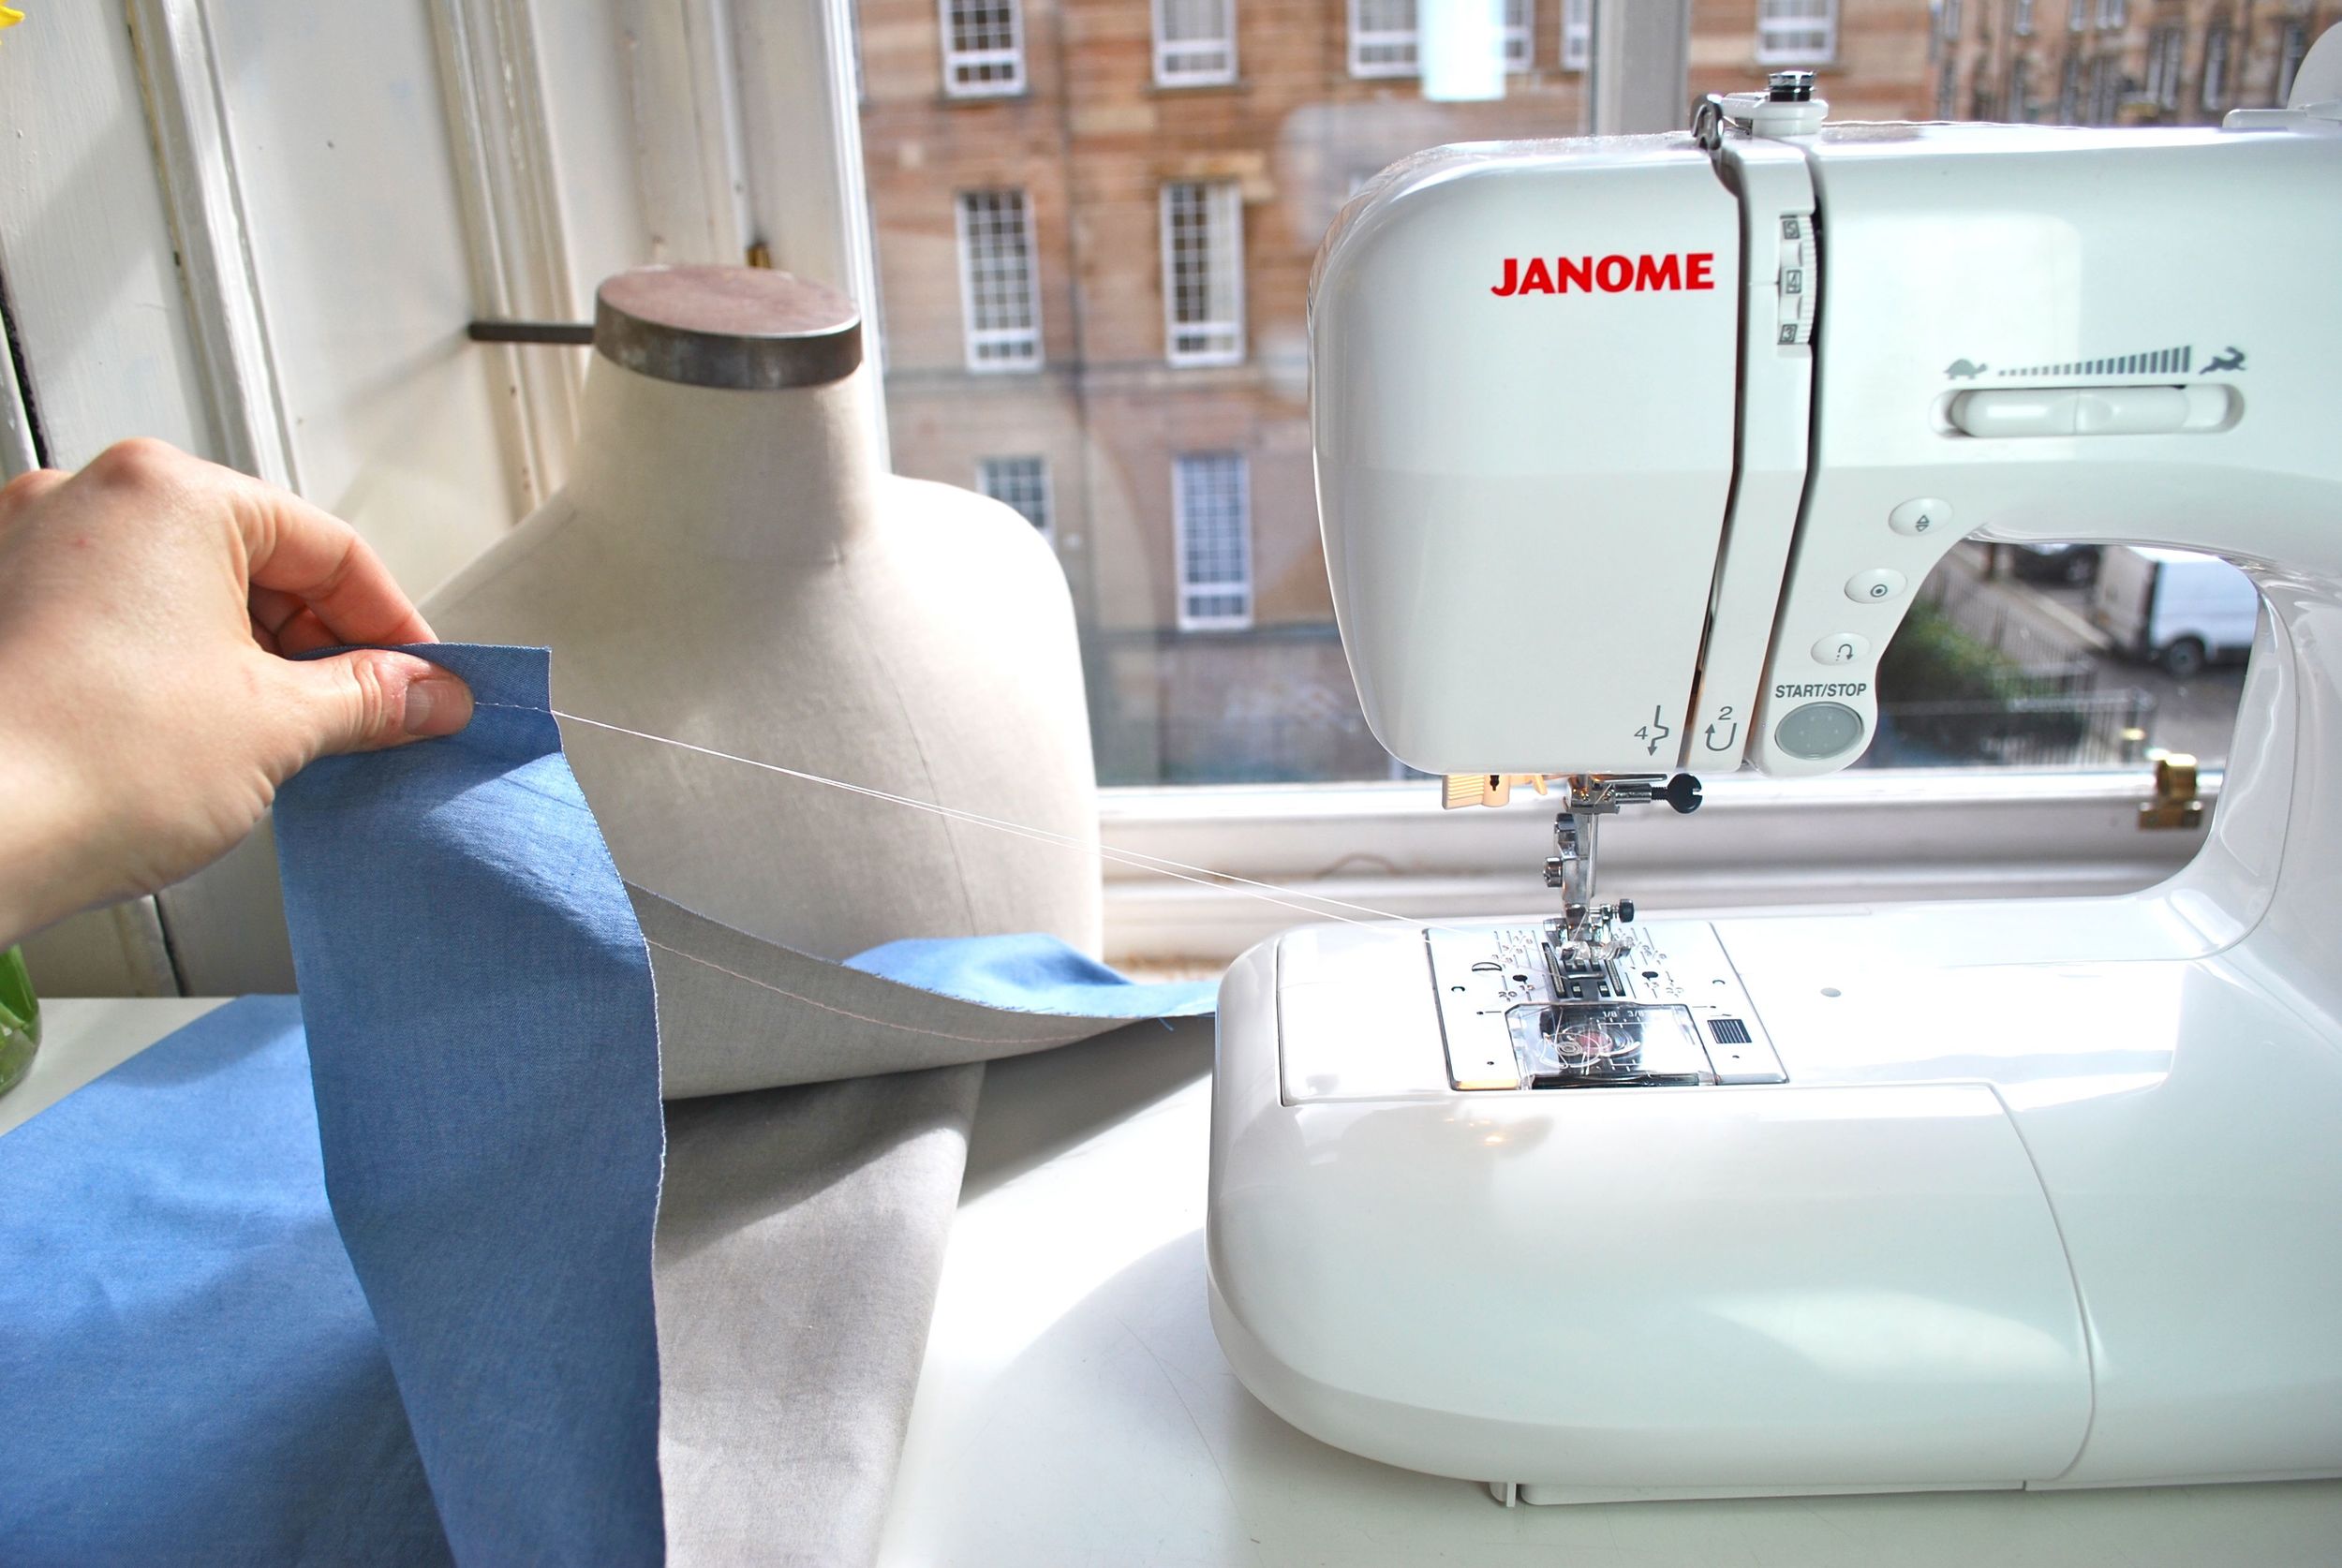
Next you're going to stitch along the seam at the standard 5/8 inch seam allowance. One of the best pieces of advice I give my students is to make sure they keep their eye on the 5/8inch marking that is printed on the bobbin cover (see image right) and to concentrate on keeping the edge of their fabric on this line. This is the best way to ensure you stitch a straight stitch. If you let your eye follow the needle instead, you'll soon find that your fabric is not straight.
NOTE BEFORE GATHERING
If you are going to put patch pockets on the skirt front, now is the time to do it. It's very difficult to try and get your pockets straight once the fabric is gathered. As this post is quite lengthy, and gathering is one of the main techniques for the skirt, we've decided to teach the gathering and leave the pockets until next week. However, if you are making a toile, it's not necessary to include the pockets. You can always practice the pockets on a scrap piece of fabric if you'd rather just get cracking with your toile.
Gathering Fabric
Gathering provides a lovely soft fullness to a garment whilst giving you a contoured fit in certain areas. For version 1 of the Zinnia skirt, gathering is used along the waist.
This will make more sense when we start going through the process, but one thing I would recommend right at the start is to use three rows of stitching for your gathers, rather than two (as is often taught). I find that three rows gives me better control and more even distribution of the gathers.

Just about to gather the waistline of version 1. My sewing machine stitch length is set to 4.5mm.
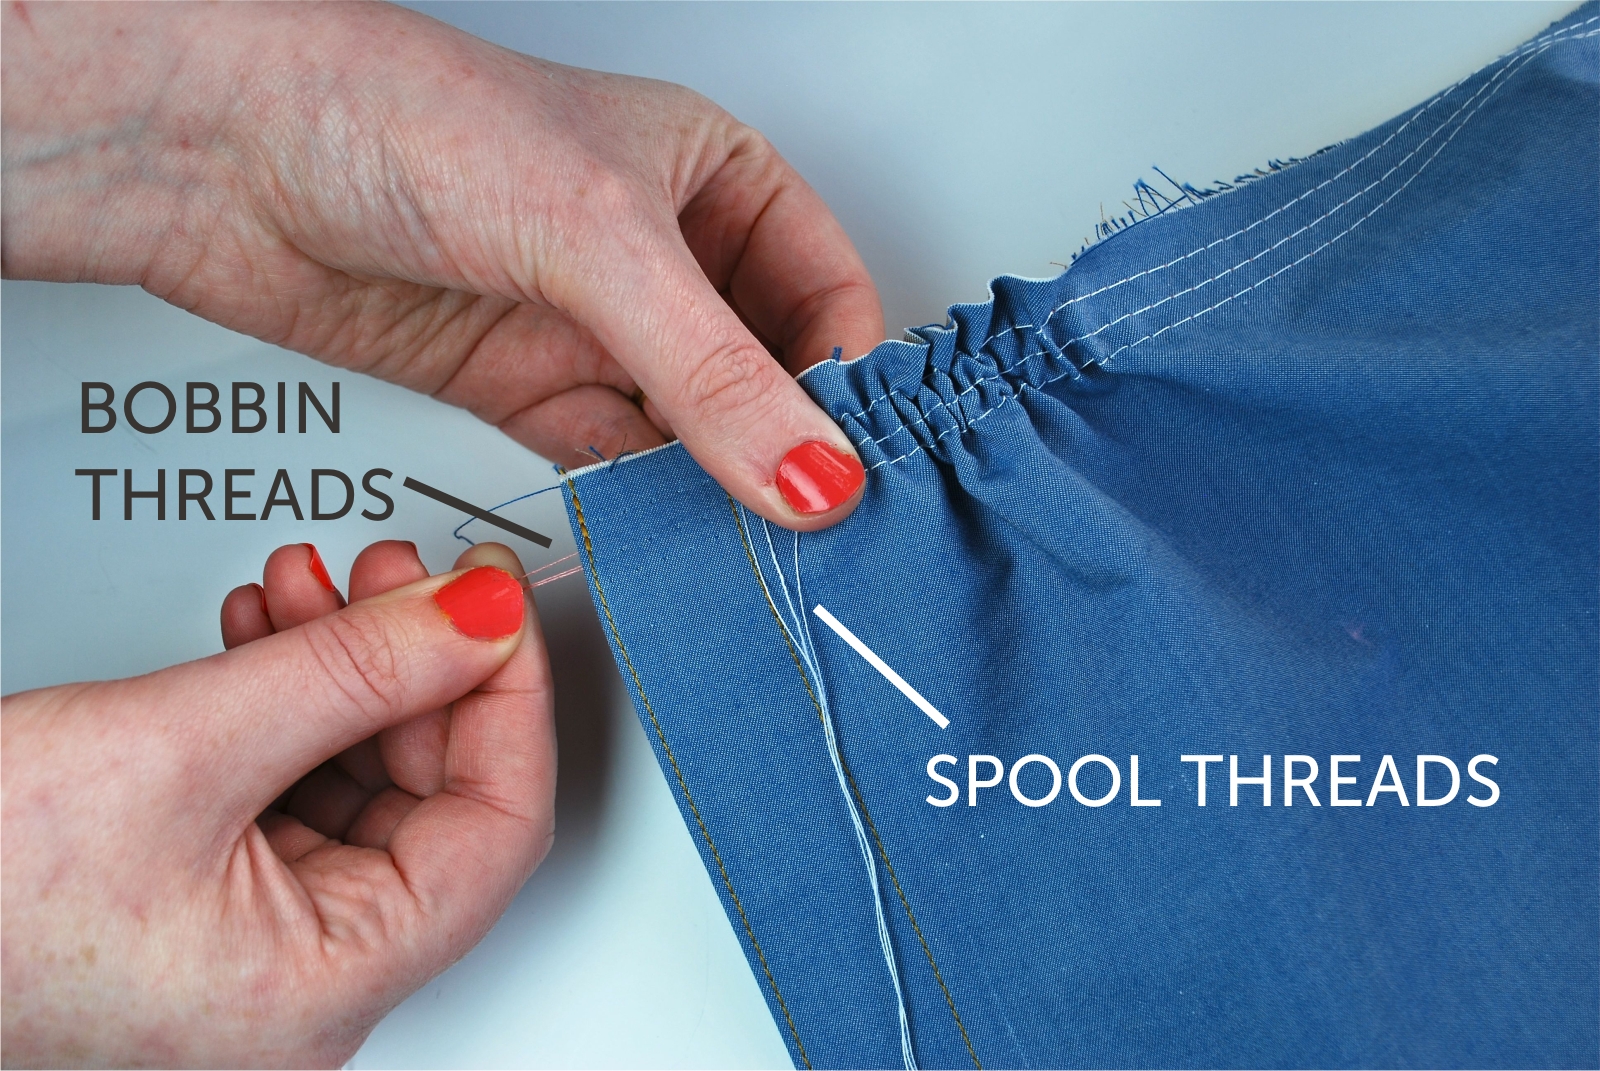
Step One - Choosing Thread Colours
Since you will be pulling on your bobbin thread to form the gathers, you want to make it nice and easy to find. Thread colour is the key here: You want to make sure that your bobbin thread is a different colour from your spool thread, although still the same type (e.g. cotton or polyester). And you’ll help yourself even more if you make both threads a contrasting colour to your fabric.

Above I am pulling on the threads to make sure I leave a long thread tail when I start my gathering stitches.
When I complete a row of gathering stitches, again, I leave long thread tails.
Step Two - Basting Stitches
Set your sewing machine to a stitch length of 4 to 5mm. Next you are going to sew three rows of basting stitches. The first row we're going to sew is the central one at 5/8inch, as this is your seam allowance. If you get this straight then its a good guide for the other two rows, which should be sewn either side at 3/4inch and 3/8inch. Stitch with the right side facing up. Make sure that you leave long thread tails at the start and finish of each row.
I like to use silk thread when I do basting; it's stronger and tends to break less than cotton or polyester. It is smooth and slippery, which means that it is easily removed.

Step Three - Begin Gathering
On the wrong side of the fabric, pull on the bobbin thread tails only. This will cause the fabric to start to gather. Slide the fabric along the thread to evenly distribute the gathers.
Step Four - Distribute Gathers
By the end of this step we will have gathered the skirt, ready to be sewn to the waistband. But we will cover sewing these two pieces together in the next post.
On your waistband pattern piece you should find a set of large circles, which should be matched up with the side seams on your skirt. I've transferred mine onto the fabric using a small dot (see image below). Continue to gather in the waist of your skirt until the side seams align with these markings. Do this for both the LHS and RHS on the back and front of the skirt.
To secure things in place insert a pin at either end of the gathering stitches and wrap the thread tails around it in a figure-of-eight (see below). This will secure your gathers until you sew them to your waistband.

The above picture shows the right hand side of the skirt.
Sewing Pleats
Pleats, like gathers, are a method of fitting or contouring. Folds of fabric are stitched together in parallel lines down a specified length of the garment. In the case of the Zinnia Skirt, this length is just a few inches at the waist.
NOTE ABOUT VERSION THREE
Please note that the order of sewing for Version 3 is a bit different. We will be covering these differences in the next post.
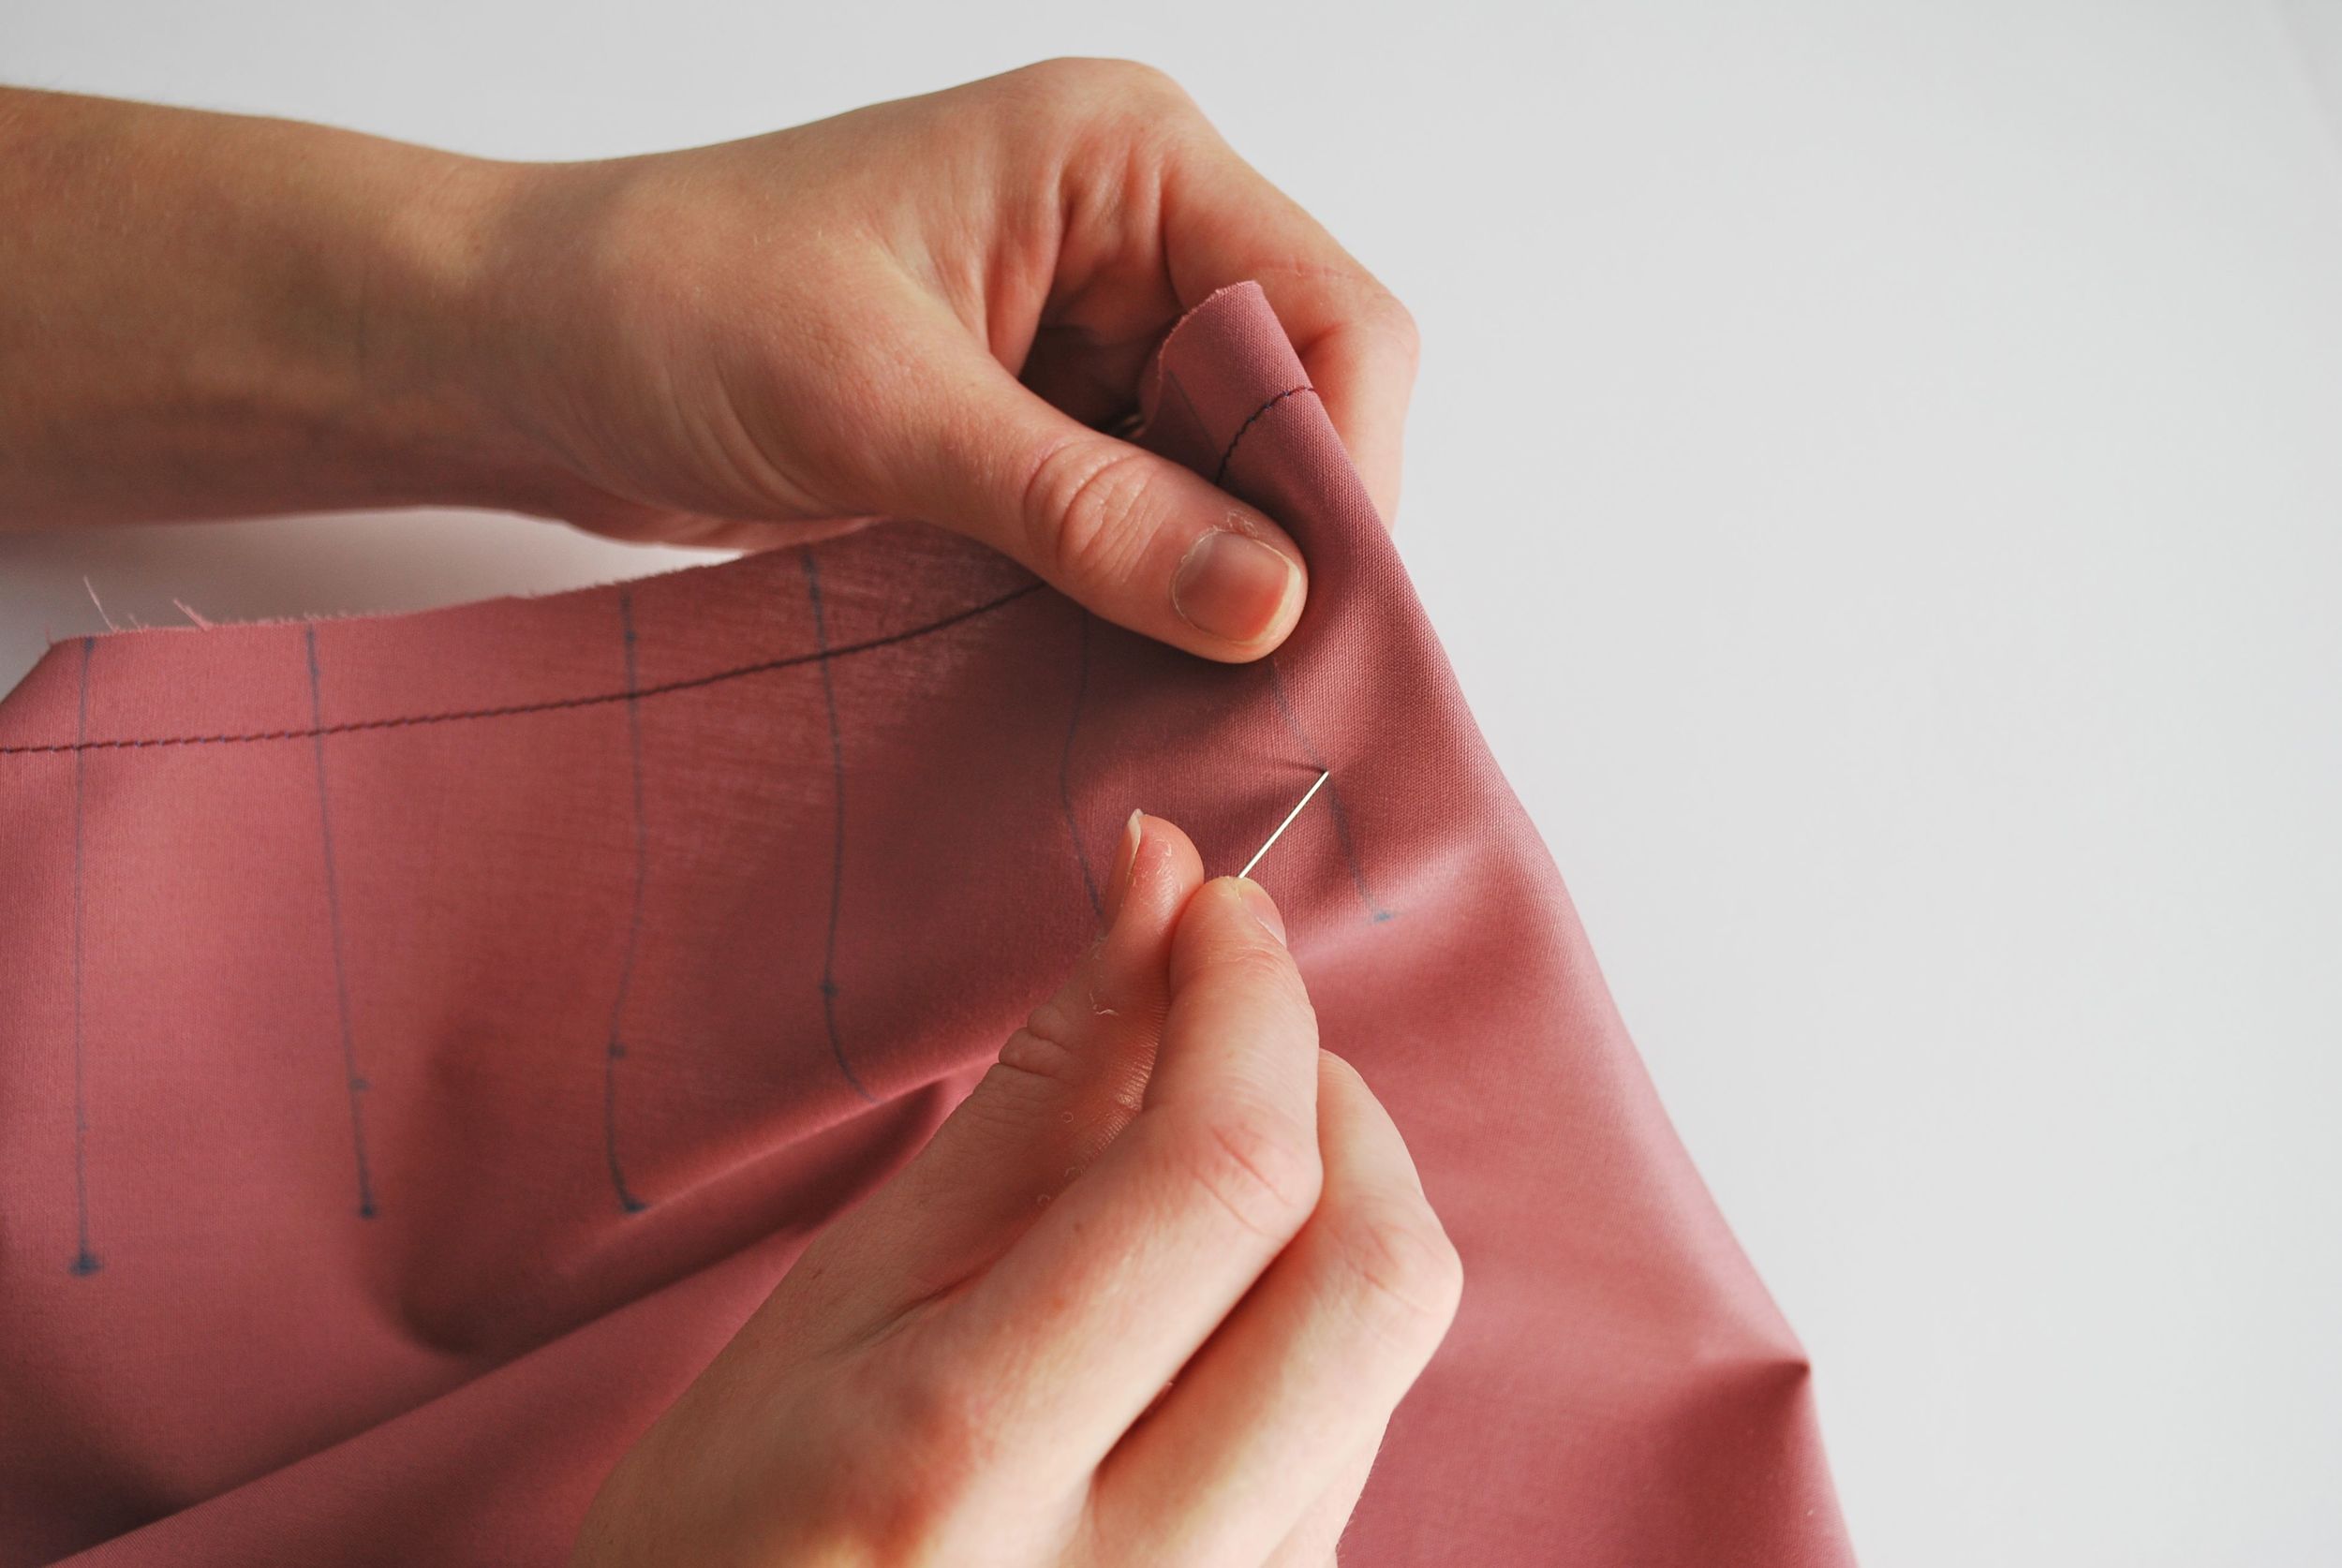
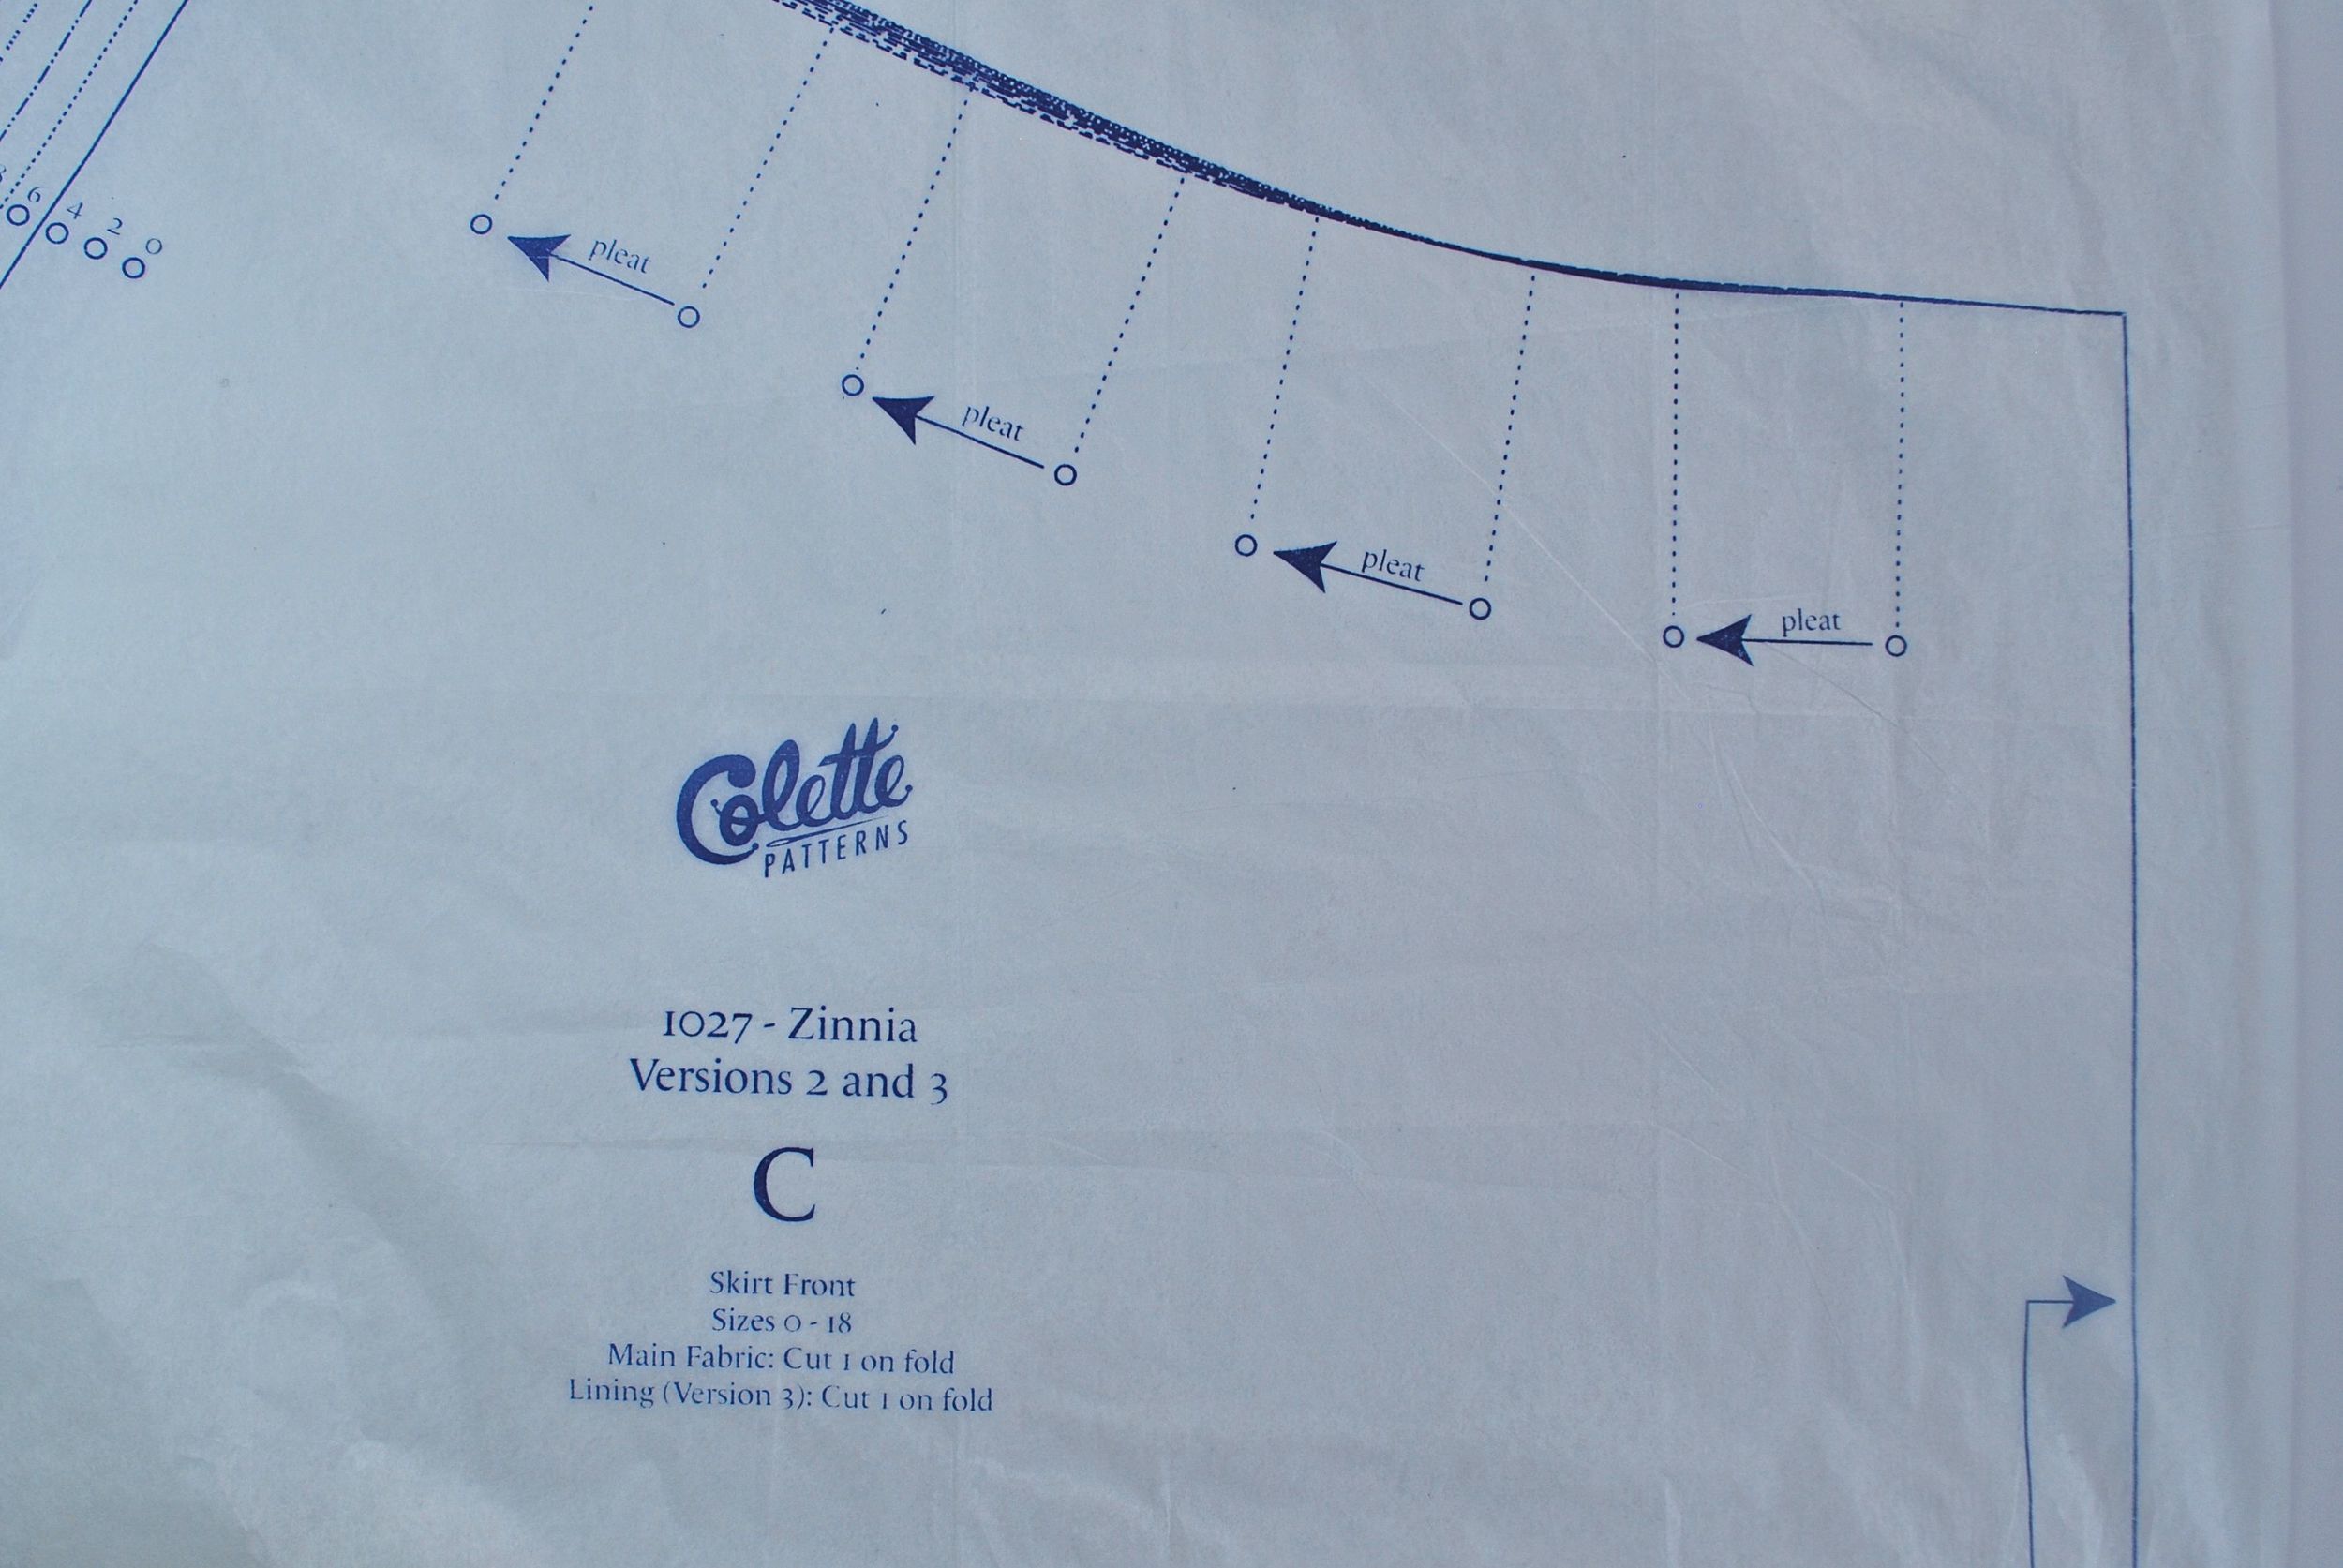
Step One - Transfer Pleat Markings
For the pleats you will need to have transferred the small circles from the pattern that show the pleat locations, and the dotted lines between them and the waist, showing the pleat stitch lines.
Step Two - Fold and Pin Pleats
It's worth clarifying that the pleats we are making here are formed on the wrong side of the fabric. That is to say they bend inwards towards the inside of your garment. But alternatively you could sew them the opposite way, so feel free to experiment with your toile and decide what's best.
Hold your fabric so that the wrong side is facing up. Pinch the fabric, so that the opposing pleat lines match each other exactly (right side touching right side). The fold of the pleat should form half way between these two lines.
The images below show how I fold and pin each pleat. When pinning, I tend to push the pin through one side, precisely on the dotted line. I then turn it over to check that it is sitting exactly on the dotted line on the other side, before poking it back through to the first side. Do this for all the pleats around the waistline. Check that the raw edges of the waistline stay aligned as you pin each pleat.
1. Insert pin

2. Check pin on opposite side.

3. Re-insert pin through to first side

4. Check that the pin aligns nicely with the pleat lines.
Step Three - Basting Stitch
Stitch all your pleats using a basting stitch on the wrong side of the fabric. At this point only a temporary stitch is used so no backstitching is necessary. I recommend using a contrasting thread colour as it will be much easier remove once you’ve topstitched.


Step Four - Pressing
Lay your skirt on the ironing board with the wrong side of the skirt facing up. The next step is to press the pleats in the direction of the side seam. Working from the centre outward, the pleats to the left of the centre should be pressed to the left side seam and the pleats to the right of the centre should be pressed to the right side seam. Repeat for the back of the skirt.

Pressing the pleats .
The arrows between the pleat lines show the direction in which they need to be pressed.
Step Five
Turn your fabric over so that the right side is facing up. You are now going to topstitch each pleat on this side to complete them. In the image below you'll see our topstitching is done in a thread which matches the colour of the fabric, since it is visible from the right side of the garment.
Sew the topstitches 1/8 inch away from the basting stitches. The topstitch should sit on the side of the basting stitch that is closest to the side seam, and it should pass through the three layers of fabric that form the pleat. Start at the waistline with a backstitch and sew to the complete length of the basting stitch. Finish with another backstitch.
Alternatively, if you don’t like the visible look of the backstitch at the bottom of the pleat, you can leave a long thread tail and hand-sew it through to the wrong side of the garment, where you can knot it. I've given an example of both methods in the image below.

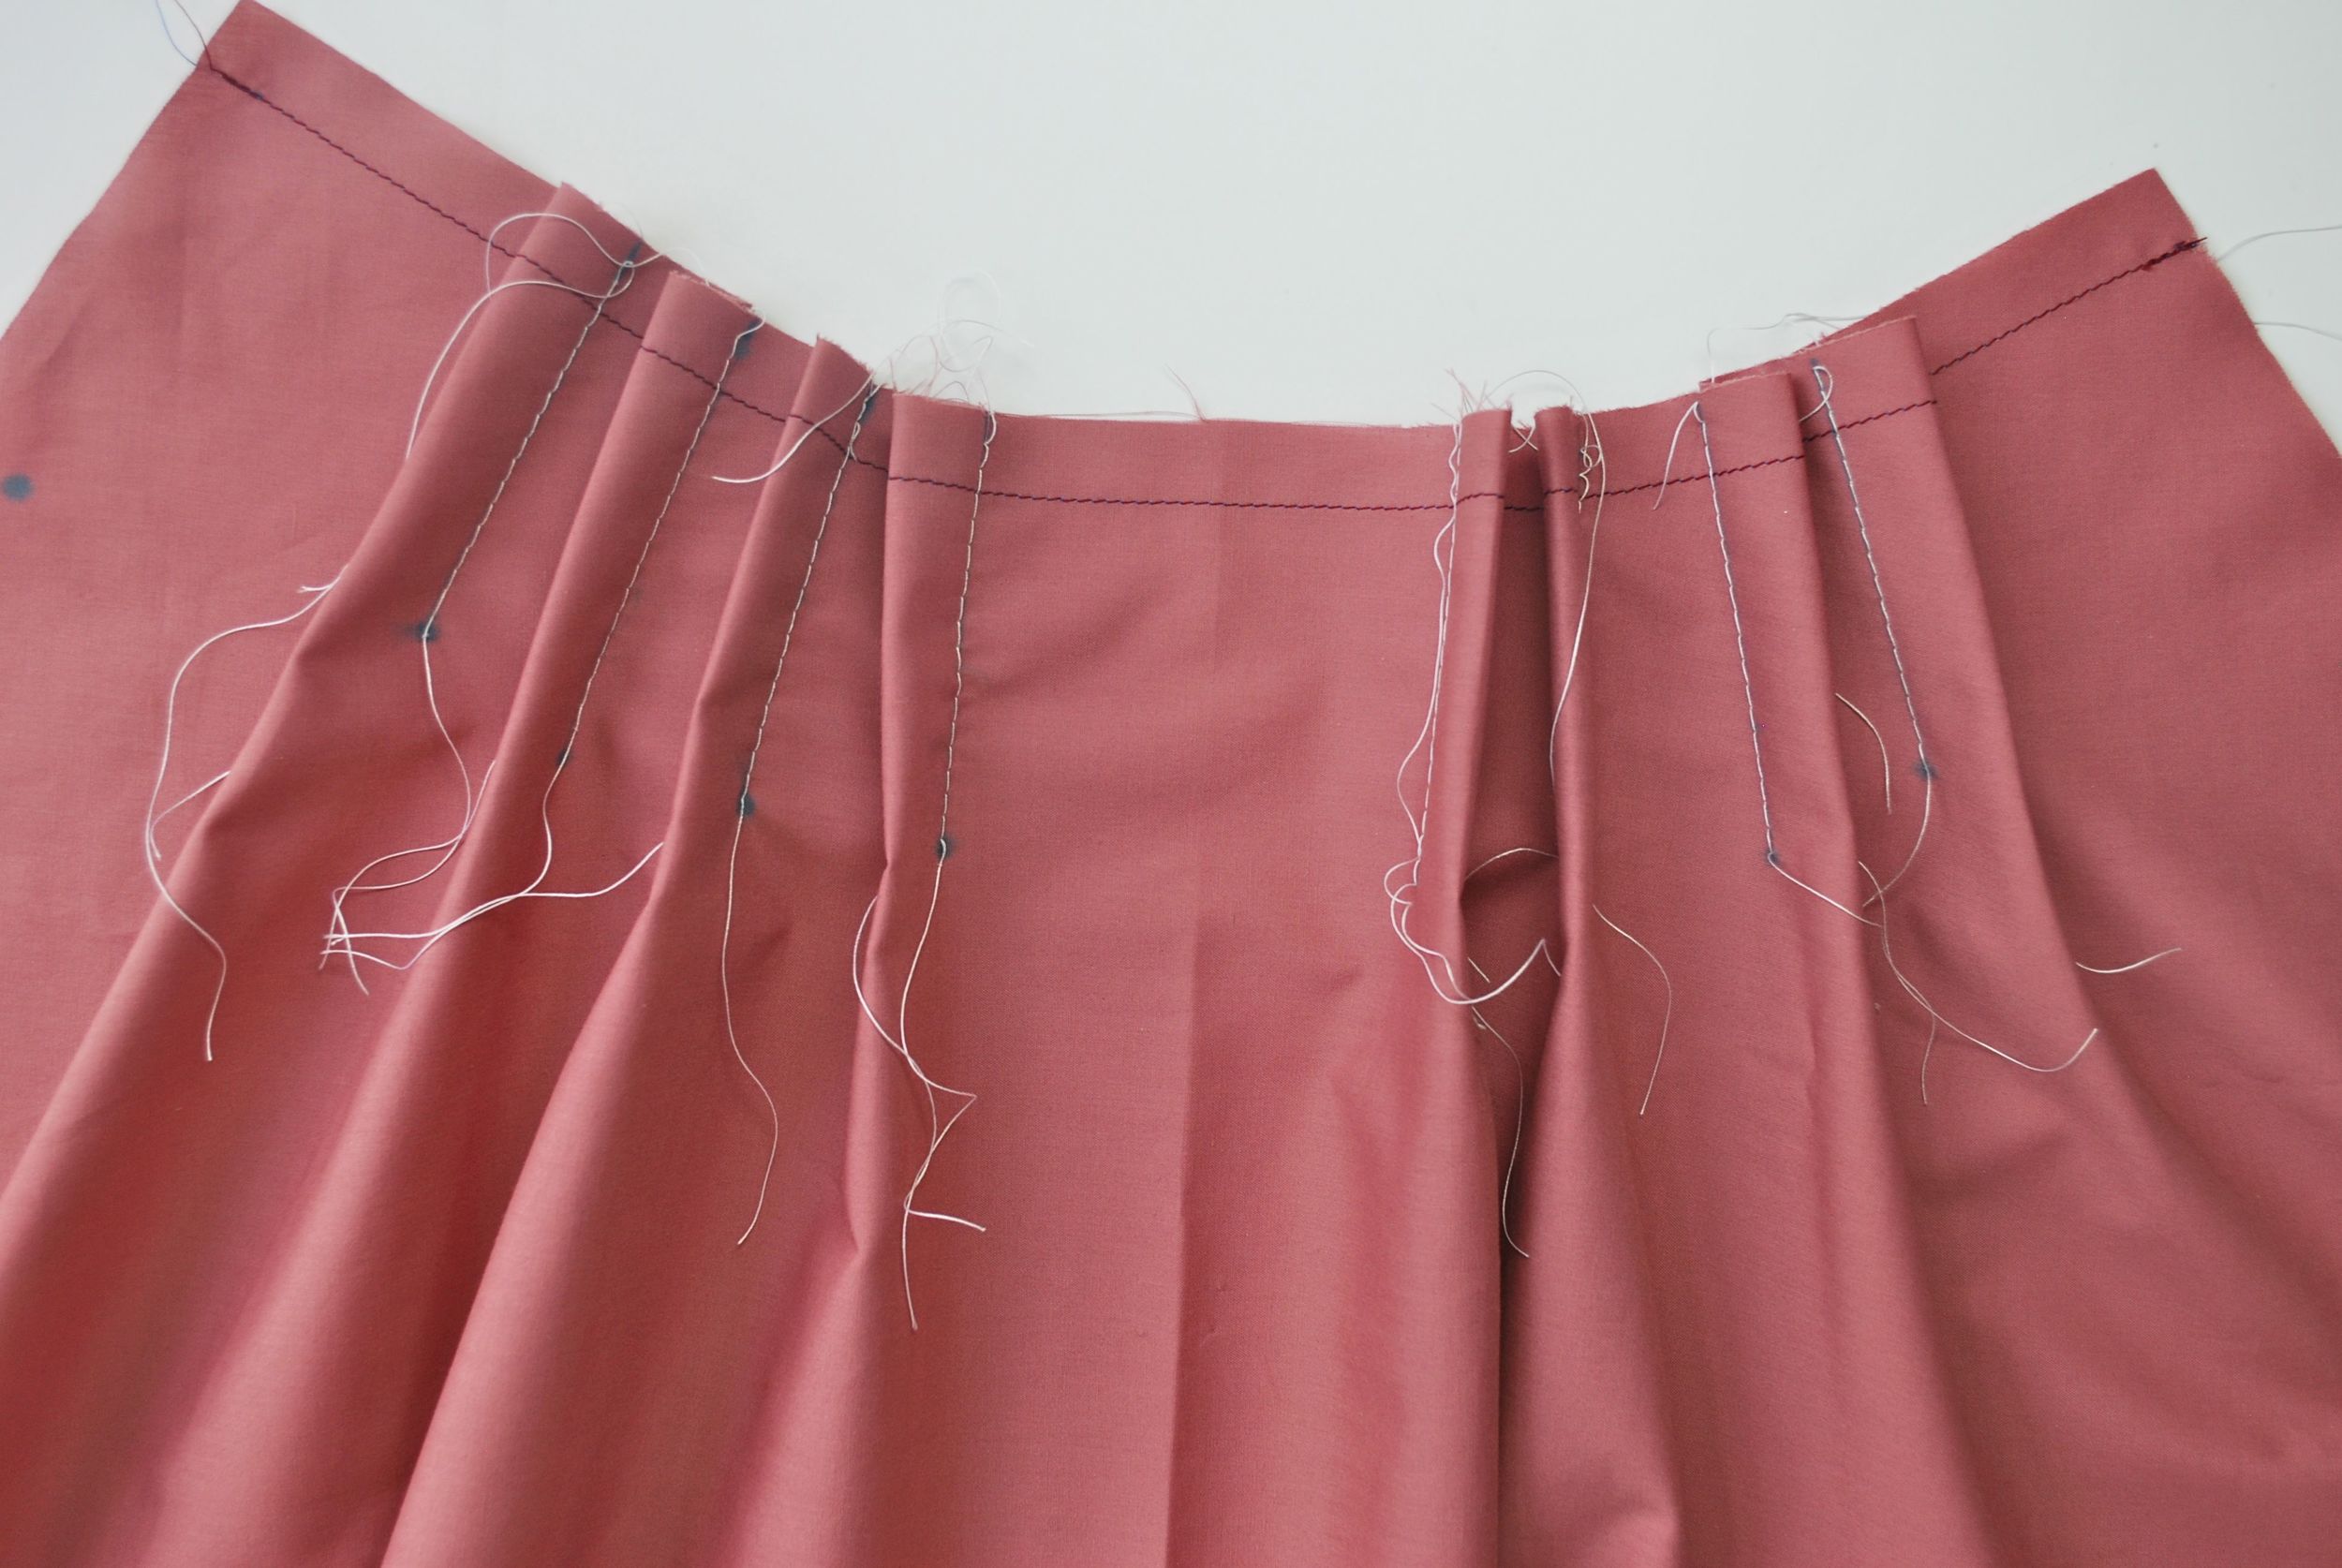
Above you can still see the blue fabric marker we used, so it looks a wee bit untidy. Some of the basting stitches (white) are also still visible. We'll get rid of these later.
Step Six
Remove the basting from your pleats. I used a seam ripper to do the job.

Next on the Zinnia Sewalong
Yes… we will be providing some information about how to enter the competition. Just as a side note, you are welcome to make as many entries as you would like. More to come.
- Attaching the waistband
- Seam finishes - French seams and overlocking
- Patch pockets
- In-seam pockets