By Susie Haigh,
Textile Accessory Designer, podnip
and Instructor at The Stitchery
Happy Friday sewers! Lovely to have you back again, and I hope you’ve all enjoyed working on your appliqué designs. Or maybe you spent last week choosing a lovely print and now you're just waiting to make your plain cushion cover? In which case, your patience is rewarded, because this week we're putting in our zippers and sewing our cushions together!
Zippin' Around
Zips have a reputation for being one of the ‘difficult’ bits of sewing; but once you’ve practiced a couple you’ll see they’re not too fearsome. I mentioned in Part One that we would be using a regular zip. That’s the kind where you can see the zipper teeth on the right side. Invisible or concealed zippers look a bit different: the teeth are hidden and you insert them using a different method, so we’ll save that for another day.
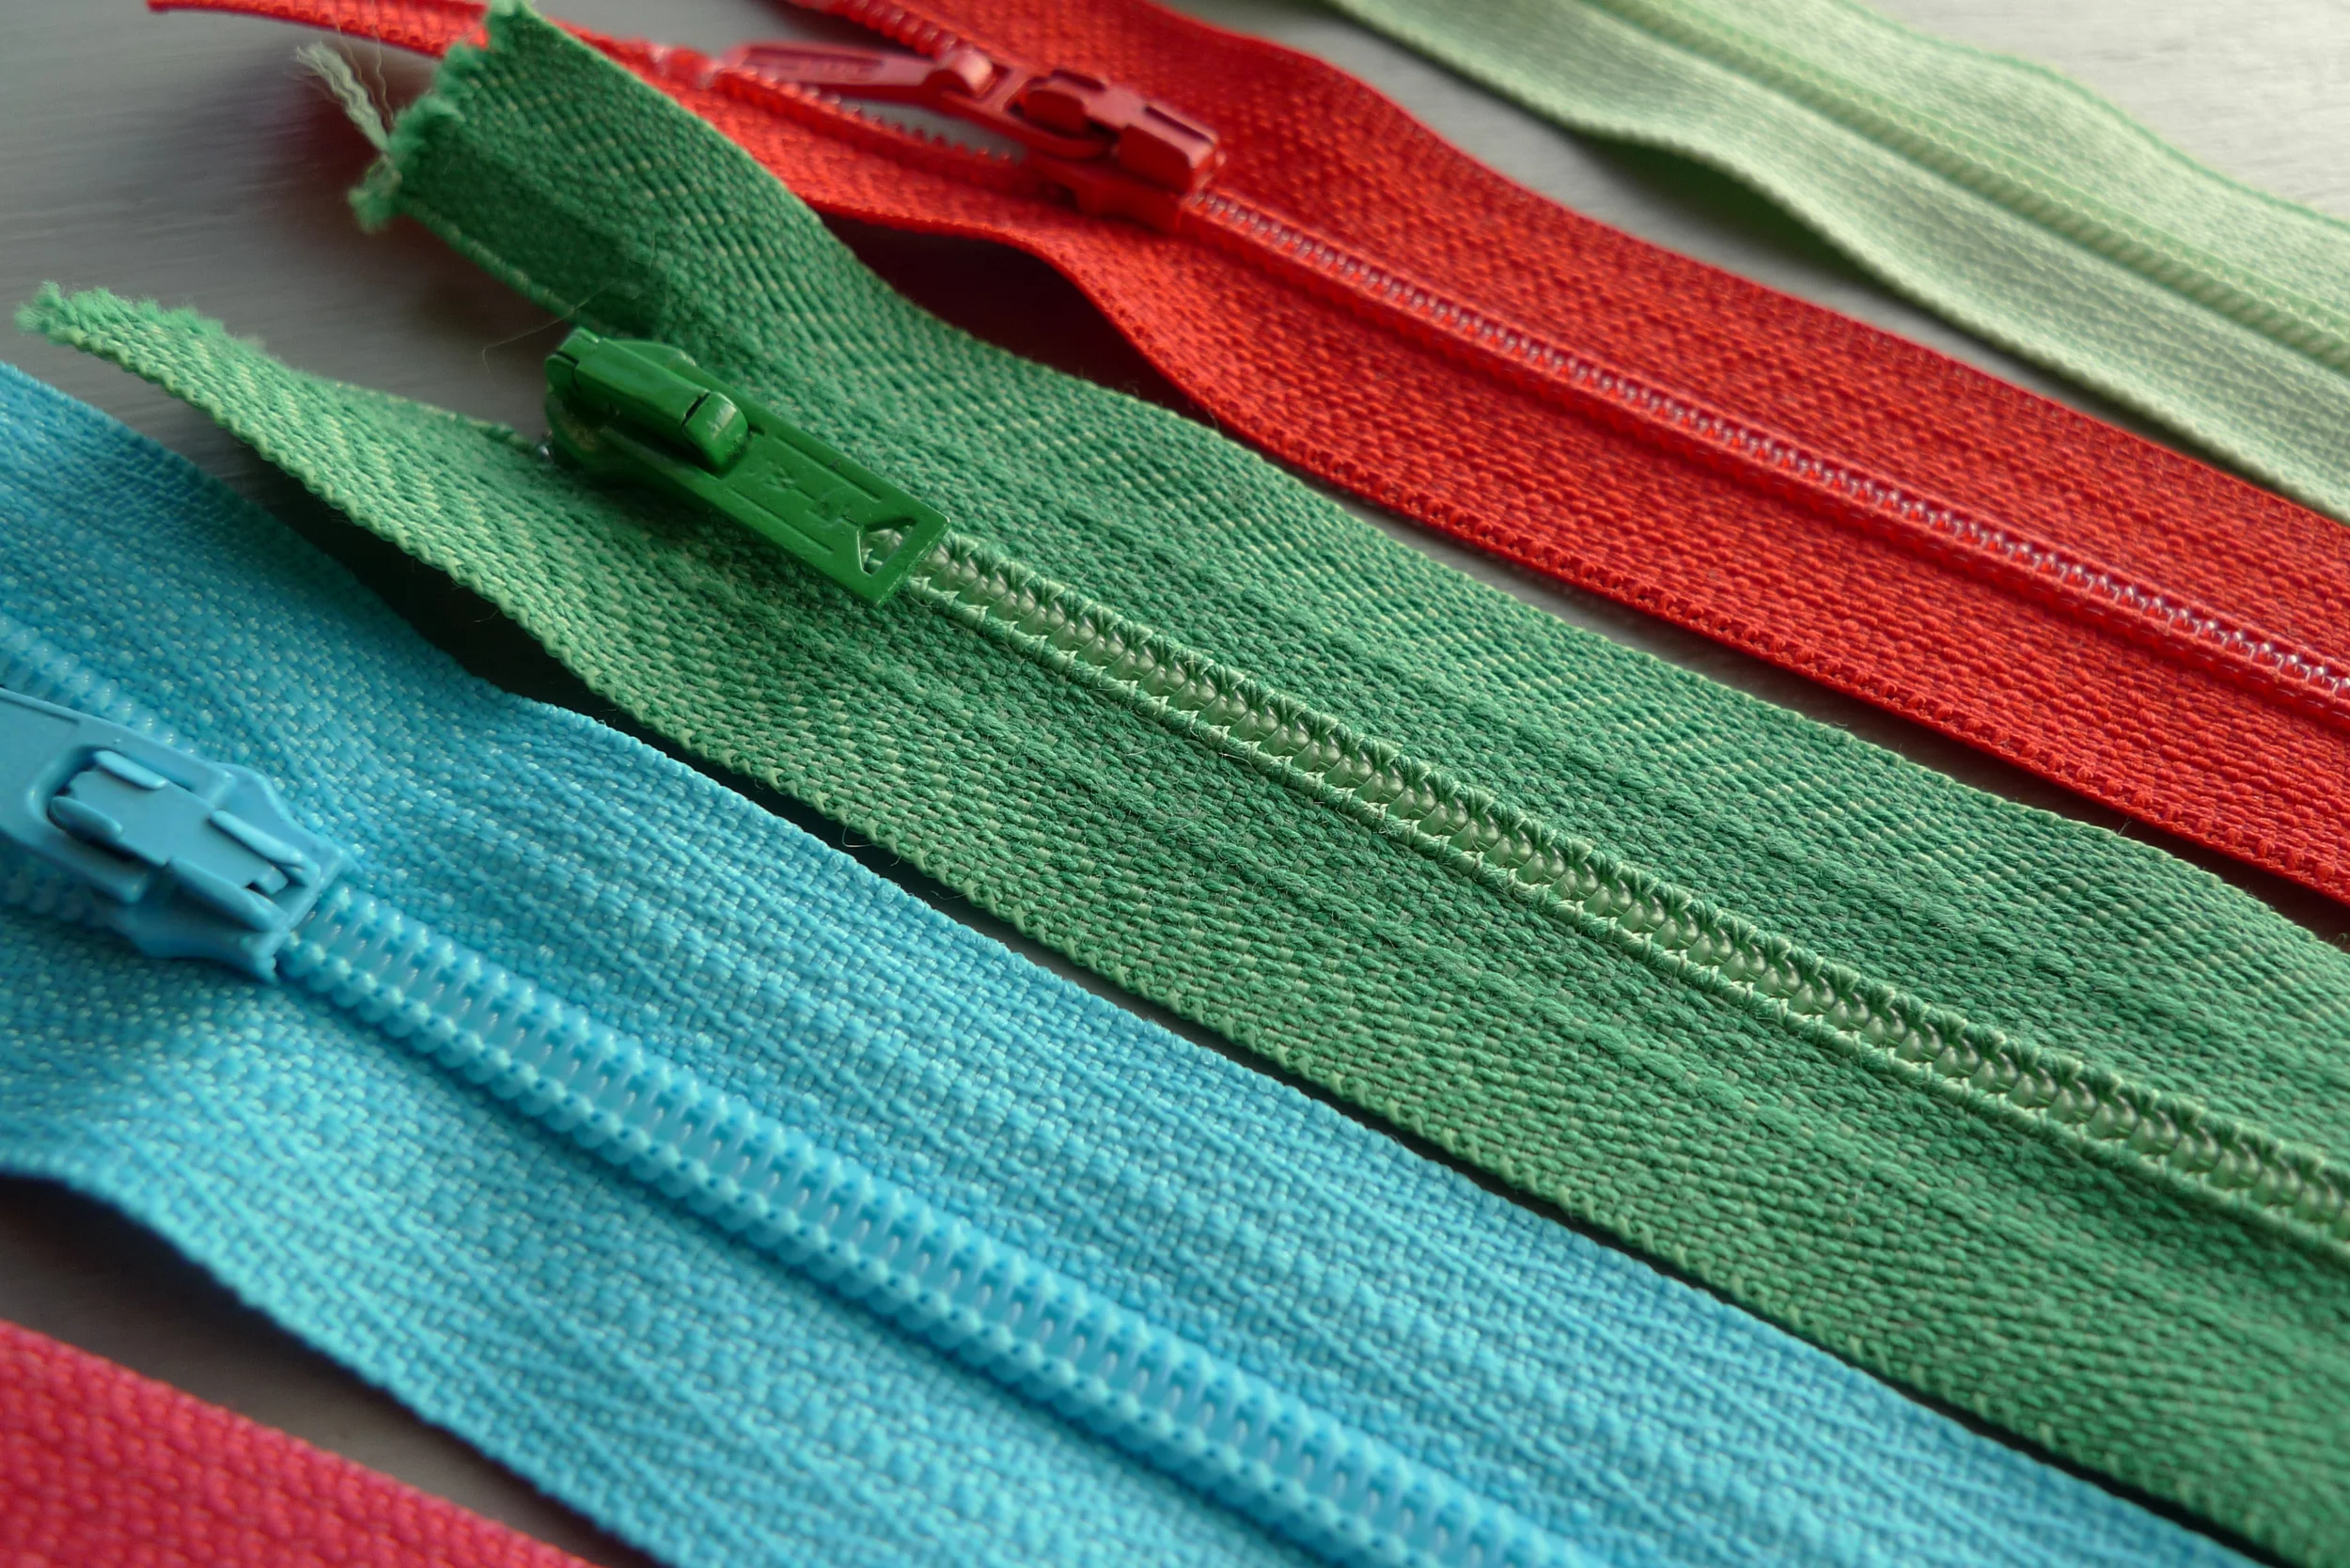
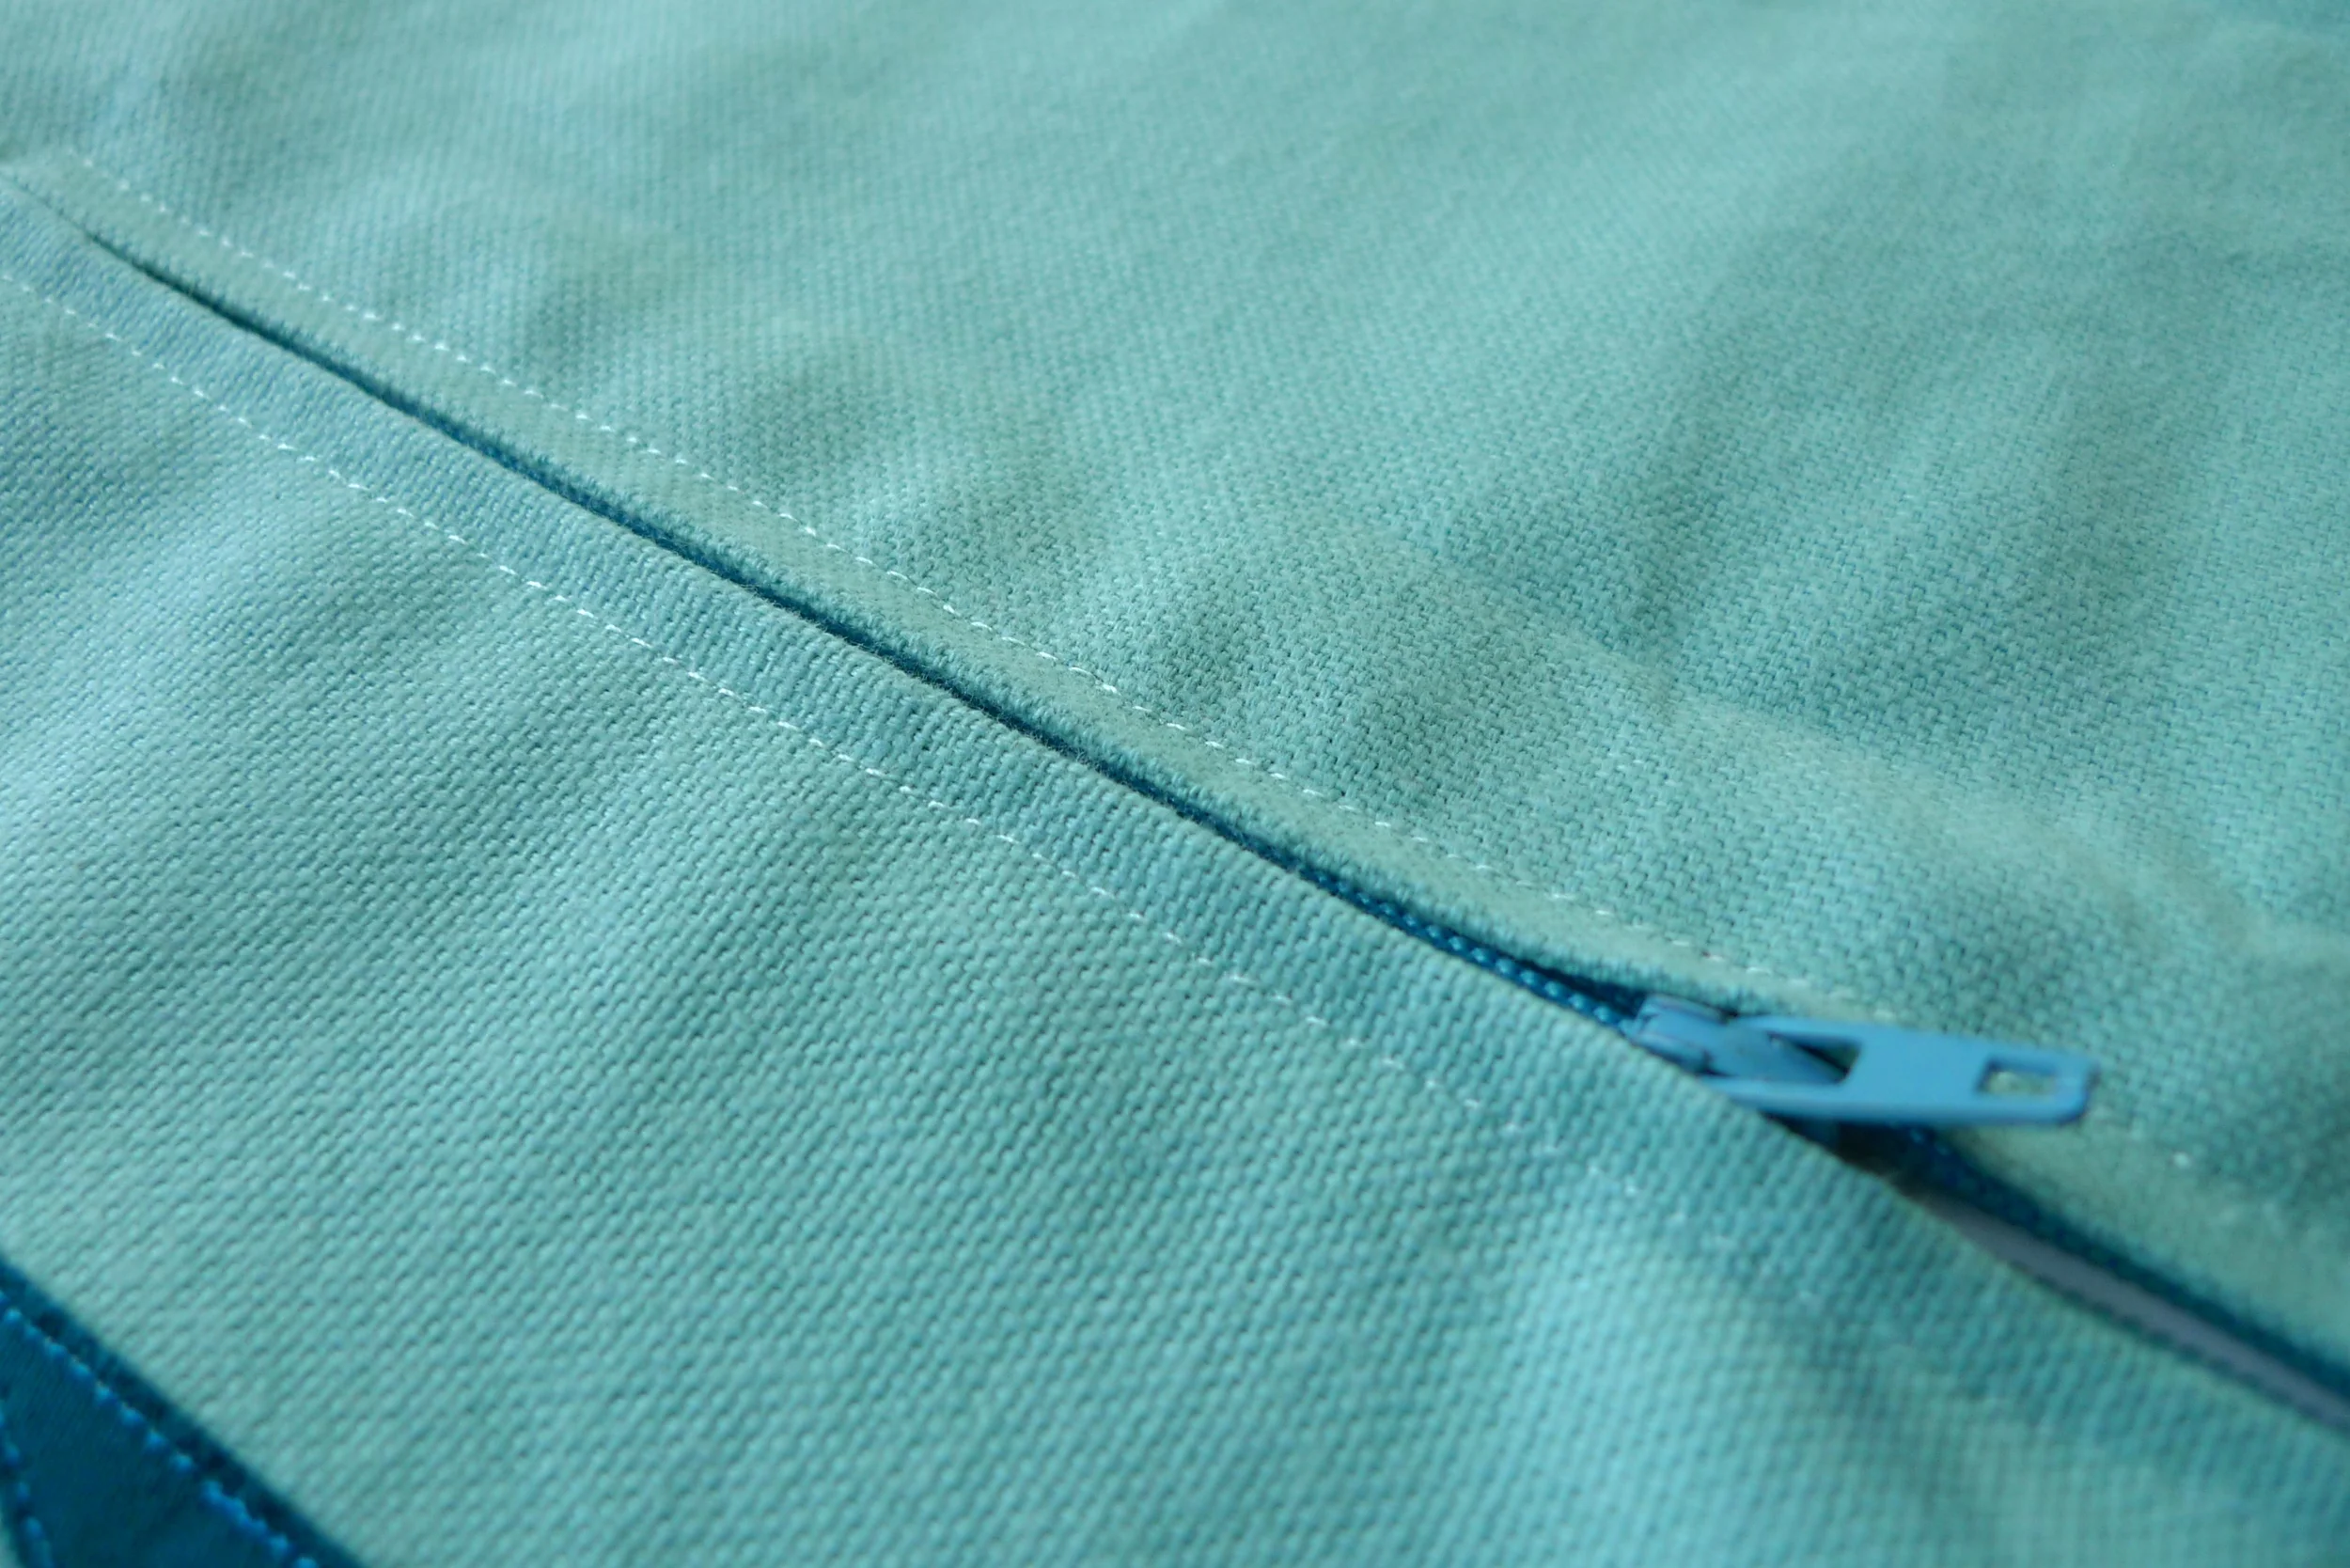
Regular zippers
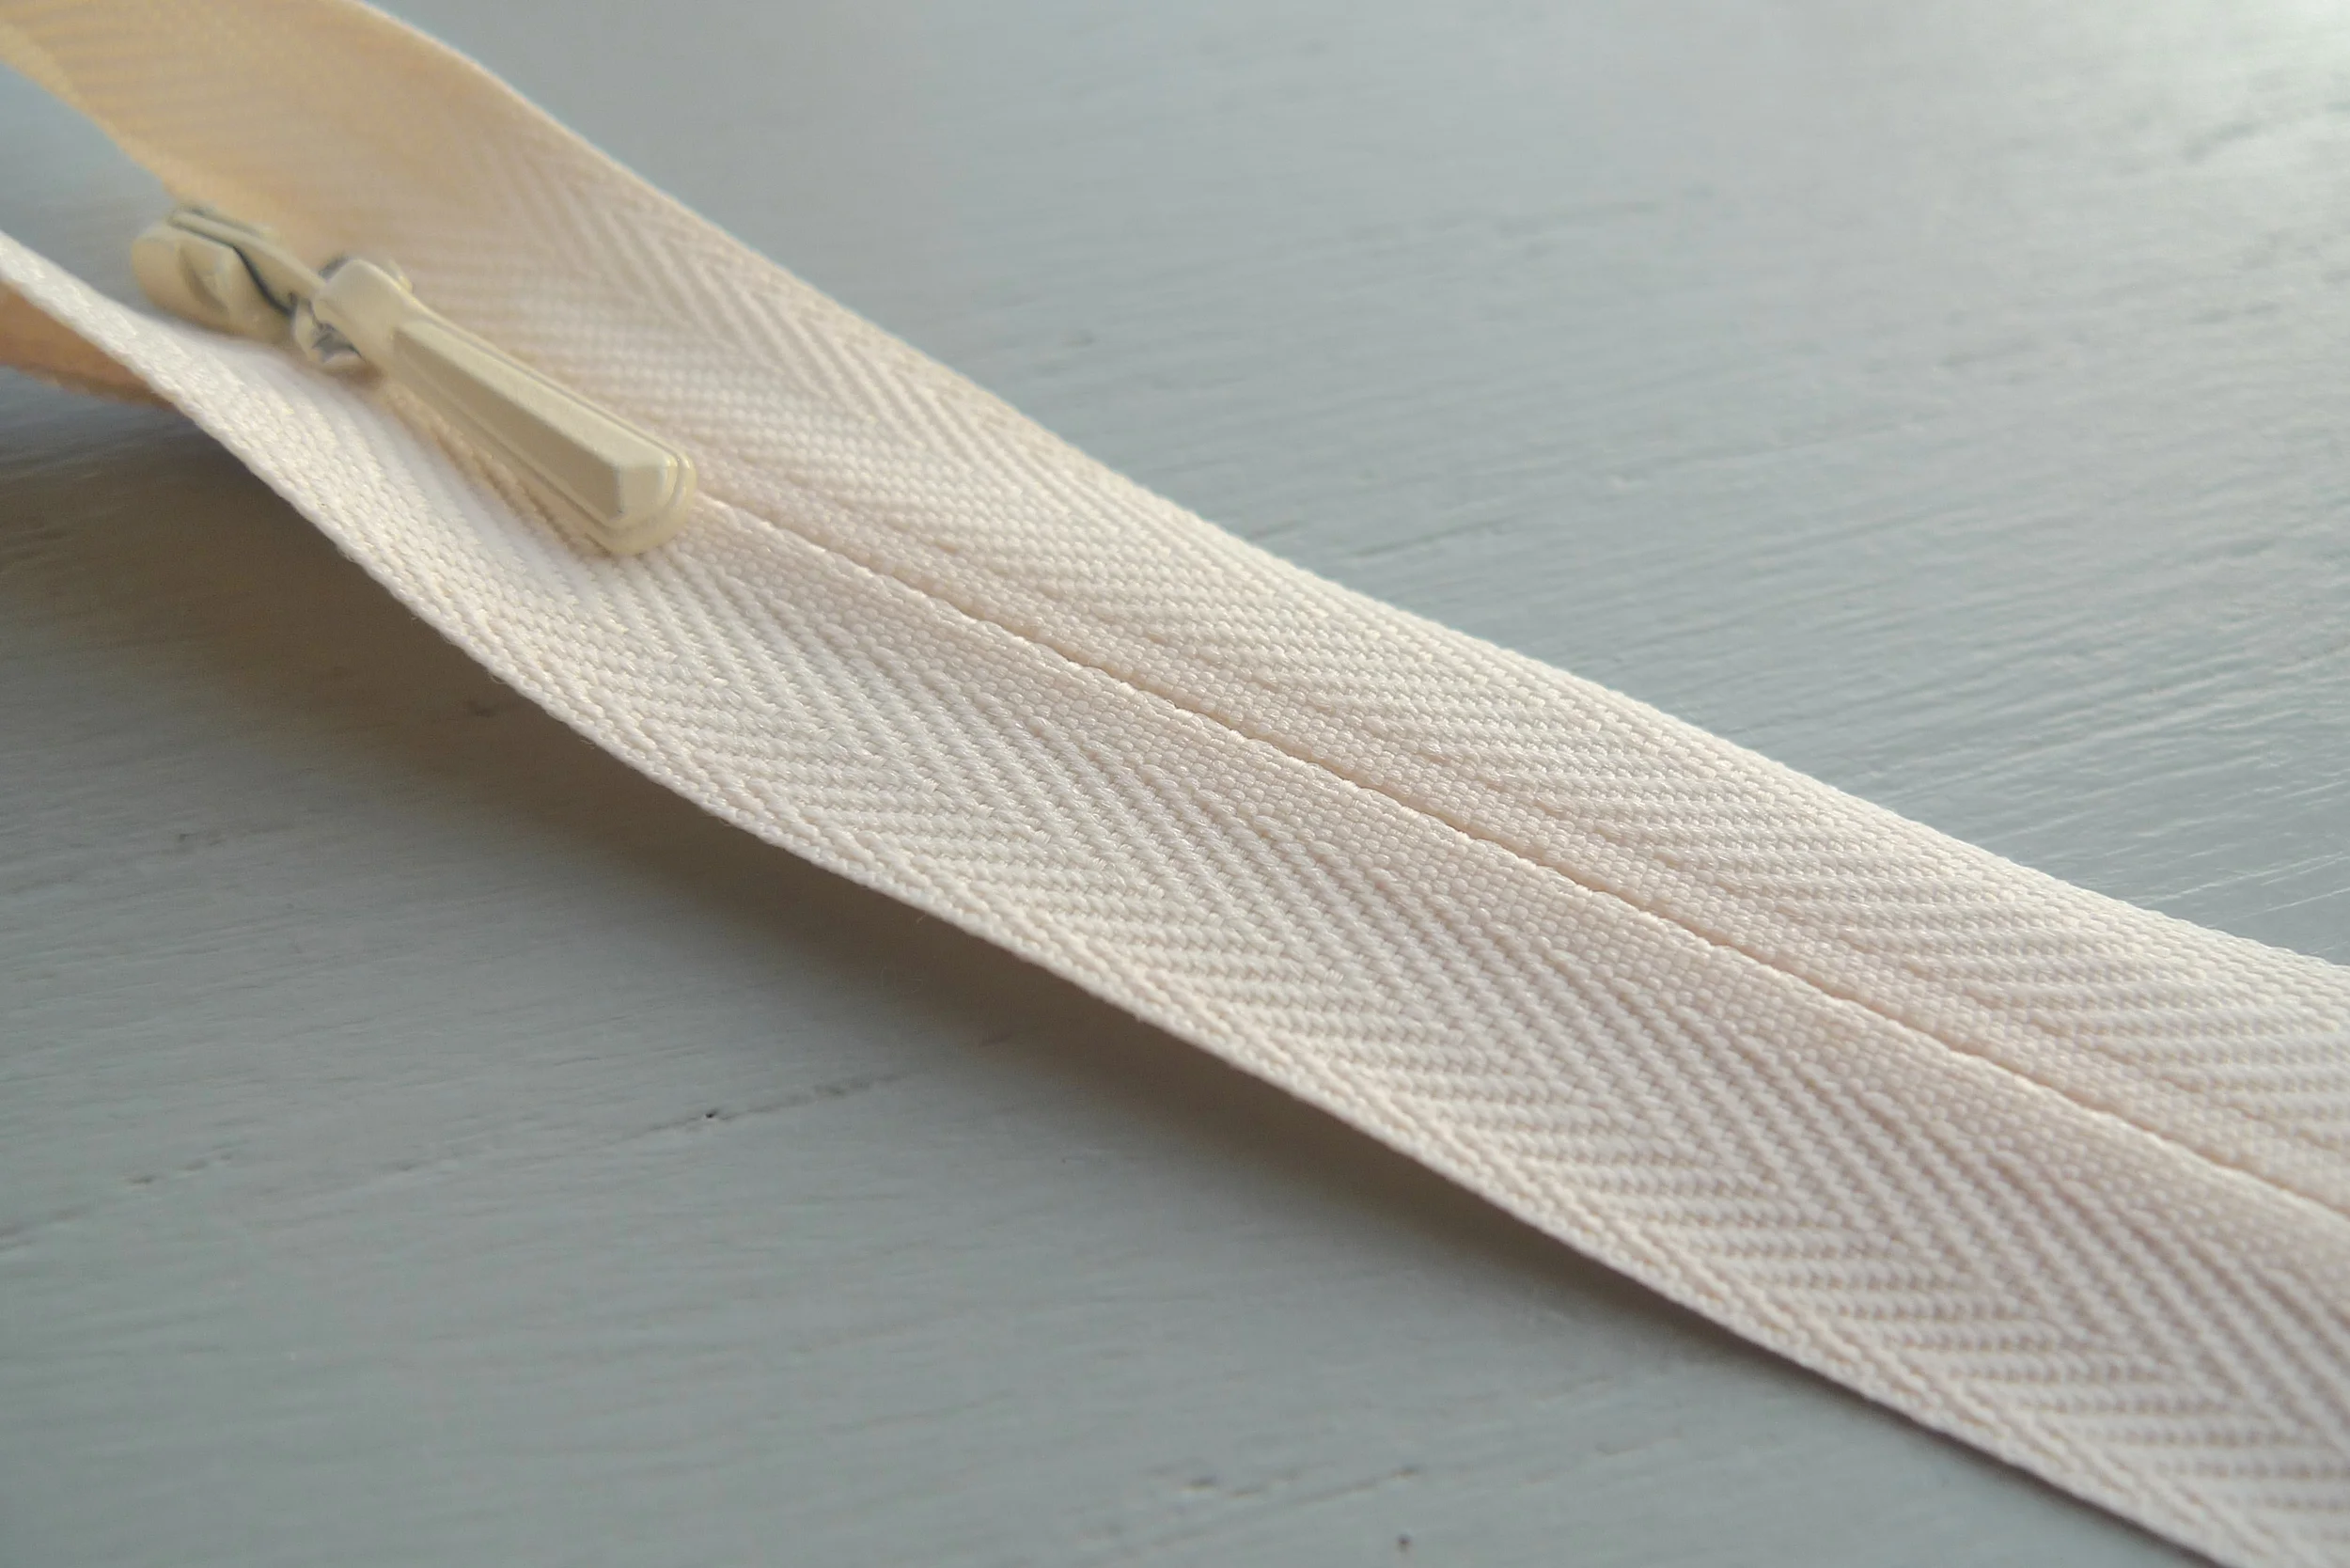
Concealed or invisible zipper

Two types of zipper foot
Before we get started, here are my two biggest zip tips:
1) Use A Zipper Foot - These narrow feet allow you to sew nice straight lines close to the bulky teeth. A regular foot would have to sit over the top of the teeth and be all wobbly. If there is one thing a presser foot doesn’t like, it’s being wobbly. The foot needs to remain level in order to form nice even stitches. This style of the foot also allows the zipper 'pull' to move past it much easier, which, as you’ll discover later, is pretty important.
Zipper feet can vary in style; I've shown two types in the photo.
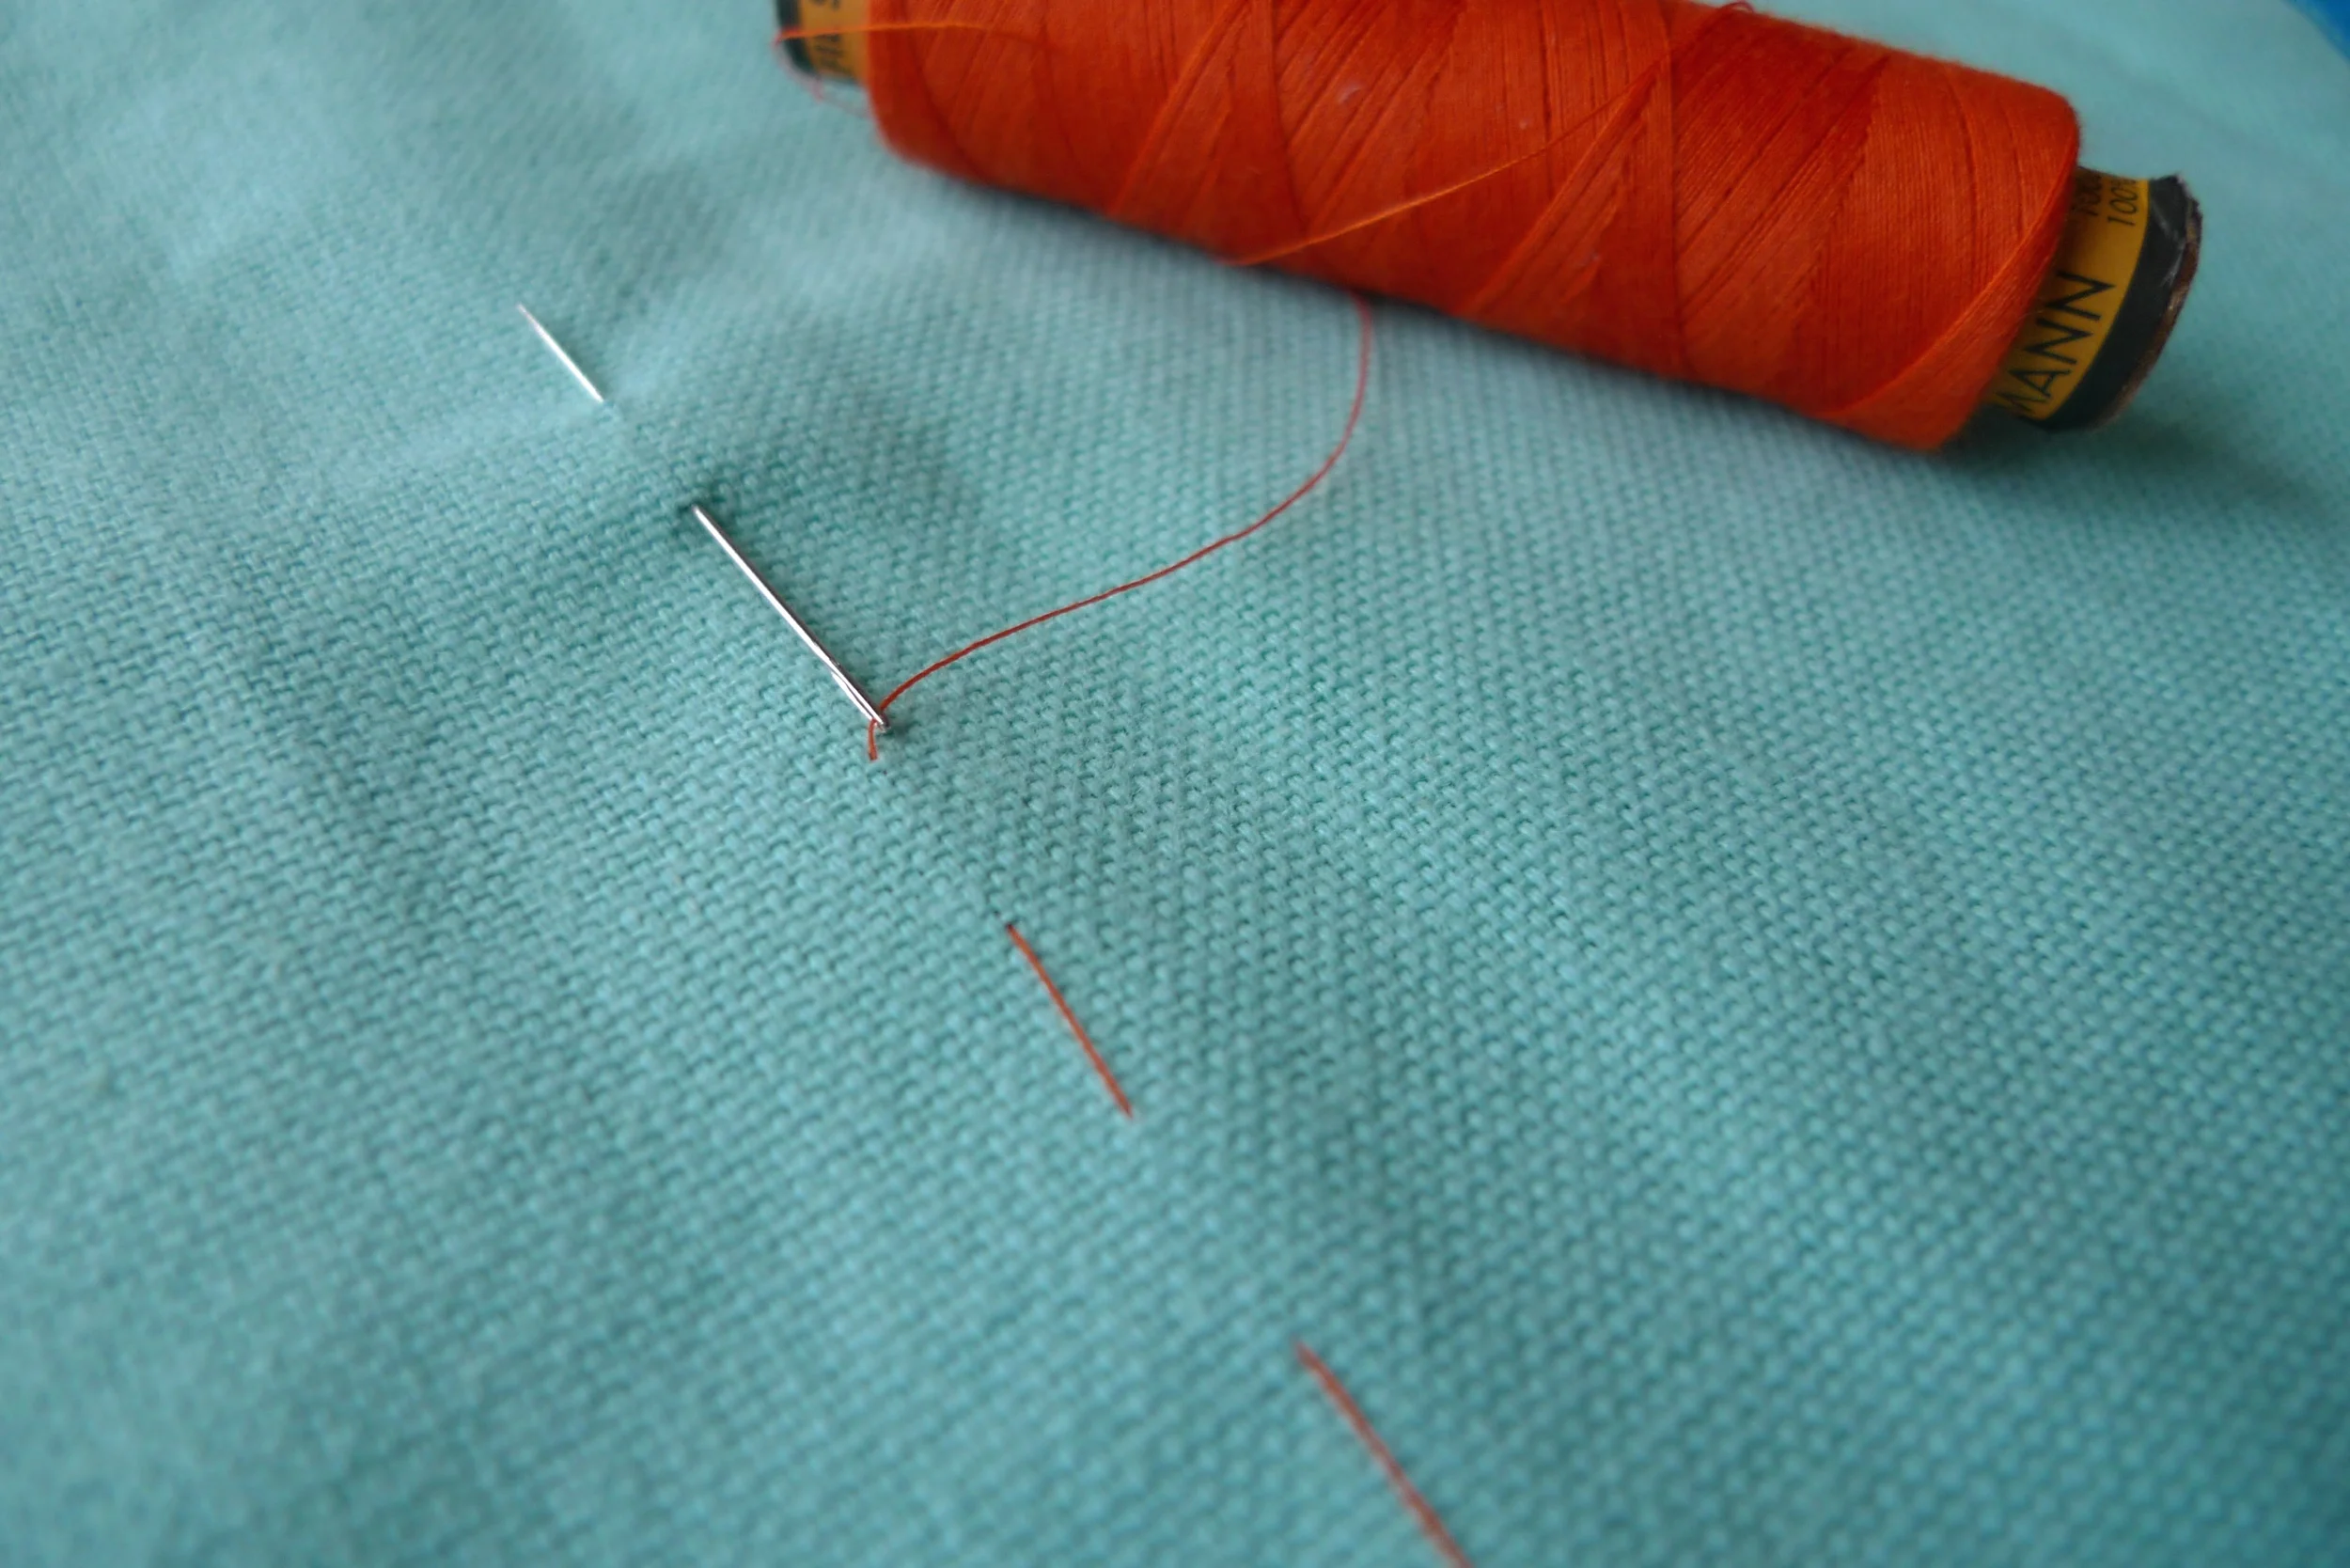
Hand basting
2) Hand Basting - Not the kind you do when roasting a turkey. Pouring hot fat on your cushion at this point would really not help you insert the zip; or anything else for that matter.
'Hand basting', simply put, means taking a needle and thread and stitching your zip in place using an even, large-ish running stitch. This will keep everything nicely in place whilst you sew in your zip and, although you may be groaning at the thought of an extra step, it really, really does make life easier. I promise.
Sewing in A Zipper

STEP 1a - Place zipper along edge of fabric where it will be inserterted.
Why not have a read through this tutorial first and make sure you understand all the steps before you get started. And note that I've used images from my blue cushion and my pink cushion interchangeably during this tutorial. Just in case there was confusion!
Ok, let’s get started. Zips at the ready? Turkey in the oven? Let’s make a cushion.
The seam allowance is ½”, so the dimensions of your cushion pieces will give you a cushion cover slightly smaller than the pad, which makes for a plump ‘stuffed’ effect. If you prefer a looser cover, you can make the dimensions ½” to 1” bigger all round.
STEP 1 - Mark Your Zipper Length On Your Fabric
Take both squares of fabric and pin them together with right sides facing, and your zipper sitting along one side. My zip is a little shorter than the suggested length I gave you in part one. But as long as it is no shorter than about 2/3 of the width of the cushion, it will be fine.
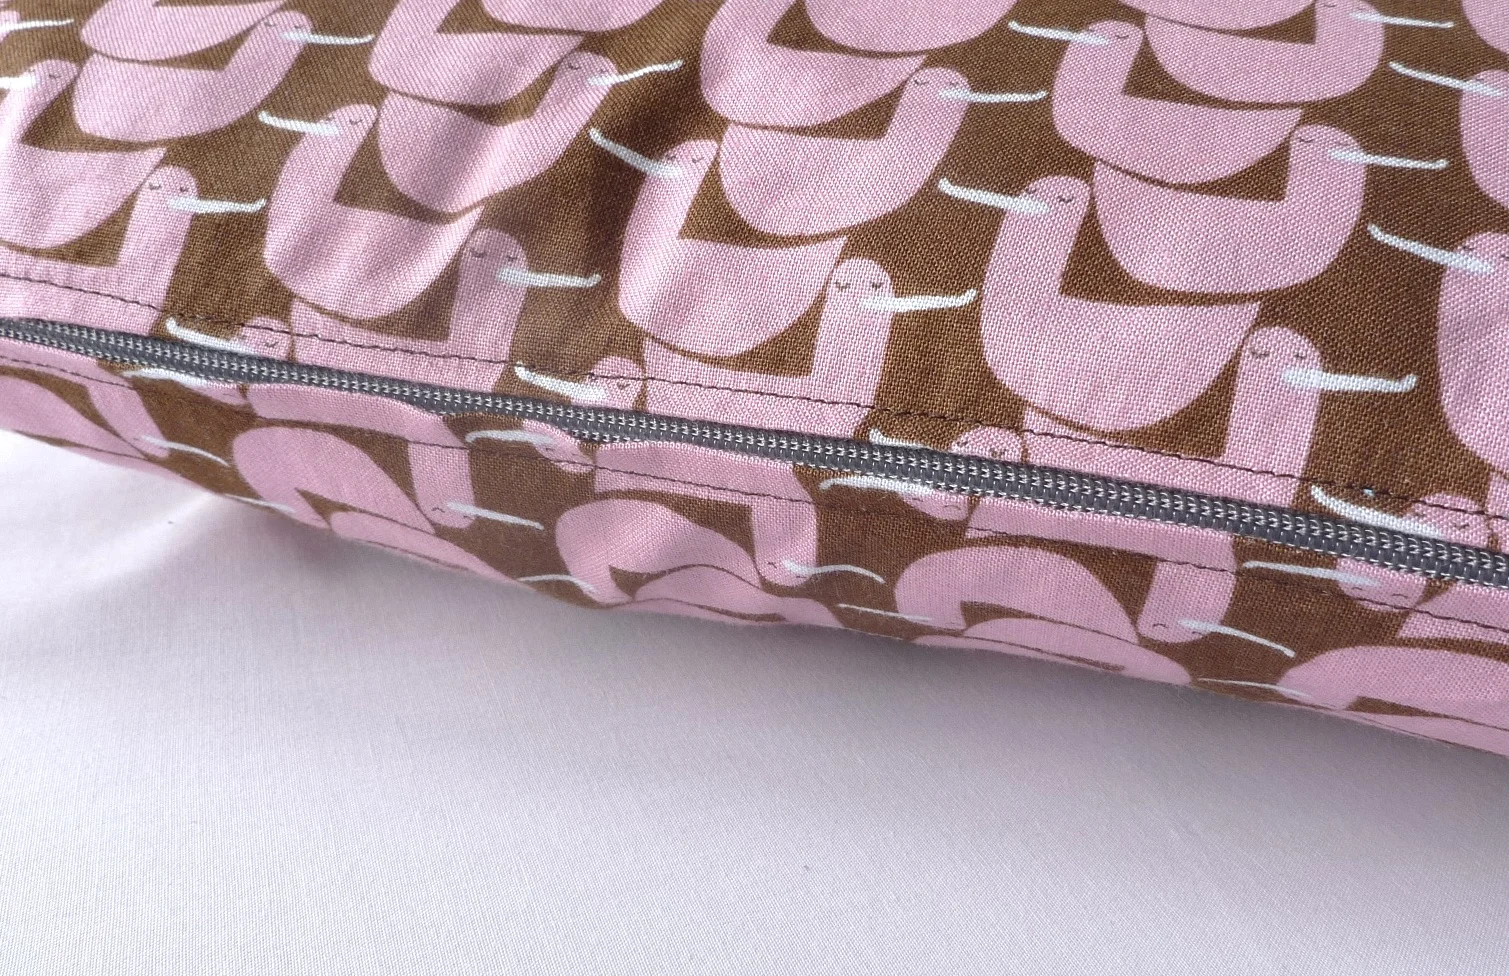
If you have a directional design on your fabric, like the duck fabric I have used, then place the zip at the 'bottom' edge. This way, when you sit your cushion on a sofa, with the print the correct way up, your zipper will be hidden underneath.
Make a mark on your fabric to show where the zip starts and finishes (blue temporary marker lines in the image below). You should mark where the zipper teeth start and finish not the end of the tape.
STEP 1b - Mark where the zipper teeth start and end. In this photo it's the blue marker lines.
STEP 2 - Sew Your Seam
Sew a standard ½” seam from the first edge of your fabric to your first mark; stop, backstitch and clip your threads (note that in my photograph, the 'first edge' is the left-hand edge). Now sew a ½” seam from the second mark to the other edge of your fabric; backstitching as normal at the beginning and end.
Backstitching is when you take a couple of stitches forward, then press the reverse button or hold down the reverse lever so you stitch backwards over your first stitches. Release the button or lever and continue forwards. A standard backstitch is 3-5 stitches long. This little back and forth stitching jig happens each time you start and finish a seam so that your stitches are secured and won’t unravel.
Change to a basting stitch; which means setting the stitch length on your machine to '4-5mm' or the biggest number it goes up to. Baste the middle section of the seam between the two marks. Don’t backstitch this time. You can see I’ve used red thread for my basting, to make it easier to identify the stitches and remove them later.
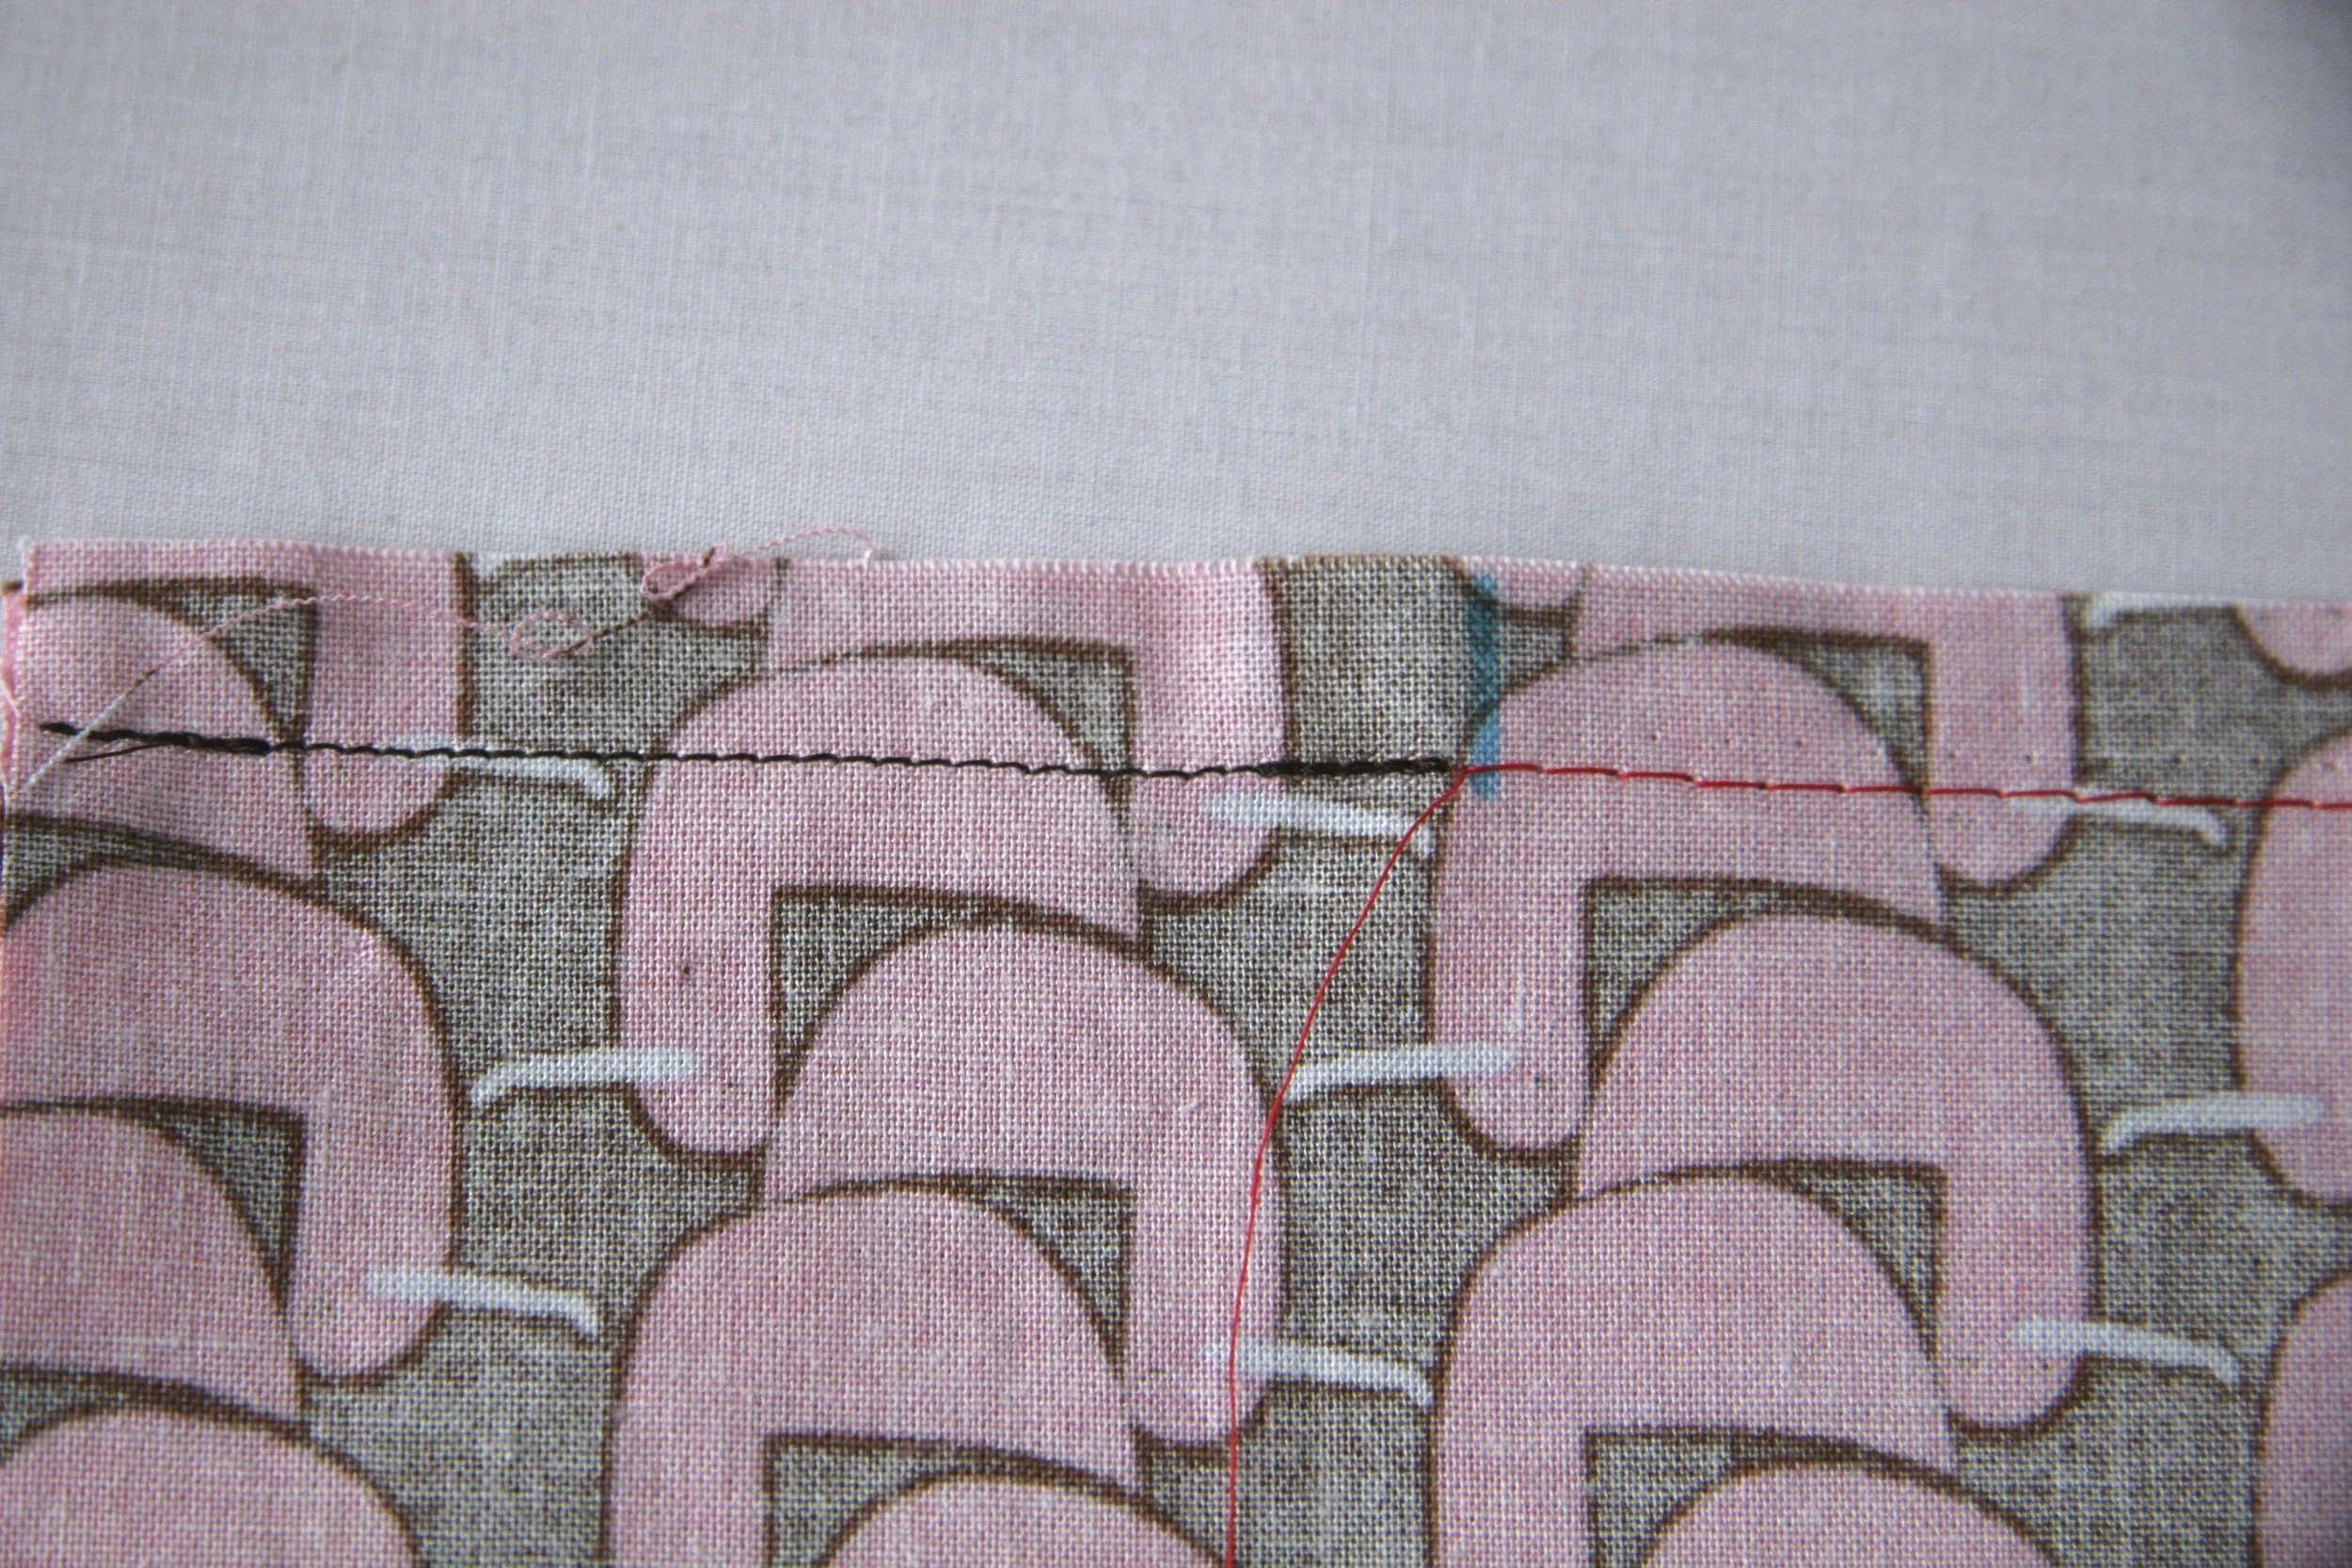
STEP 2 - Normal 1/2 inch seam in black thread with backstitch, stopping at the blue mark. And basted 1/2 inch seam in red.
STEP 3a - Press open your seam. I've neat end the raw edges
STEP 3 - Baste Your Zipper In Place
Remove the pins from your fabric and press the whole seam open.
This is a good point to neaten the raw edges of your seam allowance with an overcast or zigzag stitch. Or, if you prefer, you can neaten the edges before you sew the seam together. If you're unsure about this step, here is a great little tutorial on seam finishes.
Place your zip right side facing down along the seam, lining it up with the two marks you made earlier and centering your zipper teeth over the seam line. If your marks have disappeared under your seam allowance, then carefully mark them in again to show you where your line of basting starts and ends.
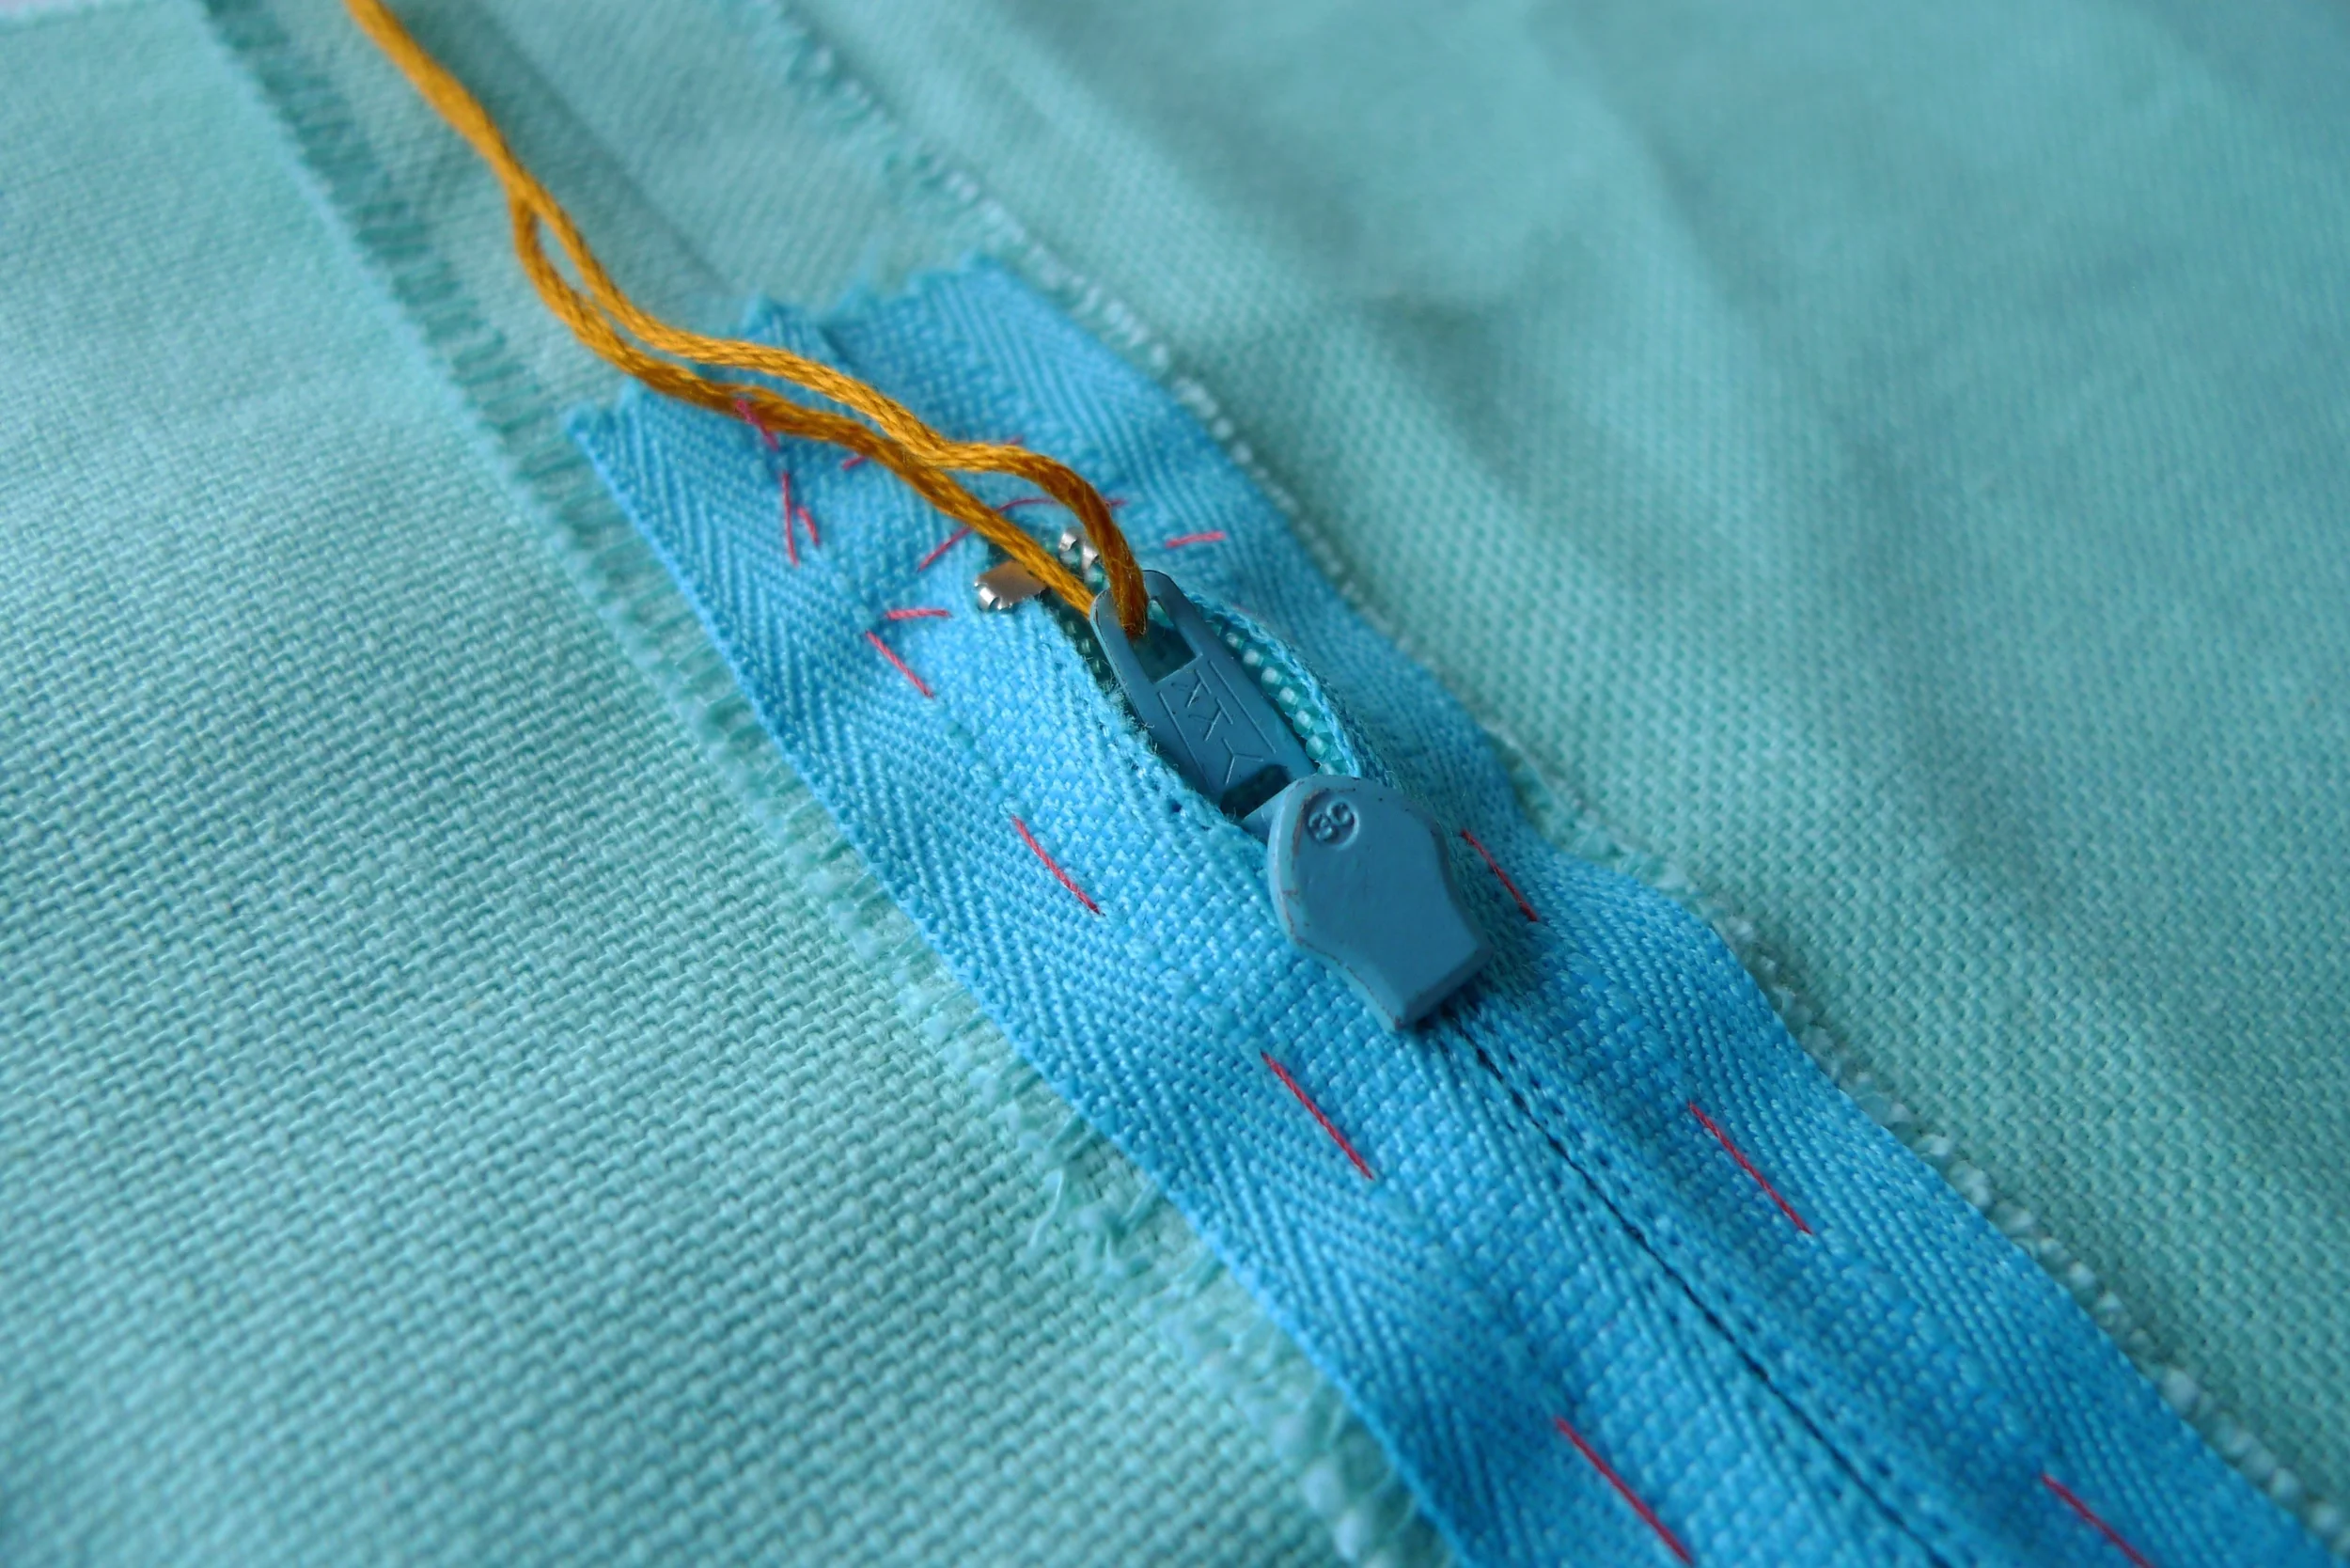
Embroidery thread tied to zip pull
At this point, it helps to unzip the zipper a little way and make sure the zipper 'pull' is peeking up, so that you can move it along. Another helpful tip is to tie a length of thin ribbon or embroidery floss onto the zipper pull. This will make moving it even easier.
Once you are happy with your zipper placement, pin it in place and hand baste to secure. Your stitches here can be long, but try and make sure they are even and straight.
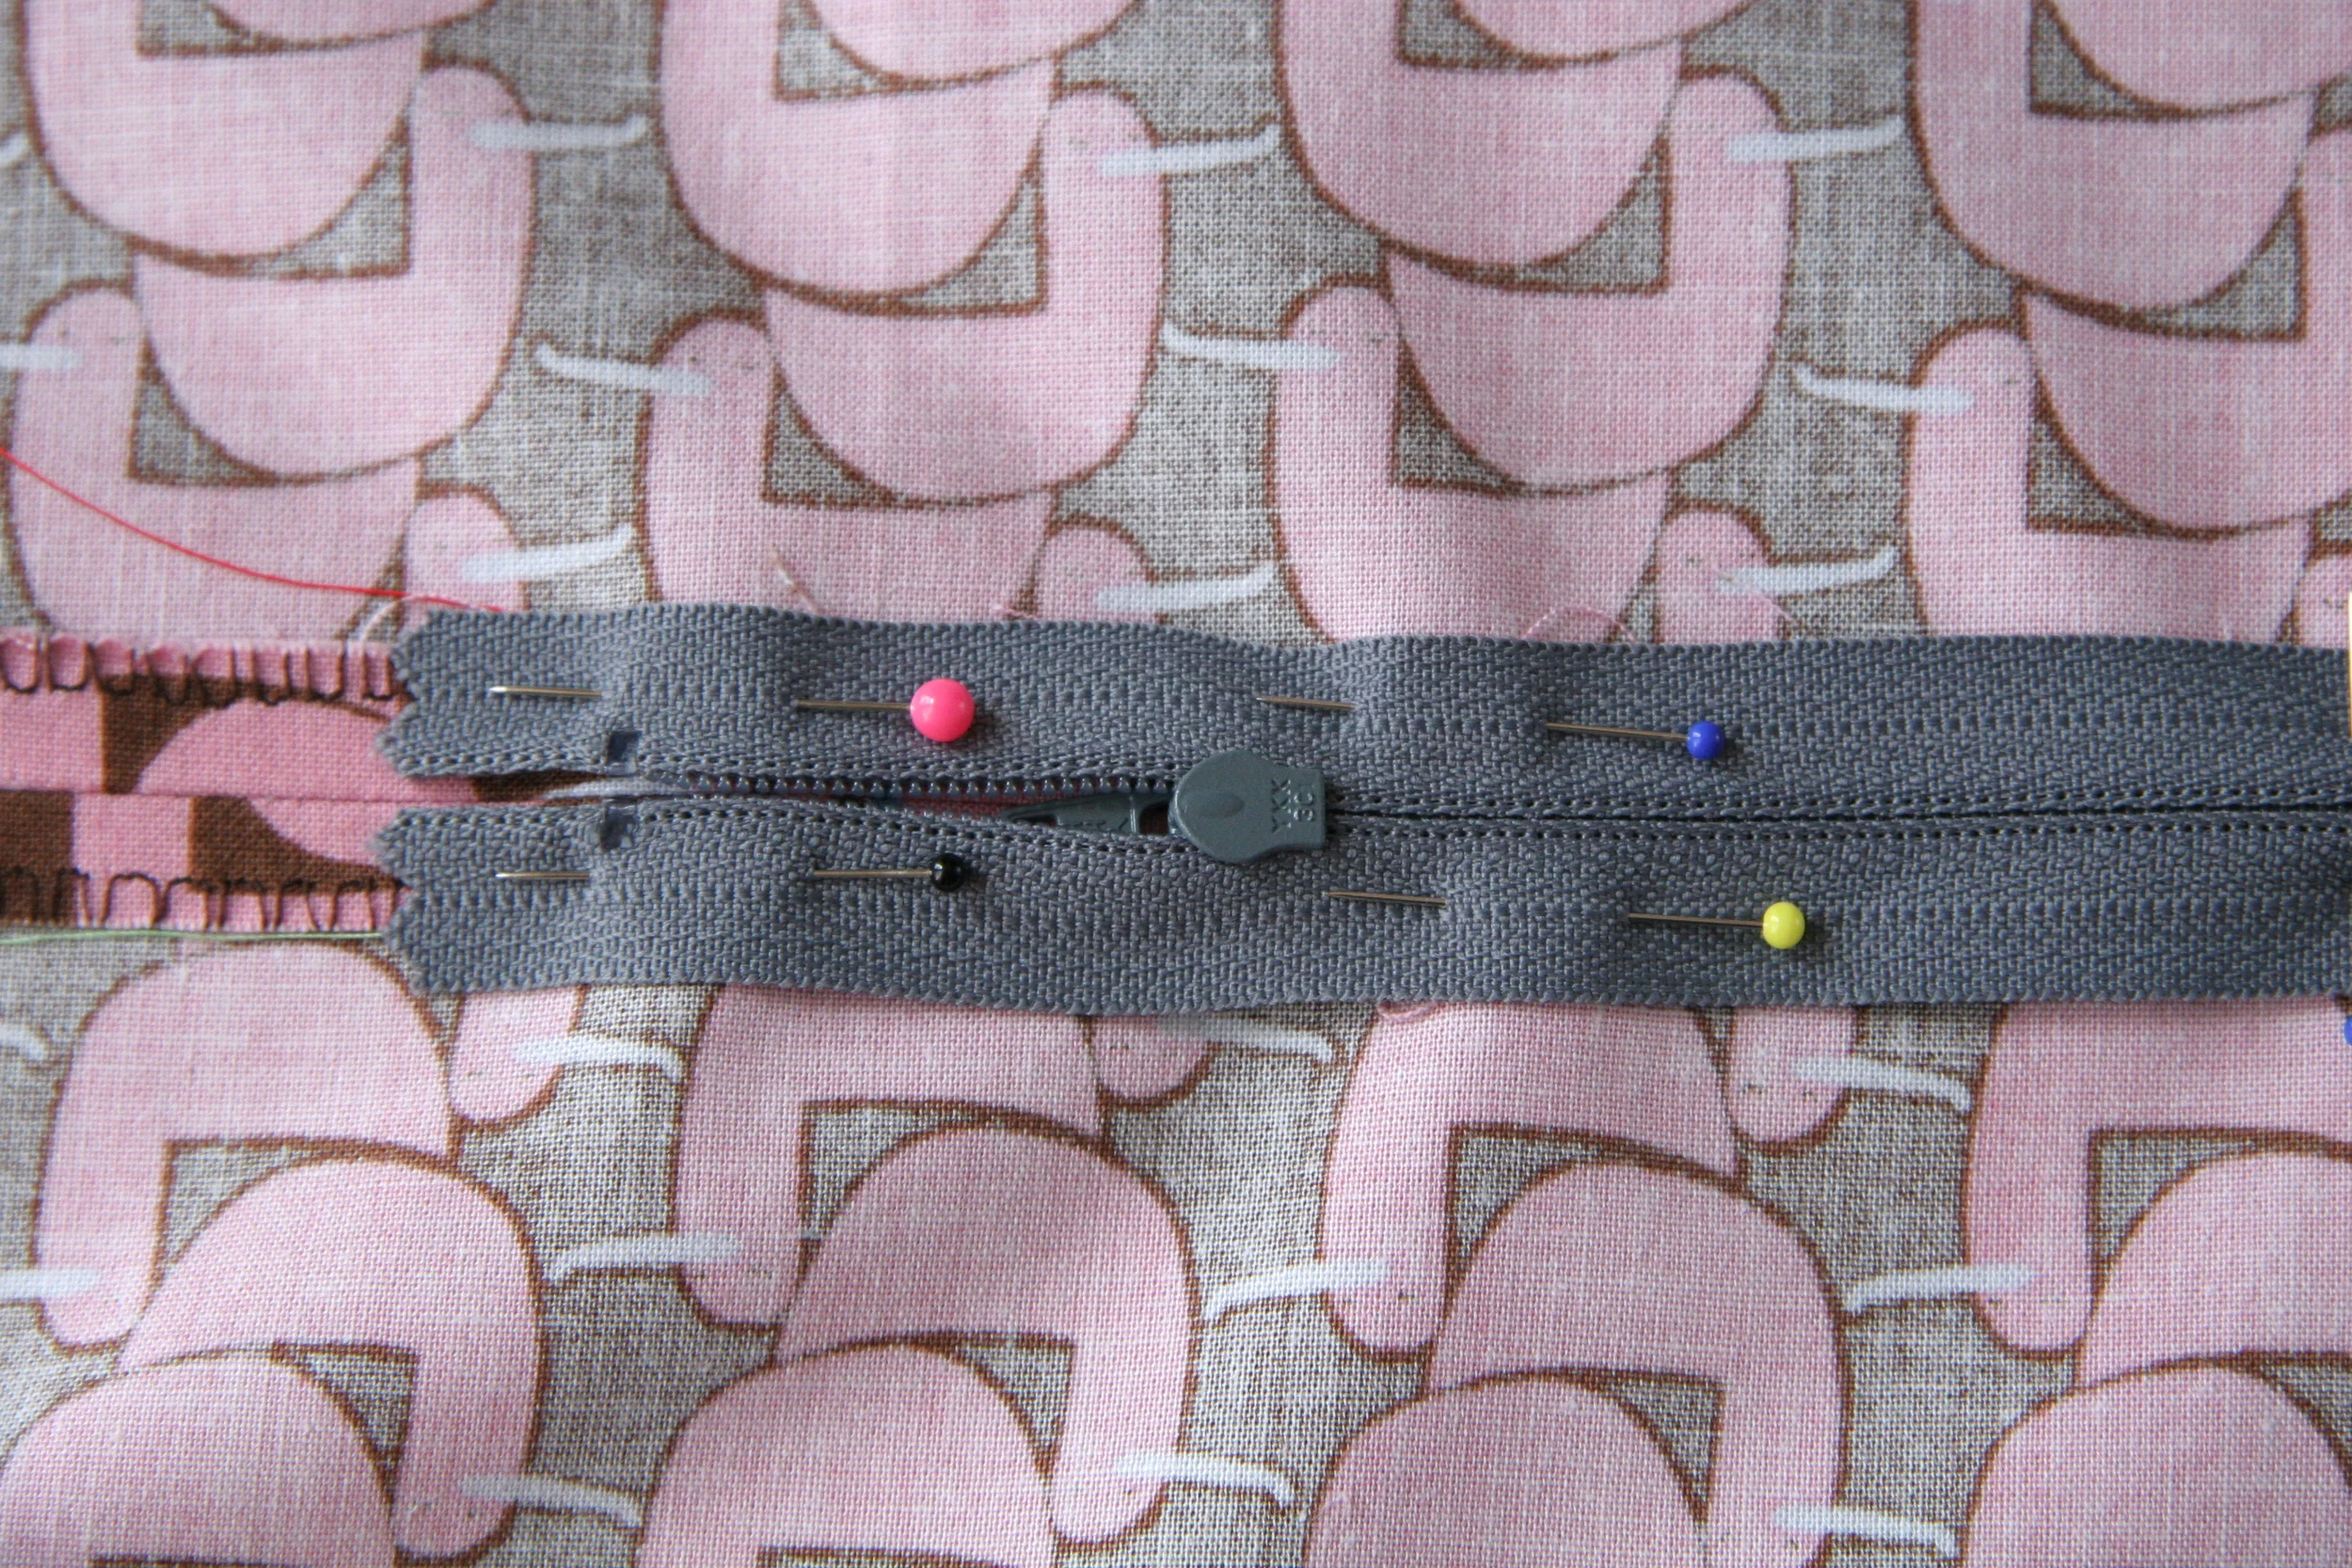
STEP 3b - Pin zip in place.

STEP 3c - Hand baste to secure.
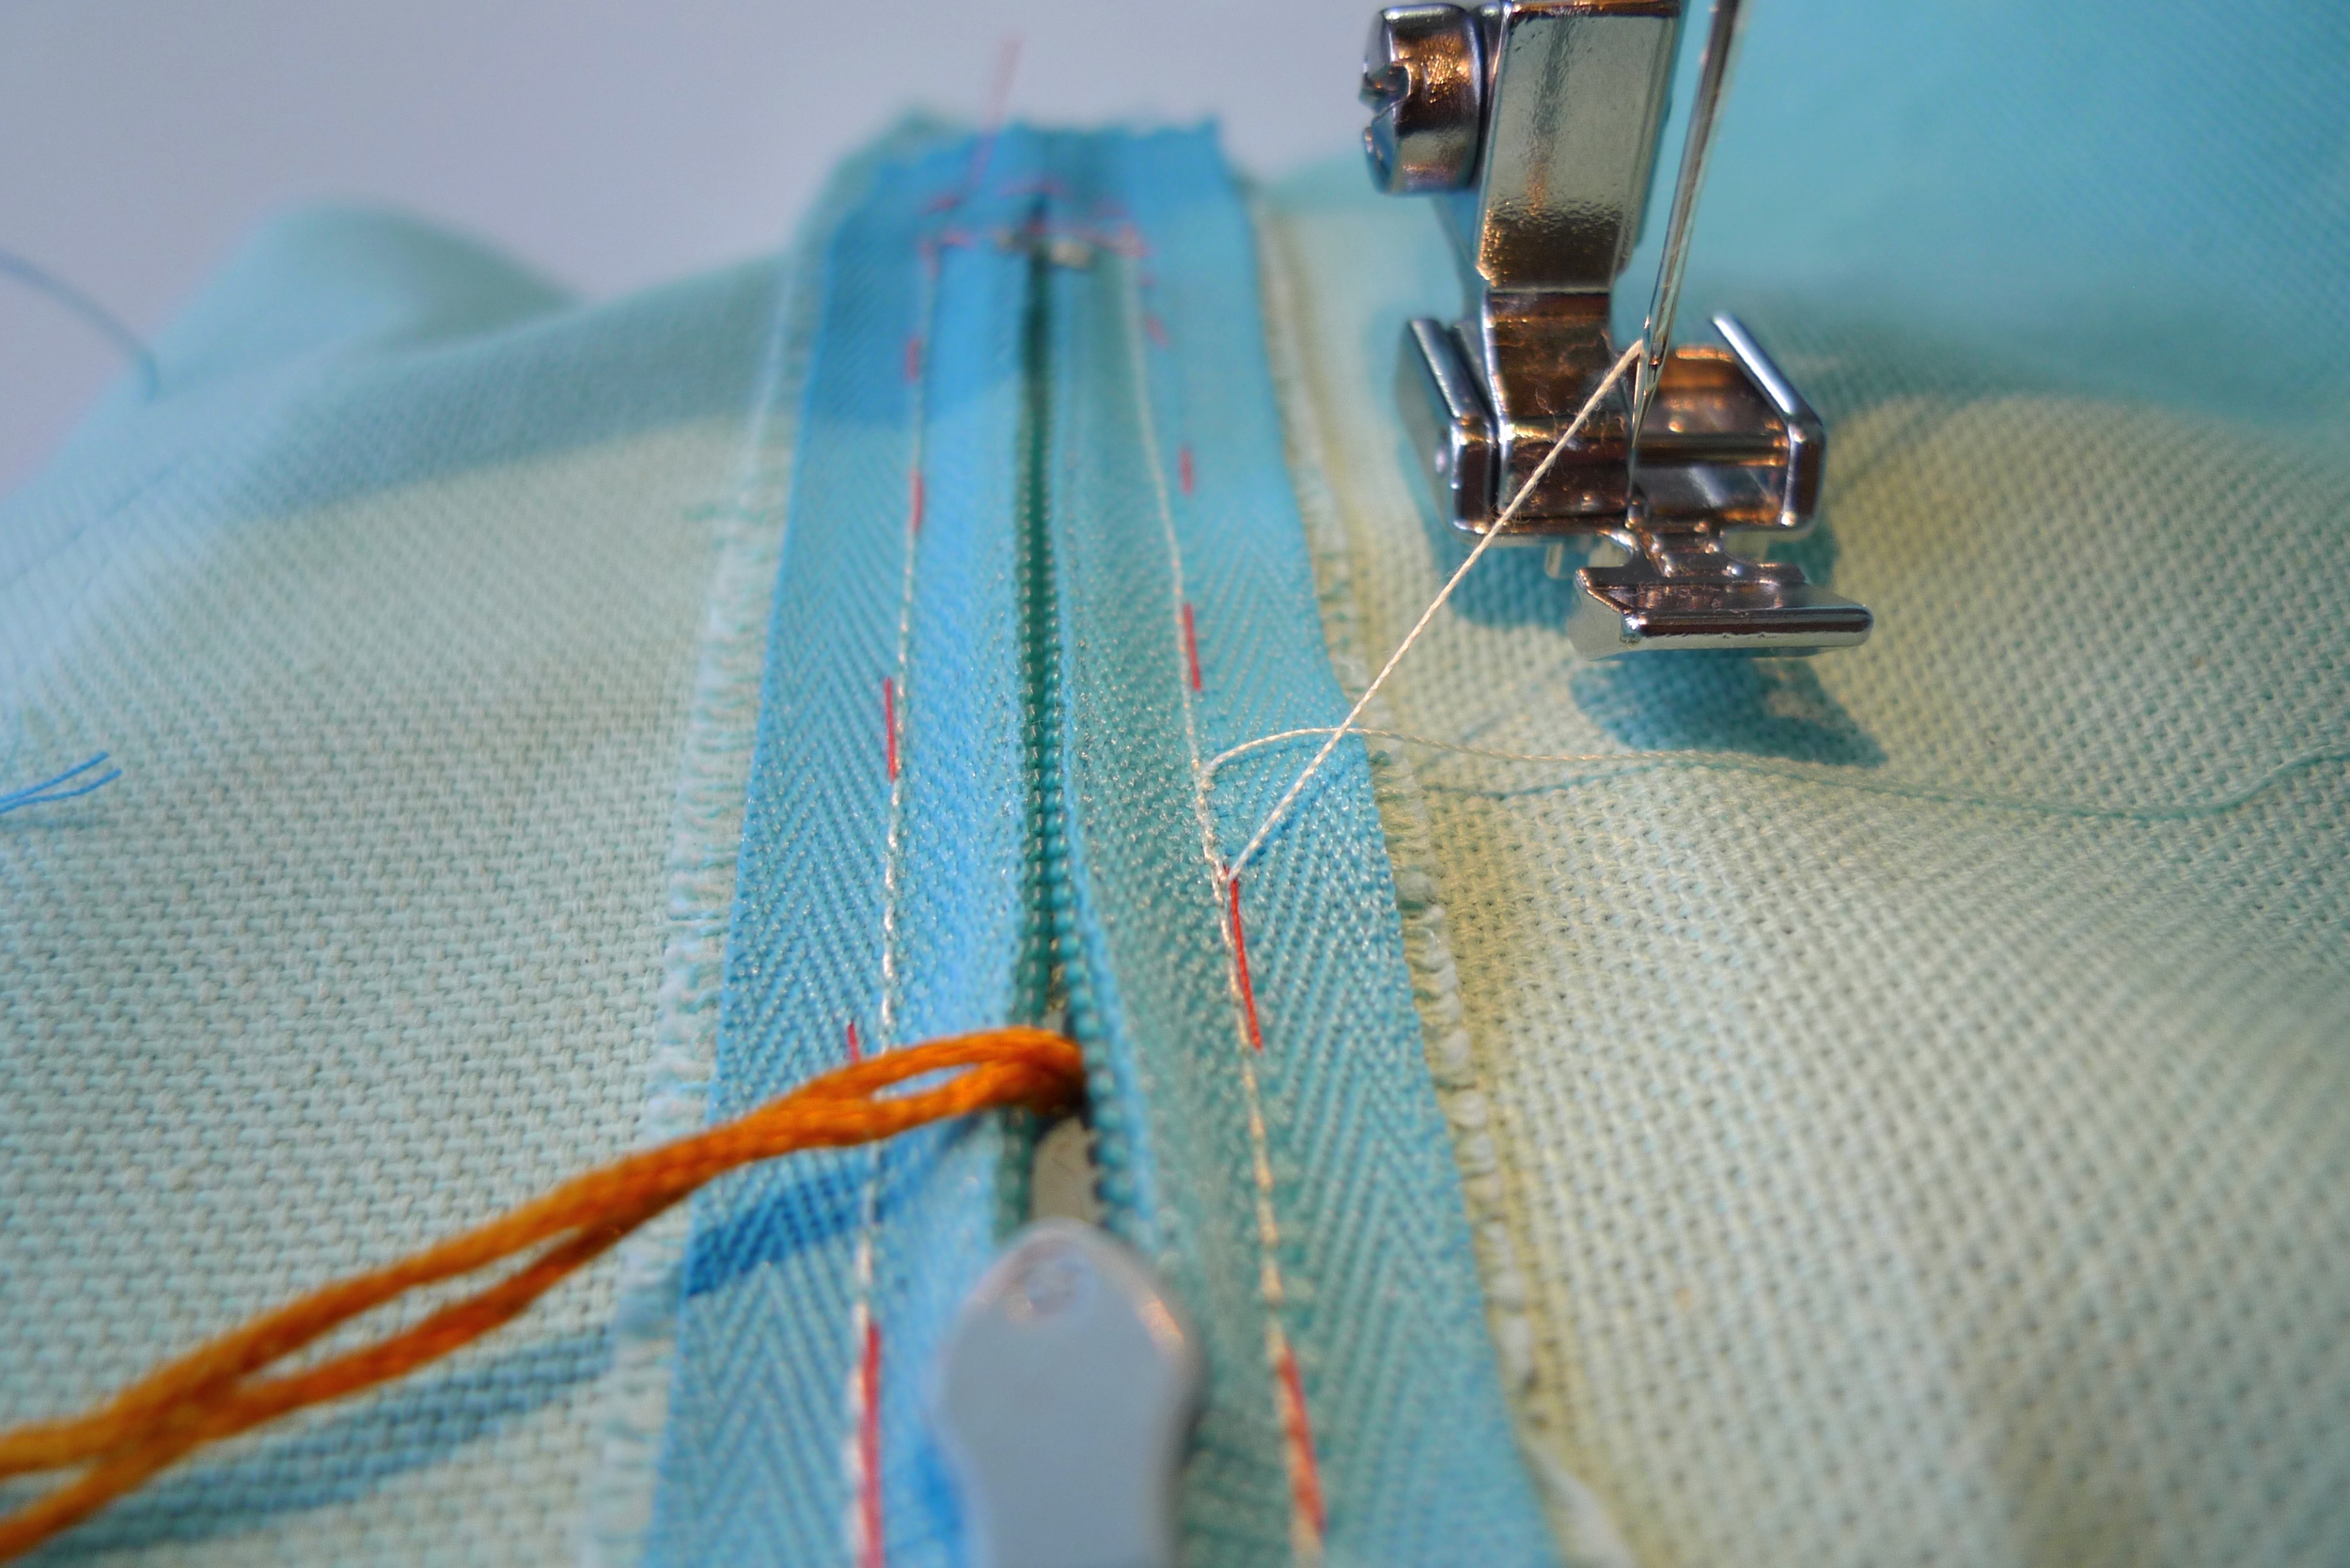
STEP 4 - Sew In The Zipper
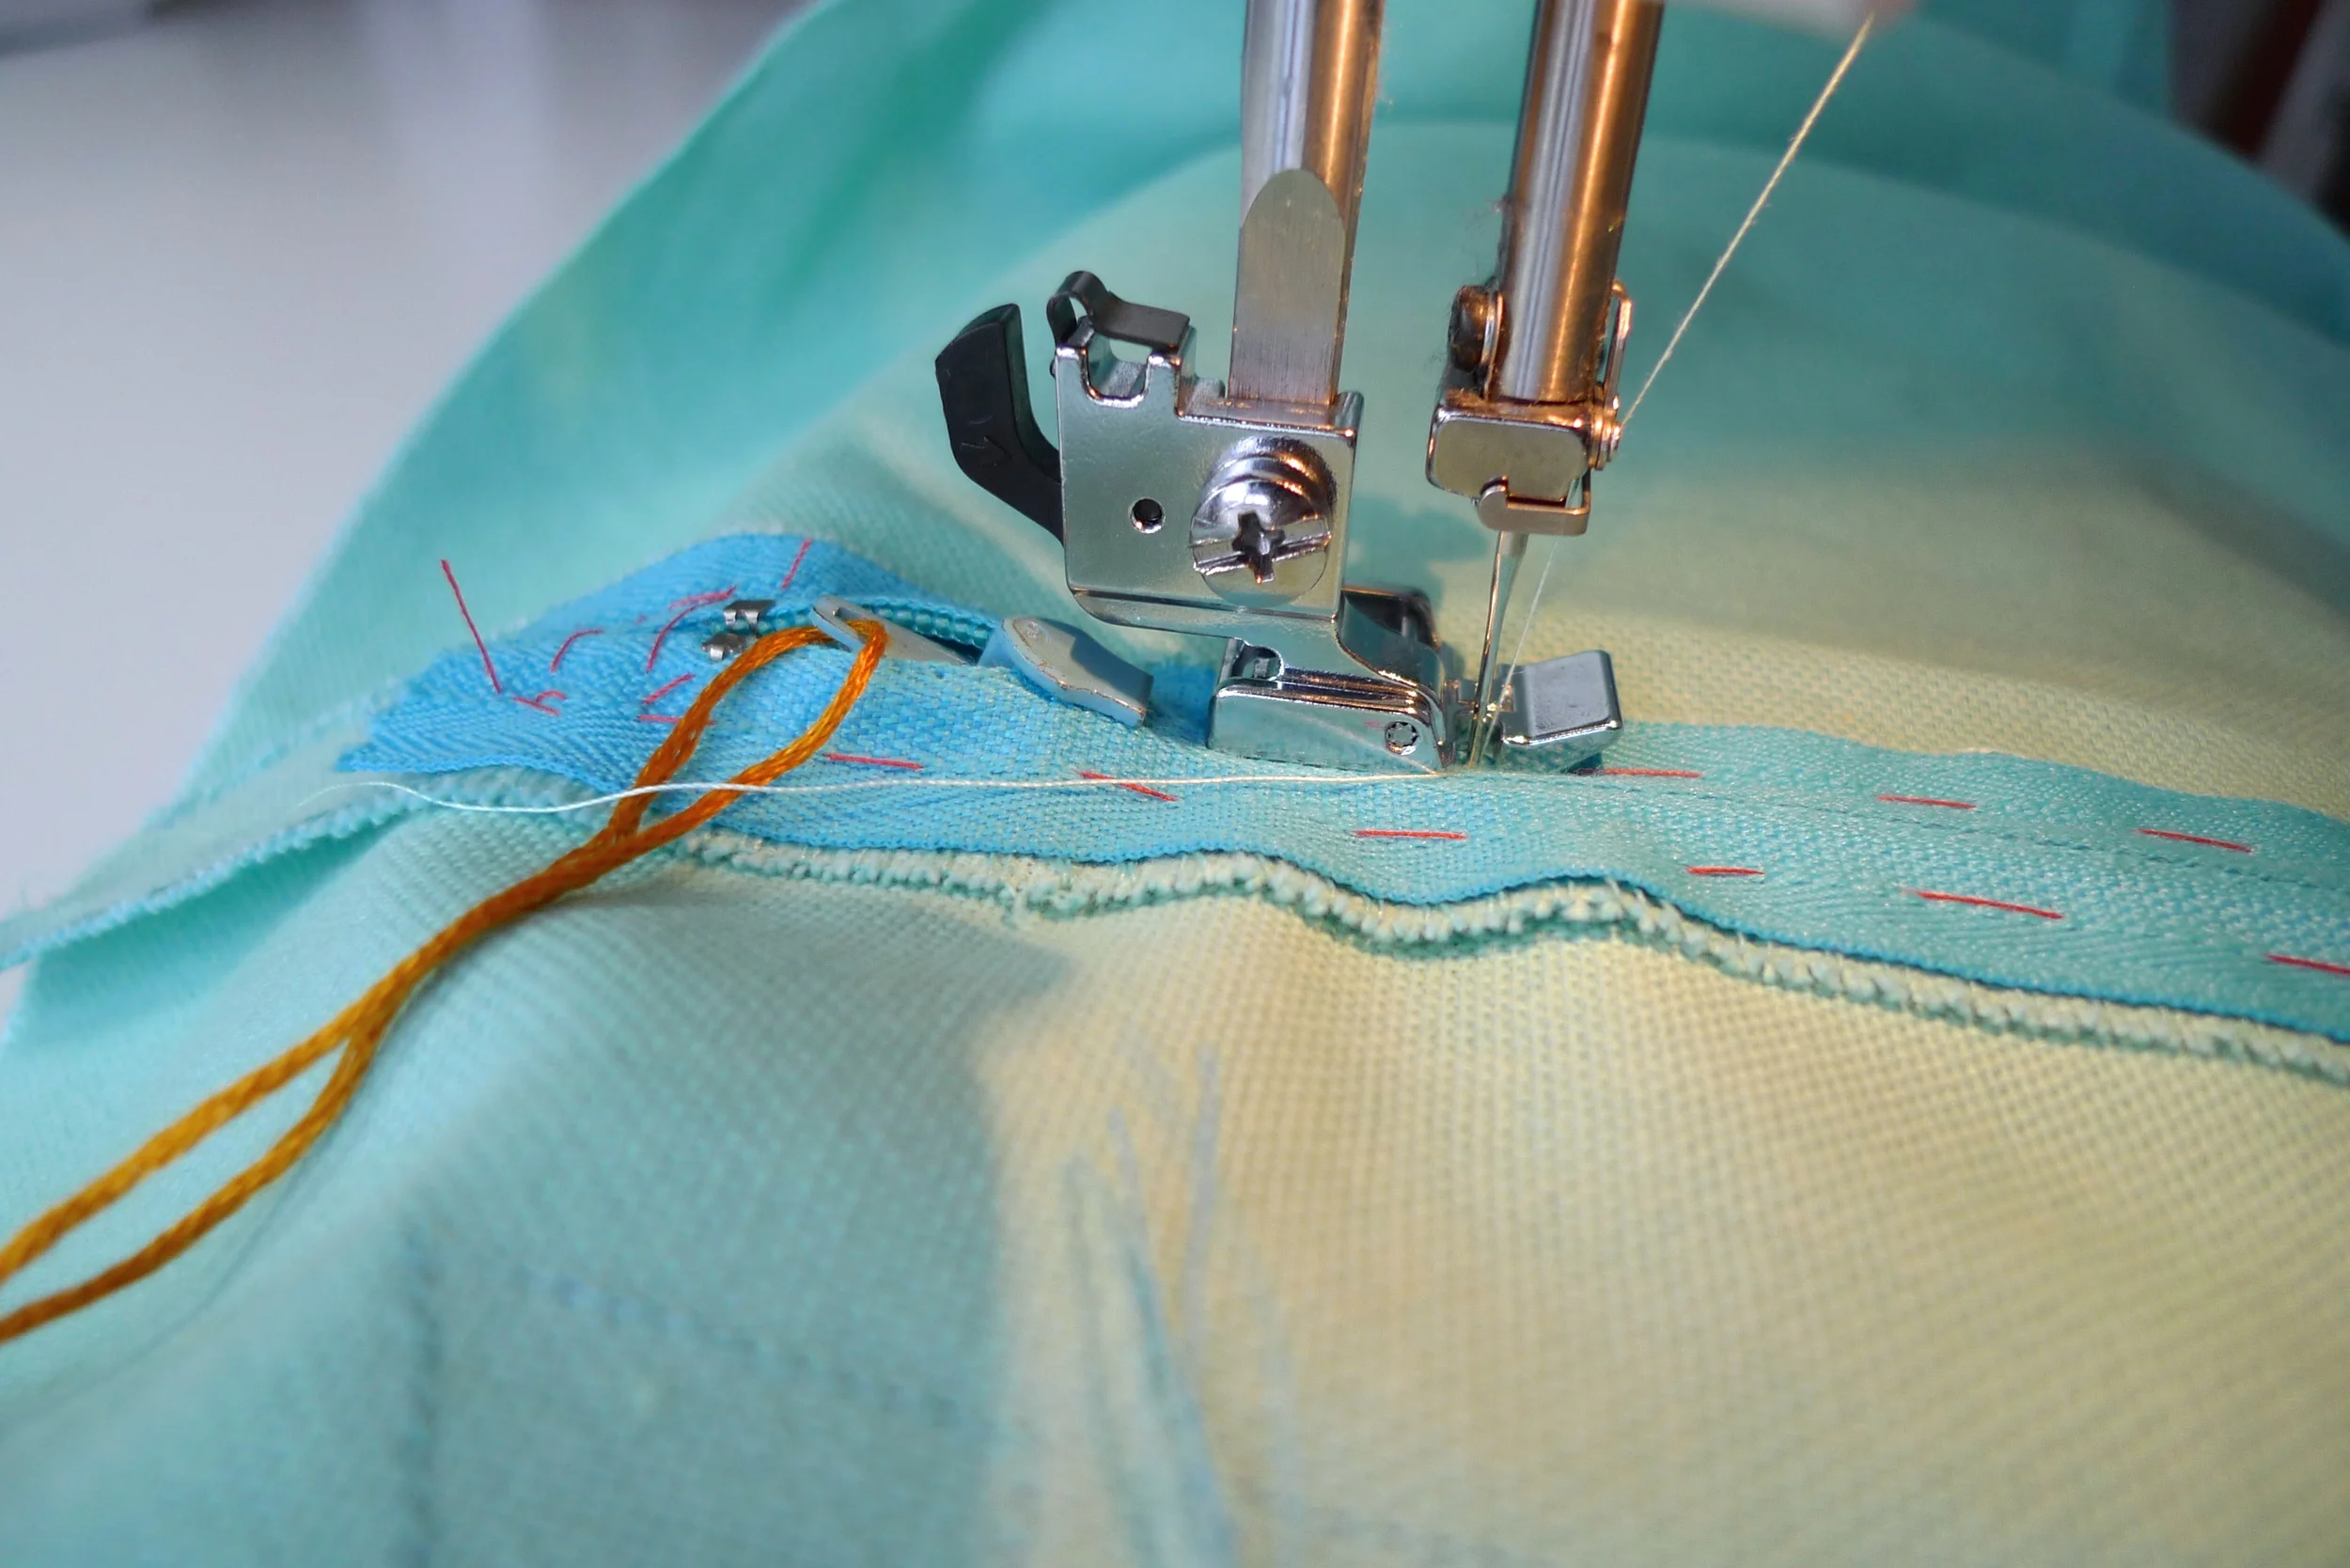
Put a zipper foot on your machine and carefully stitch down one side of the zip; close to the teeth. I like to start on the right-hand-side, just underneath the zip pull. If you start here, you can stitch all the way down, across the bottom and then up the other side before you have to worry about moving the zip.
STEP 4a - Start position, just below zip pull
Stitch down the right-hand-side, being careful to sew a nice straight line. Use the centreline of the of the zip as a visual guide: you can see in the picture that I’m aligning the back left edge of the presser foot with the centreline of the zip.
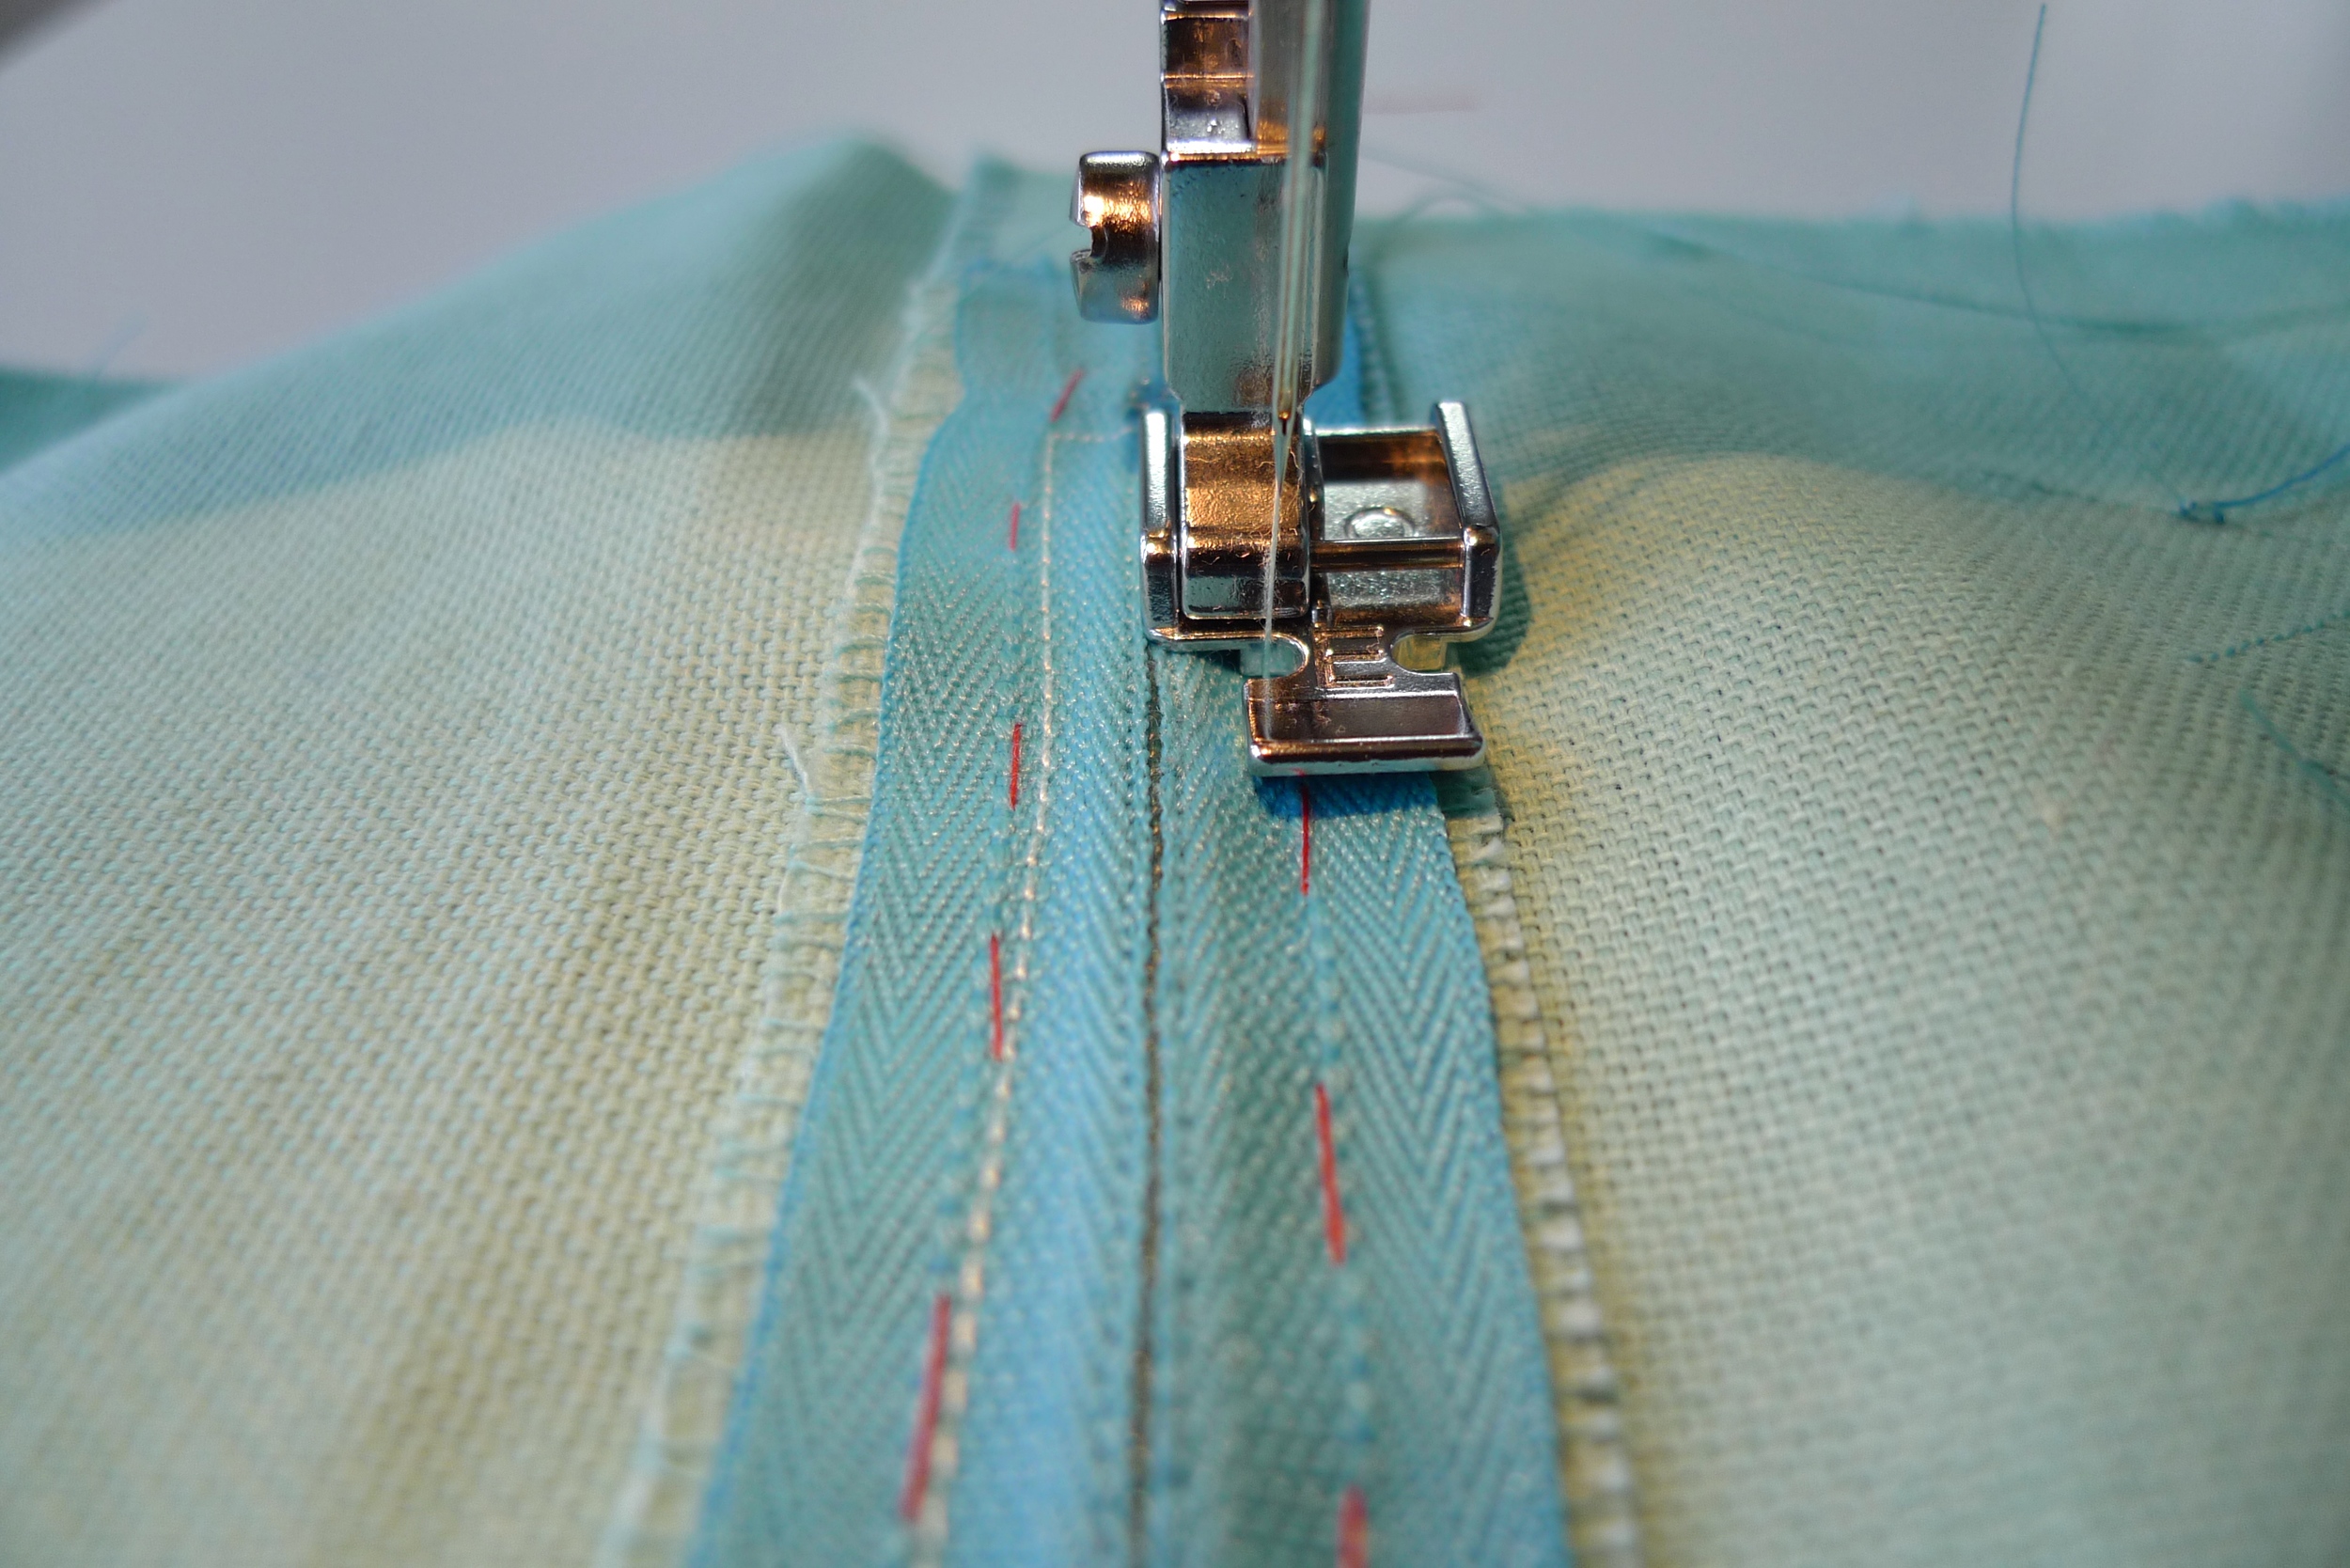
STEP 4b - Stitch down the right-hand-side, using the centreline as a guide.
At the bottom of the zip, stop and lower the needle into the fabric using the handwheel; then raise the presser foot. Now pivot 90-degrees and lower the foot again. Sew across about ½” and pivot again to sew up the left-hand-side of your zip. If it helps, you can use a sewing gauge to mark guide lines or dots on the zip tape, so you know when to pivot at each corner.
Make sure that you sew across the zipper just below the plastic or metal stoppers. You don’t want your needle to hit these little hard bits as it might break.
STEP 4c - Approaching the short end
STEP 4d - Presser foot raised to pivot round corner
So, now you’ve navigated the bottom and you’re on your way back up the left-hand-side of the zip, heading towards the zip pull again.
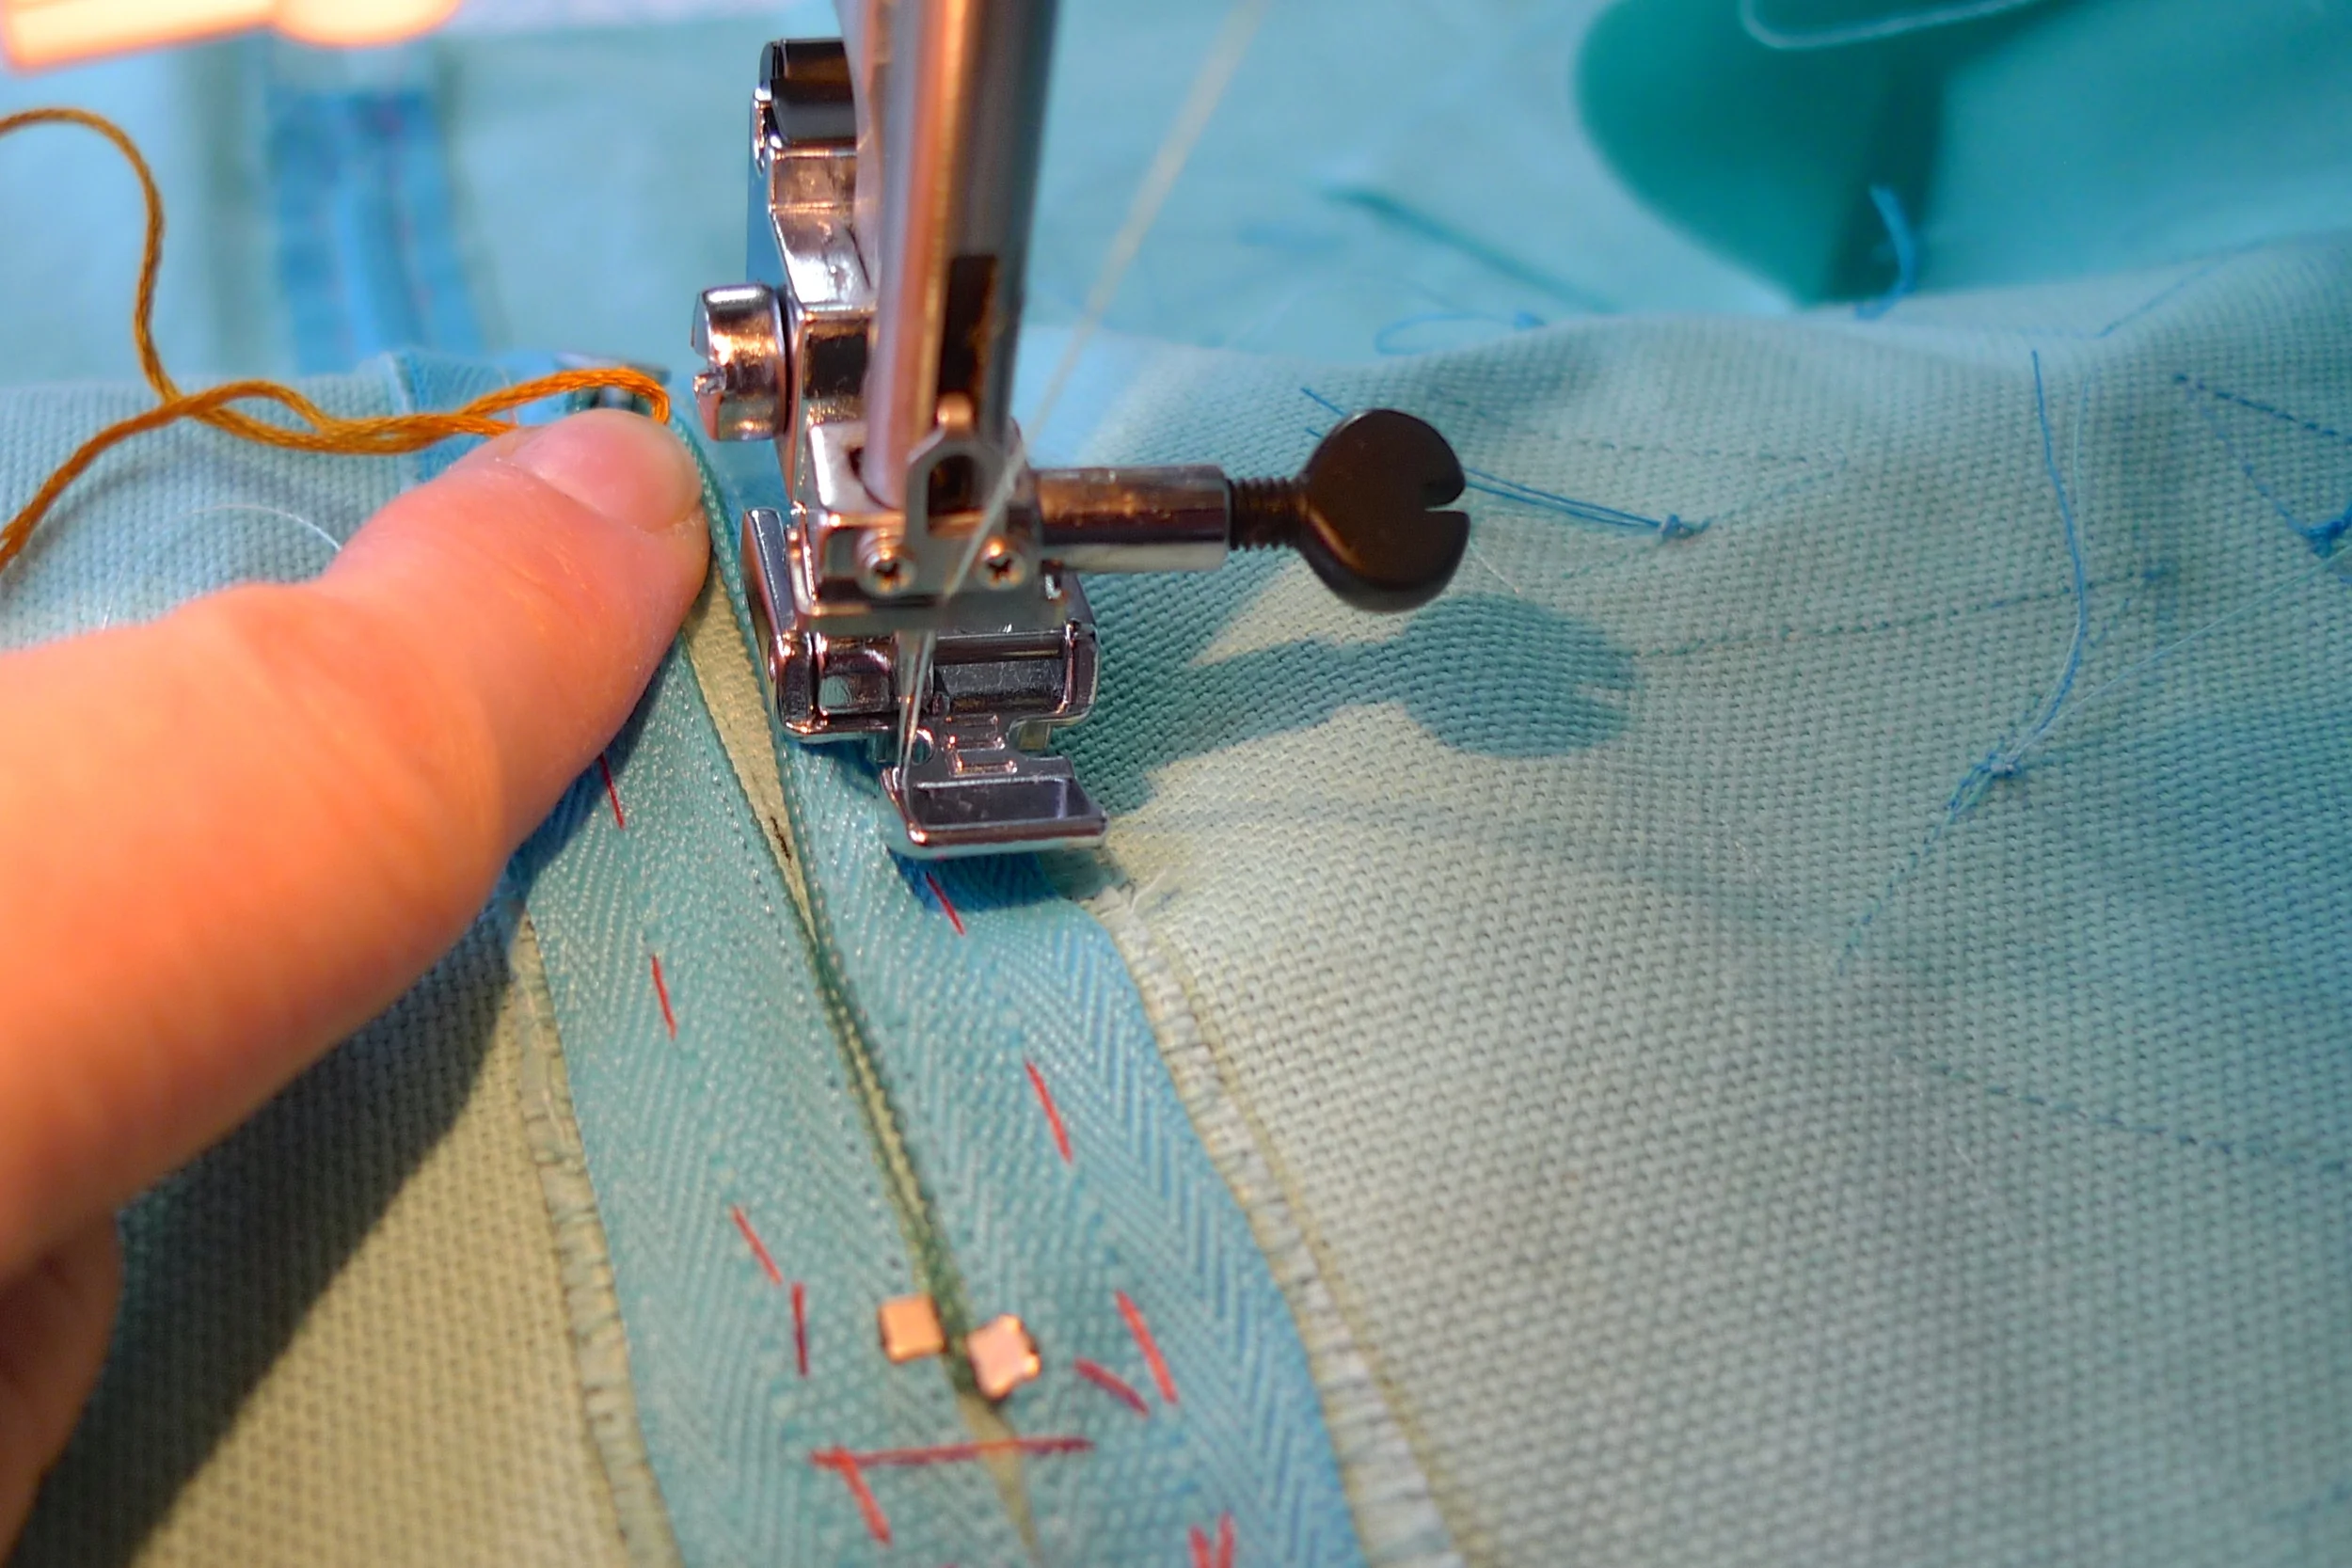
Stop stitching just before the toe of the presser foot reaches the zip pull. Lower the needle into the fabric and raise your presser foot (as if you're about to pivot). Gently ease the zip past the needle and also past the point where your stitching started on the other side. And now lower your presser foot again.
This is the fiddly bit. It helps if you put your thumb on the tip of the zip pull and give it a wee push, rather than trying to grip it and pull it back. Your needle will be holding the fabric in place, so it’s ok if you have to push and pull a little to wriggle it past.
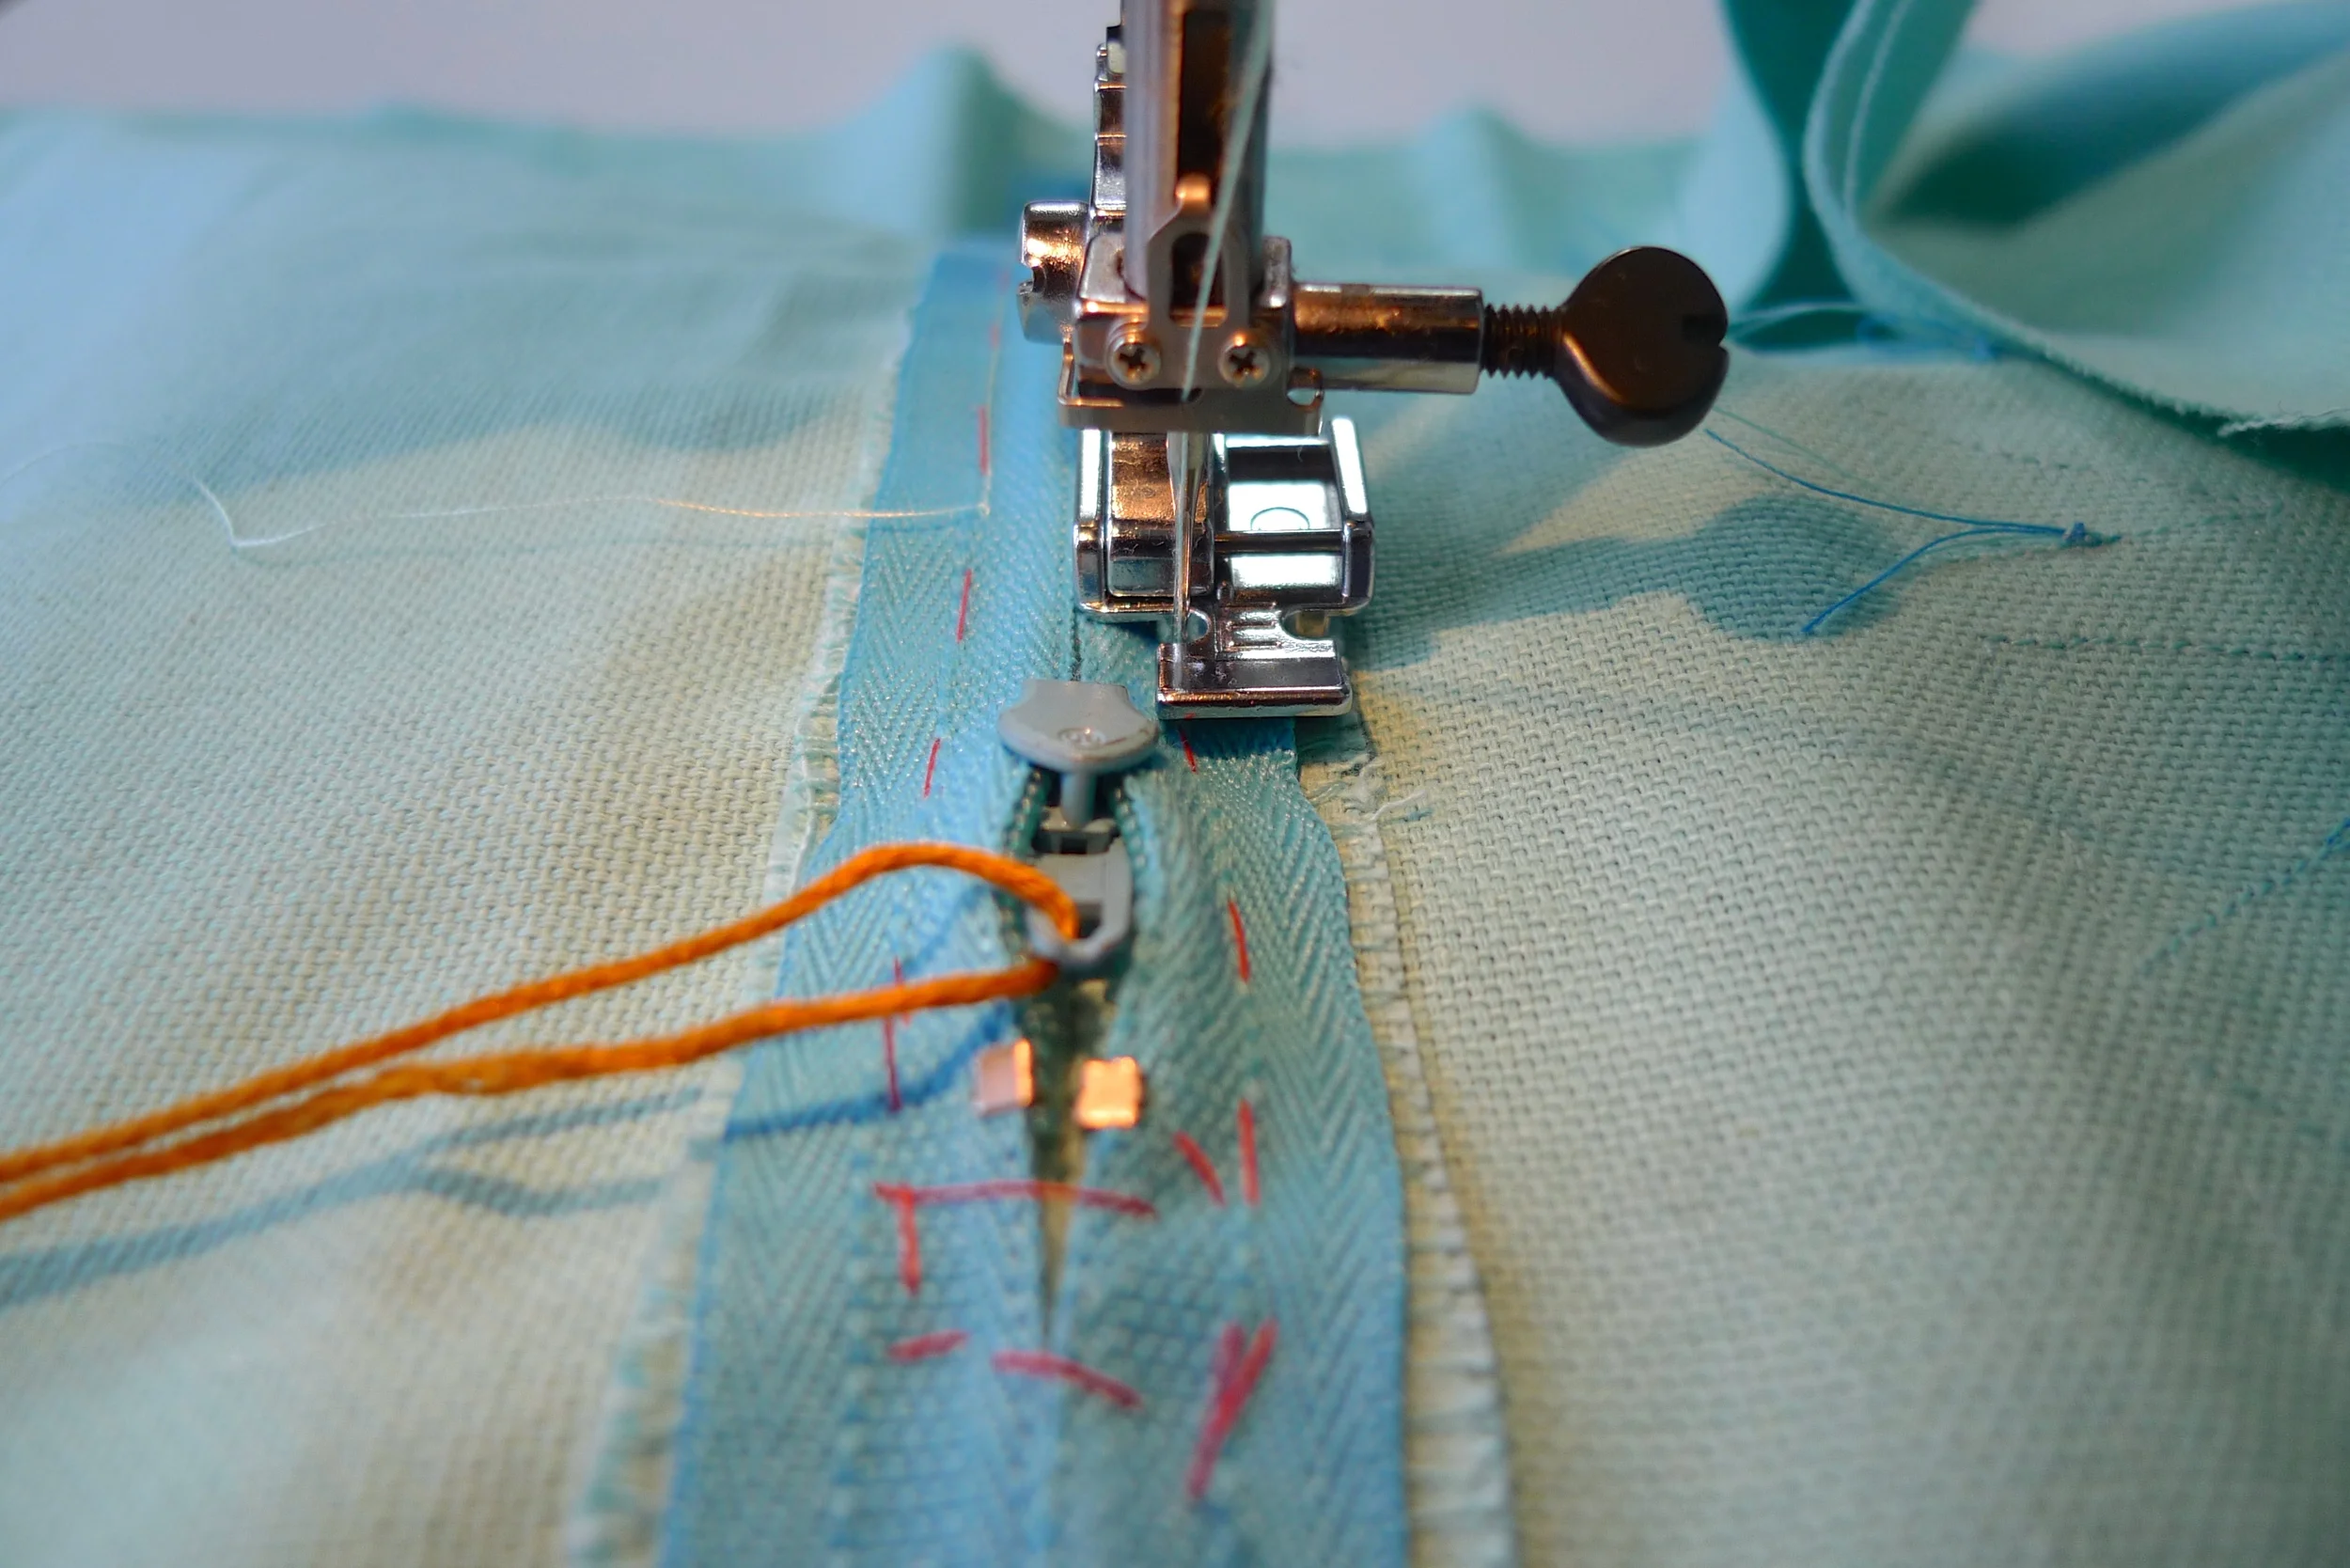
STEP 4e - Stop just before the toe of the presser foot reaches the zip pull.
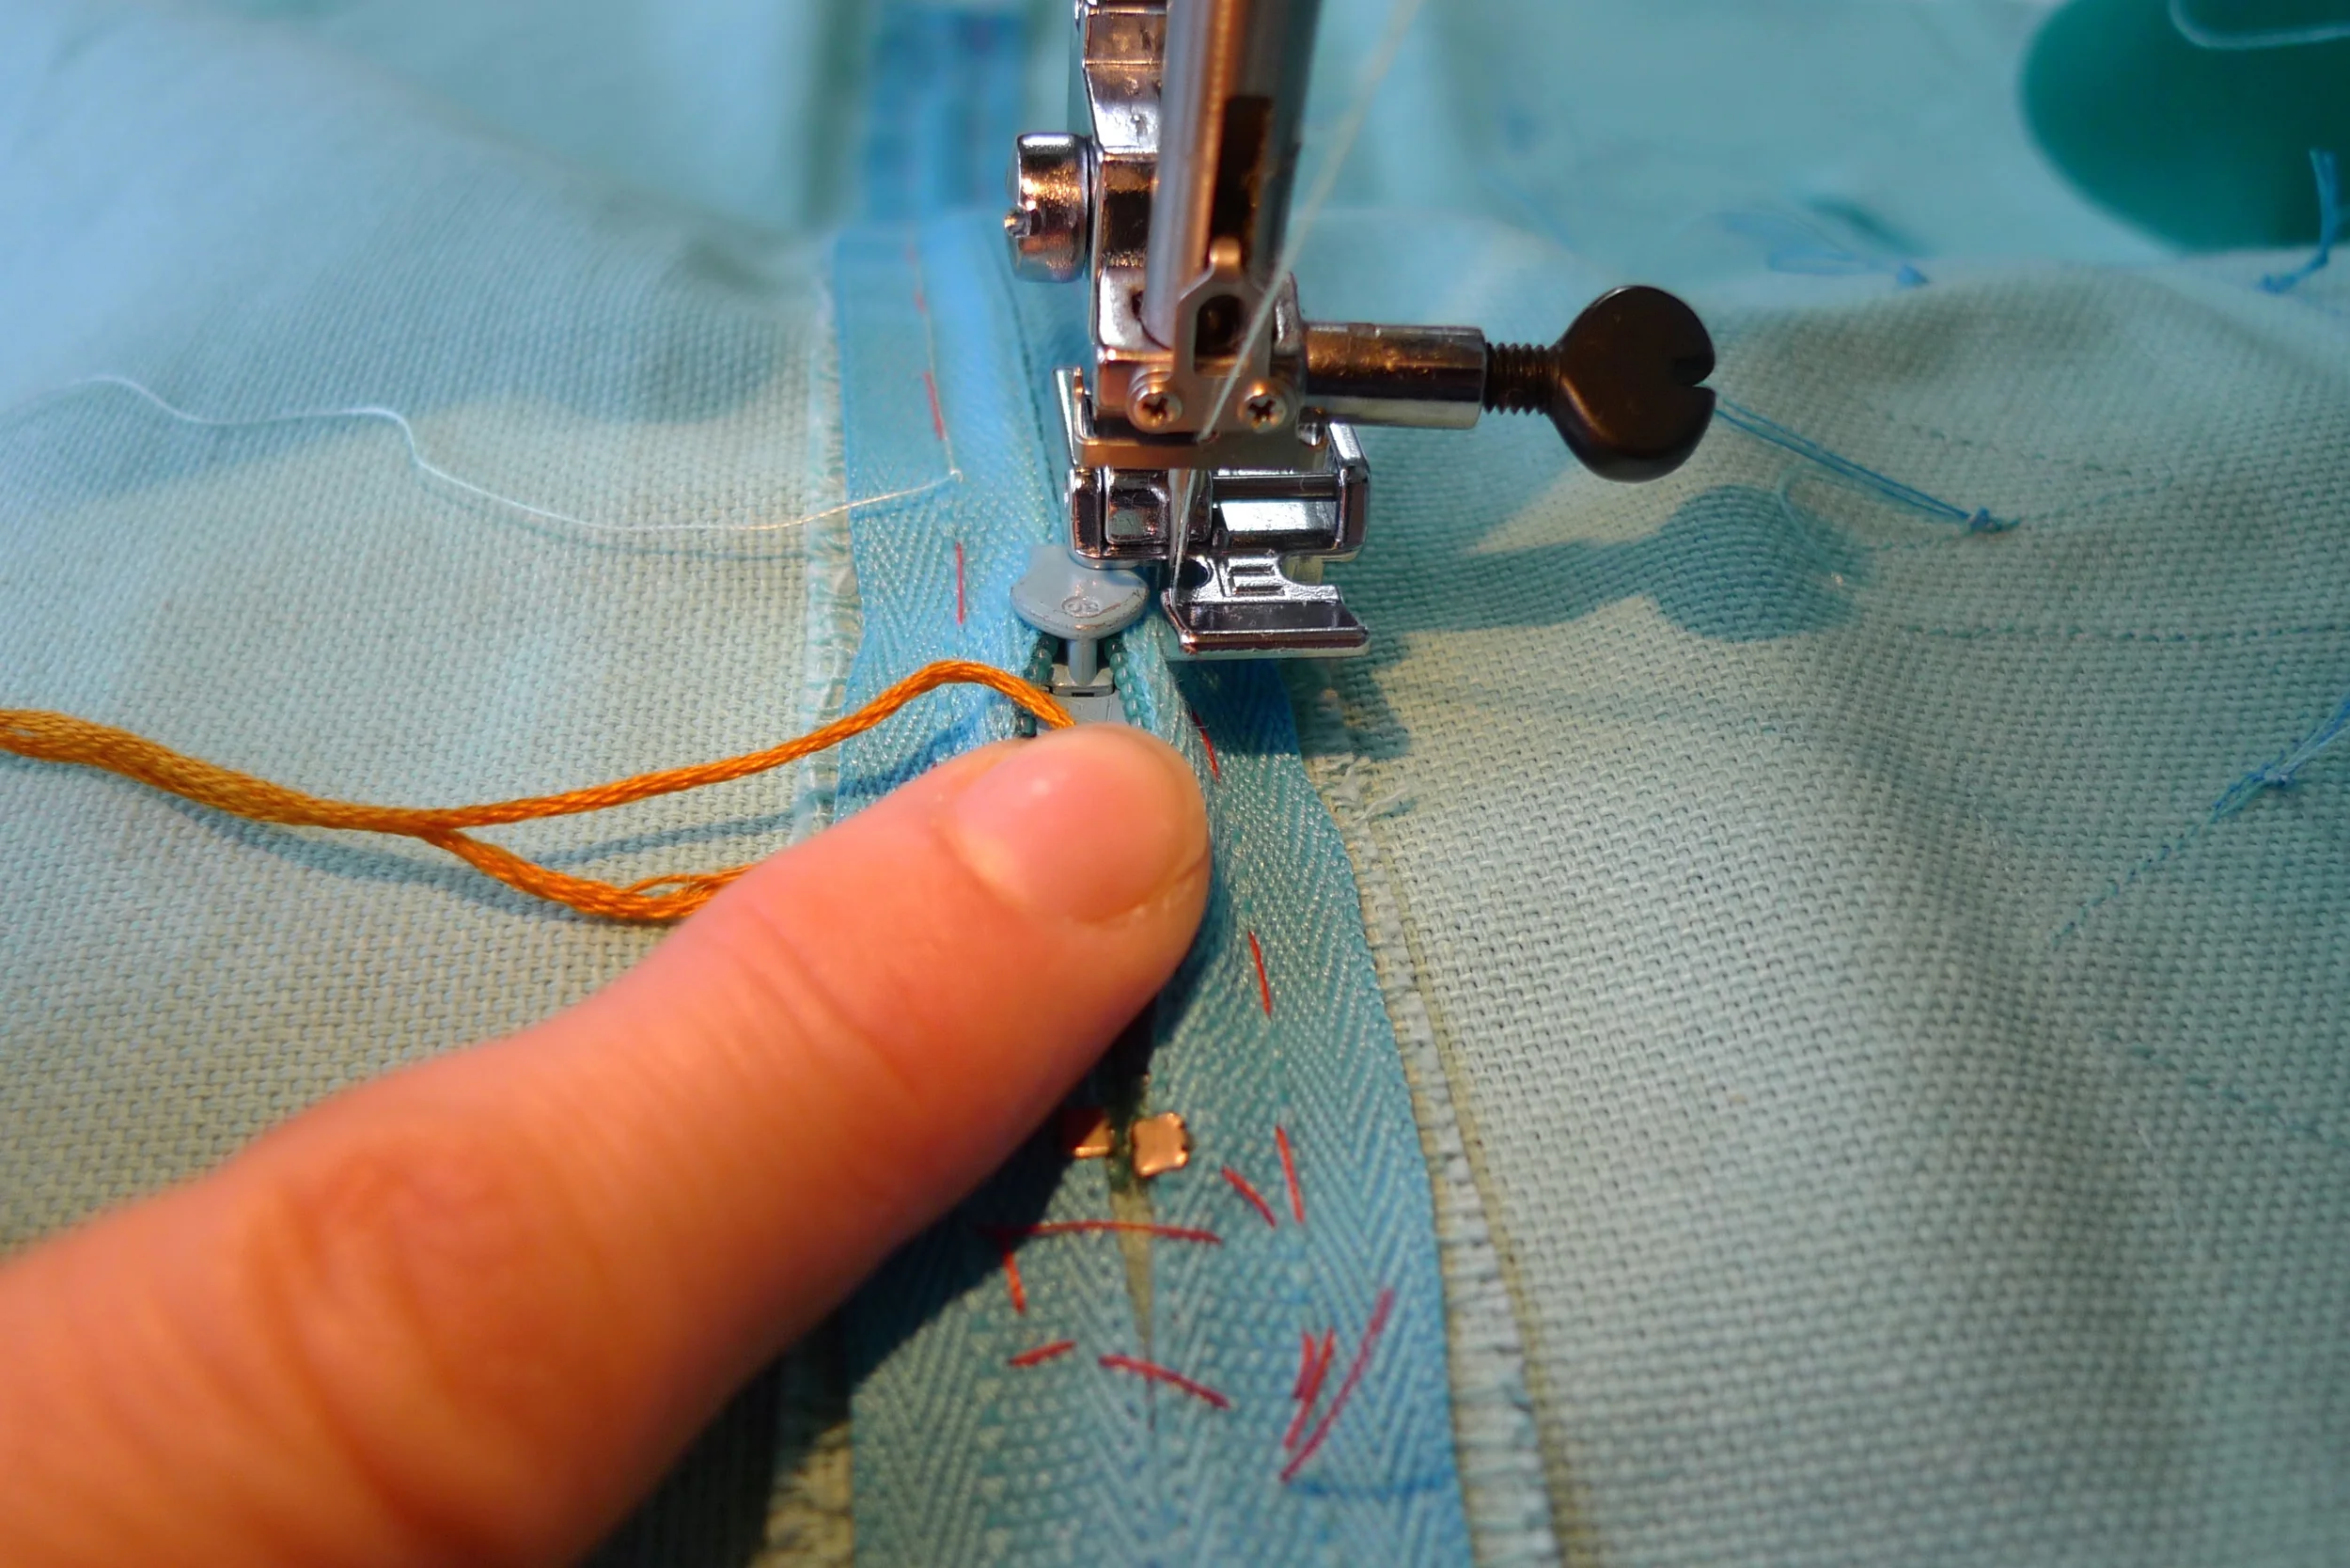
STEP 4f - Gently pull the zip past the needle and
STEP 4g - Move the zip all the way past the needle and also the point where you first started stitching on the other side.
Relief… you’ve got past the zip pull and now you’re nearly home and dry. Stitch to the end and repeat the pivot, turn, pivot, to get across the short end of the zip. Then sew the last inch, back to your starting position. Hopefully your line of stitching will match up perfectly!
STEP 4h - Finishing off, back where you started.
You can either backstitch or leave your thread tails long and pull through the spool threads to tie them off on the underside for a neater finish.

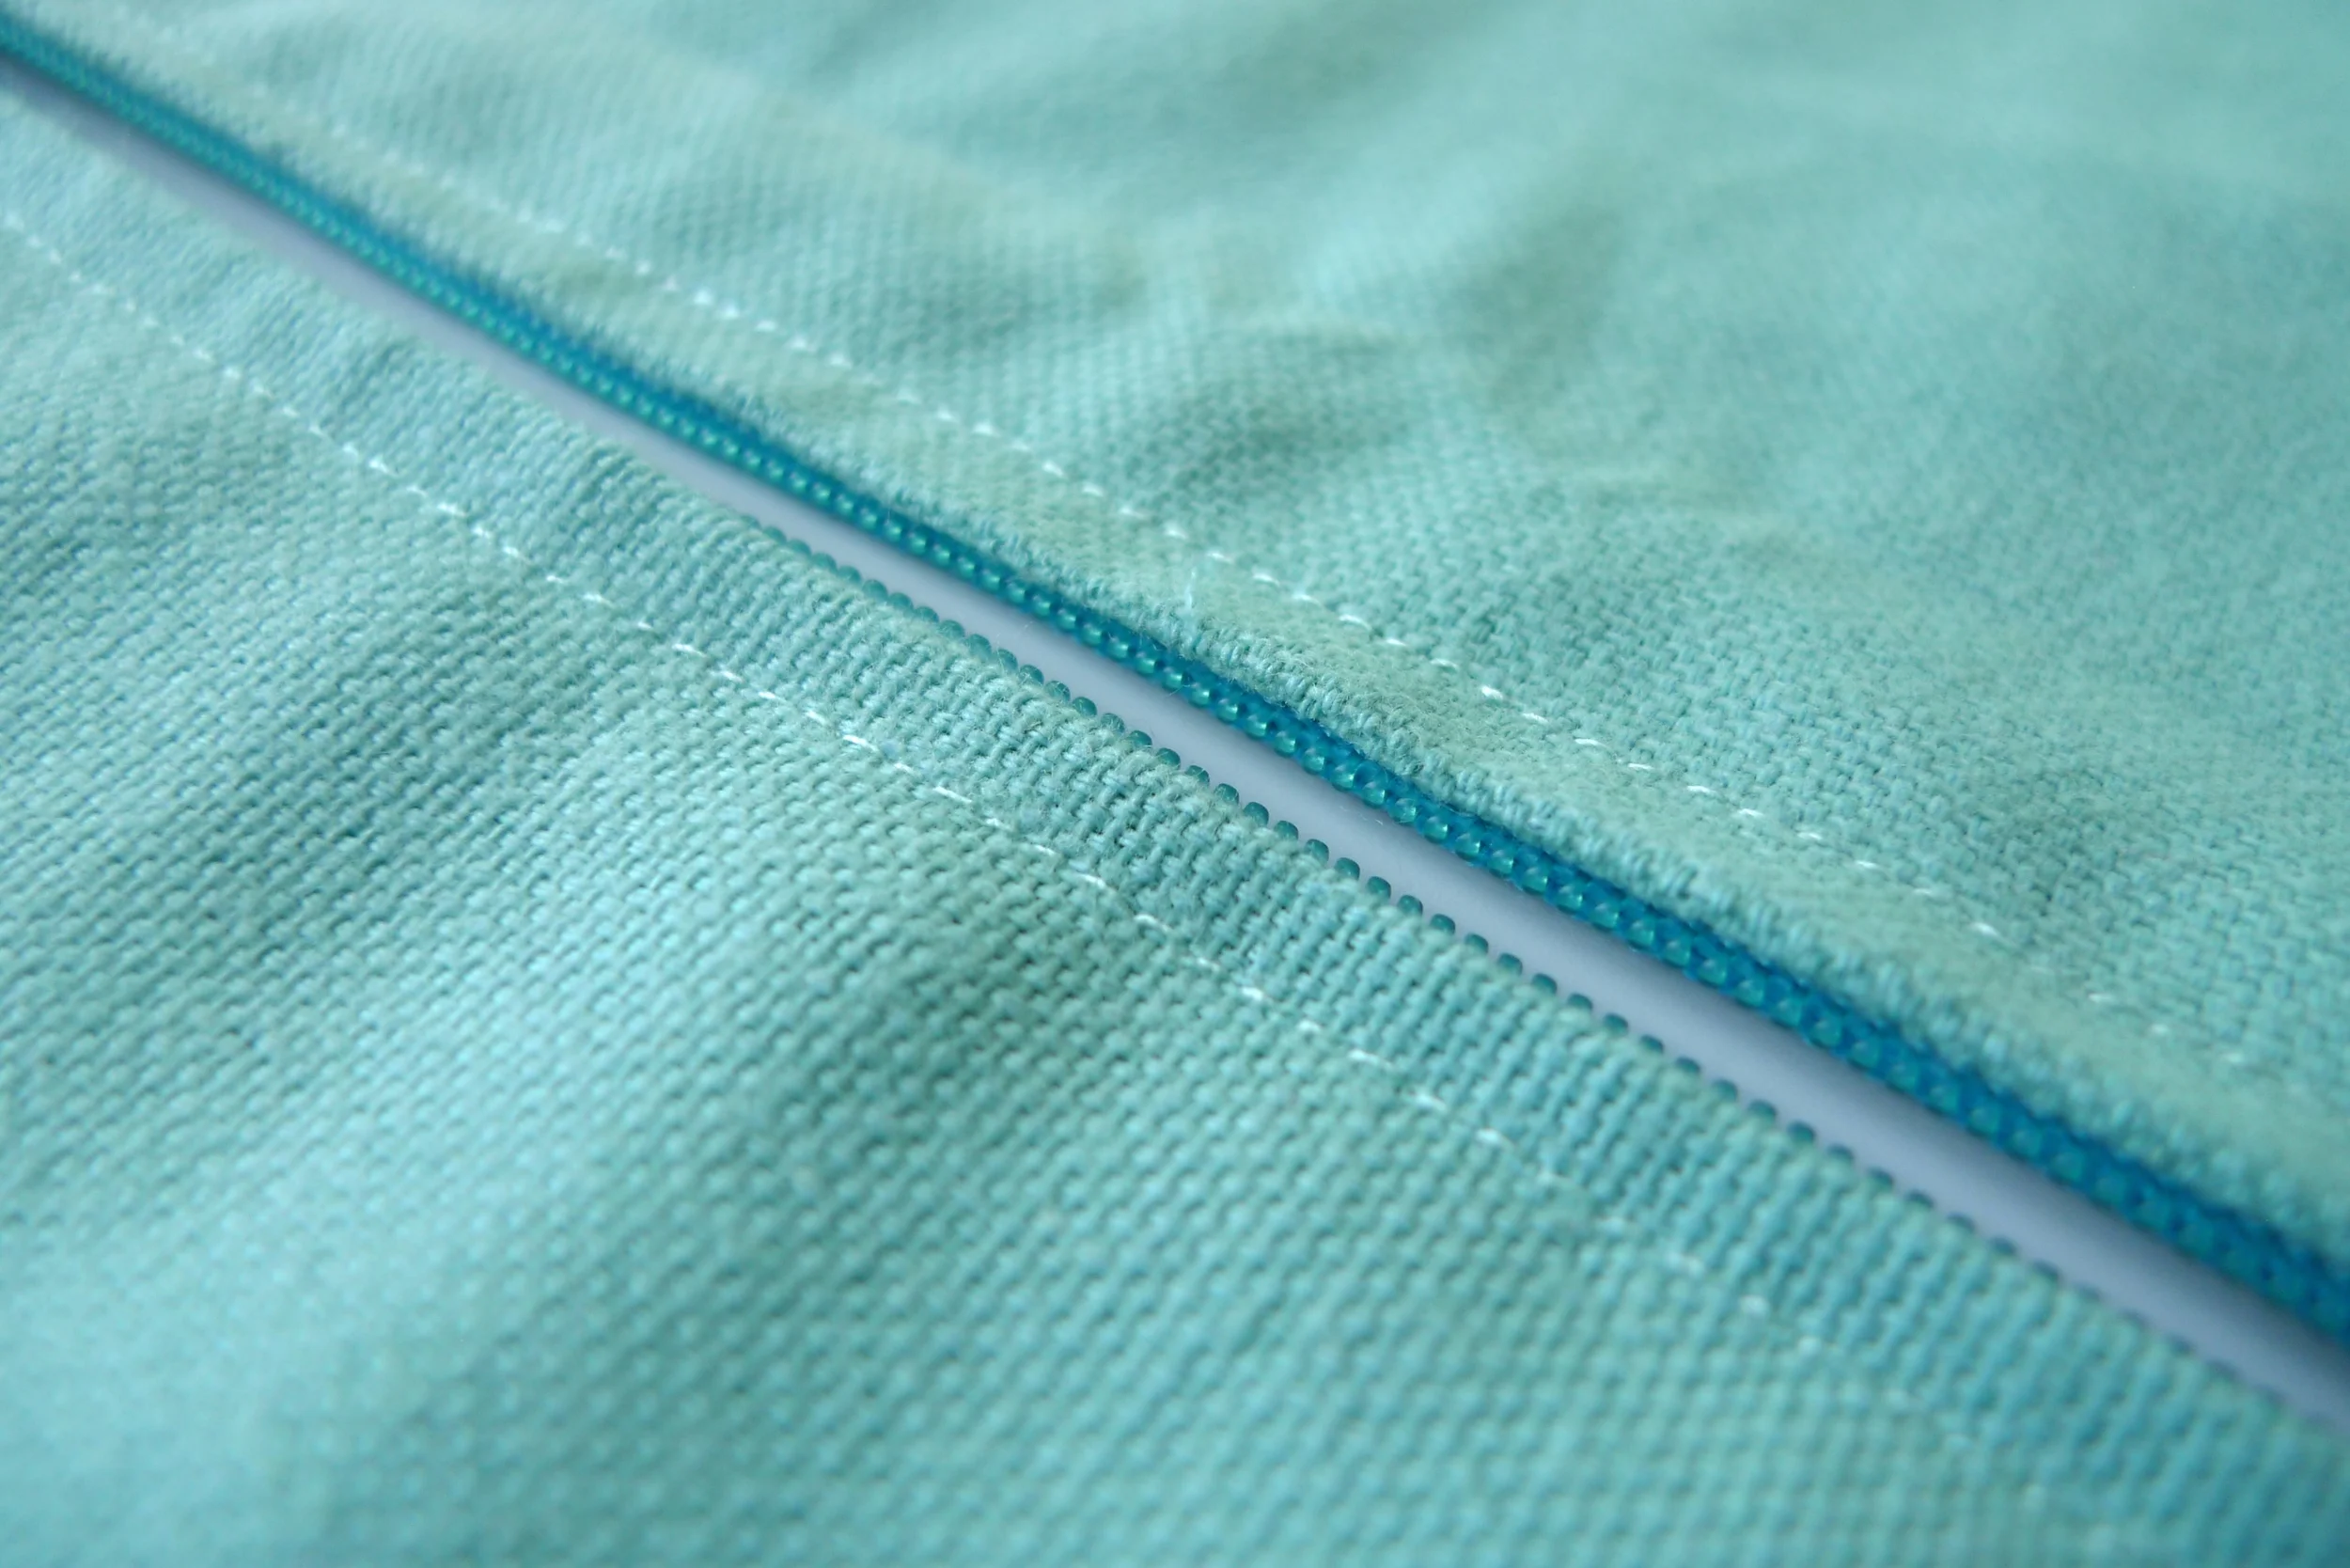
Zip sewn in, looking from the wrong side of the fabric
Turn your fabric over to the right side and carefully unpick the basting stitches using a seam ripper.
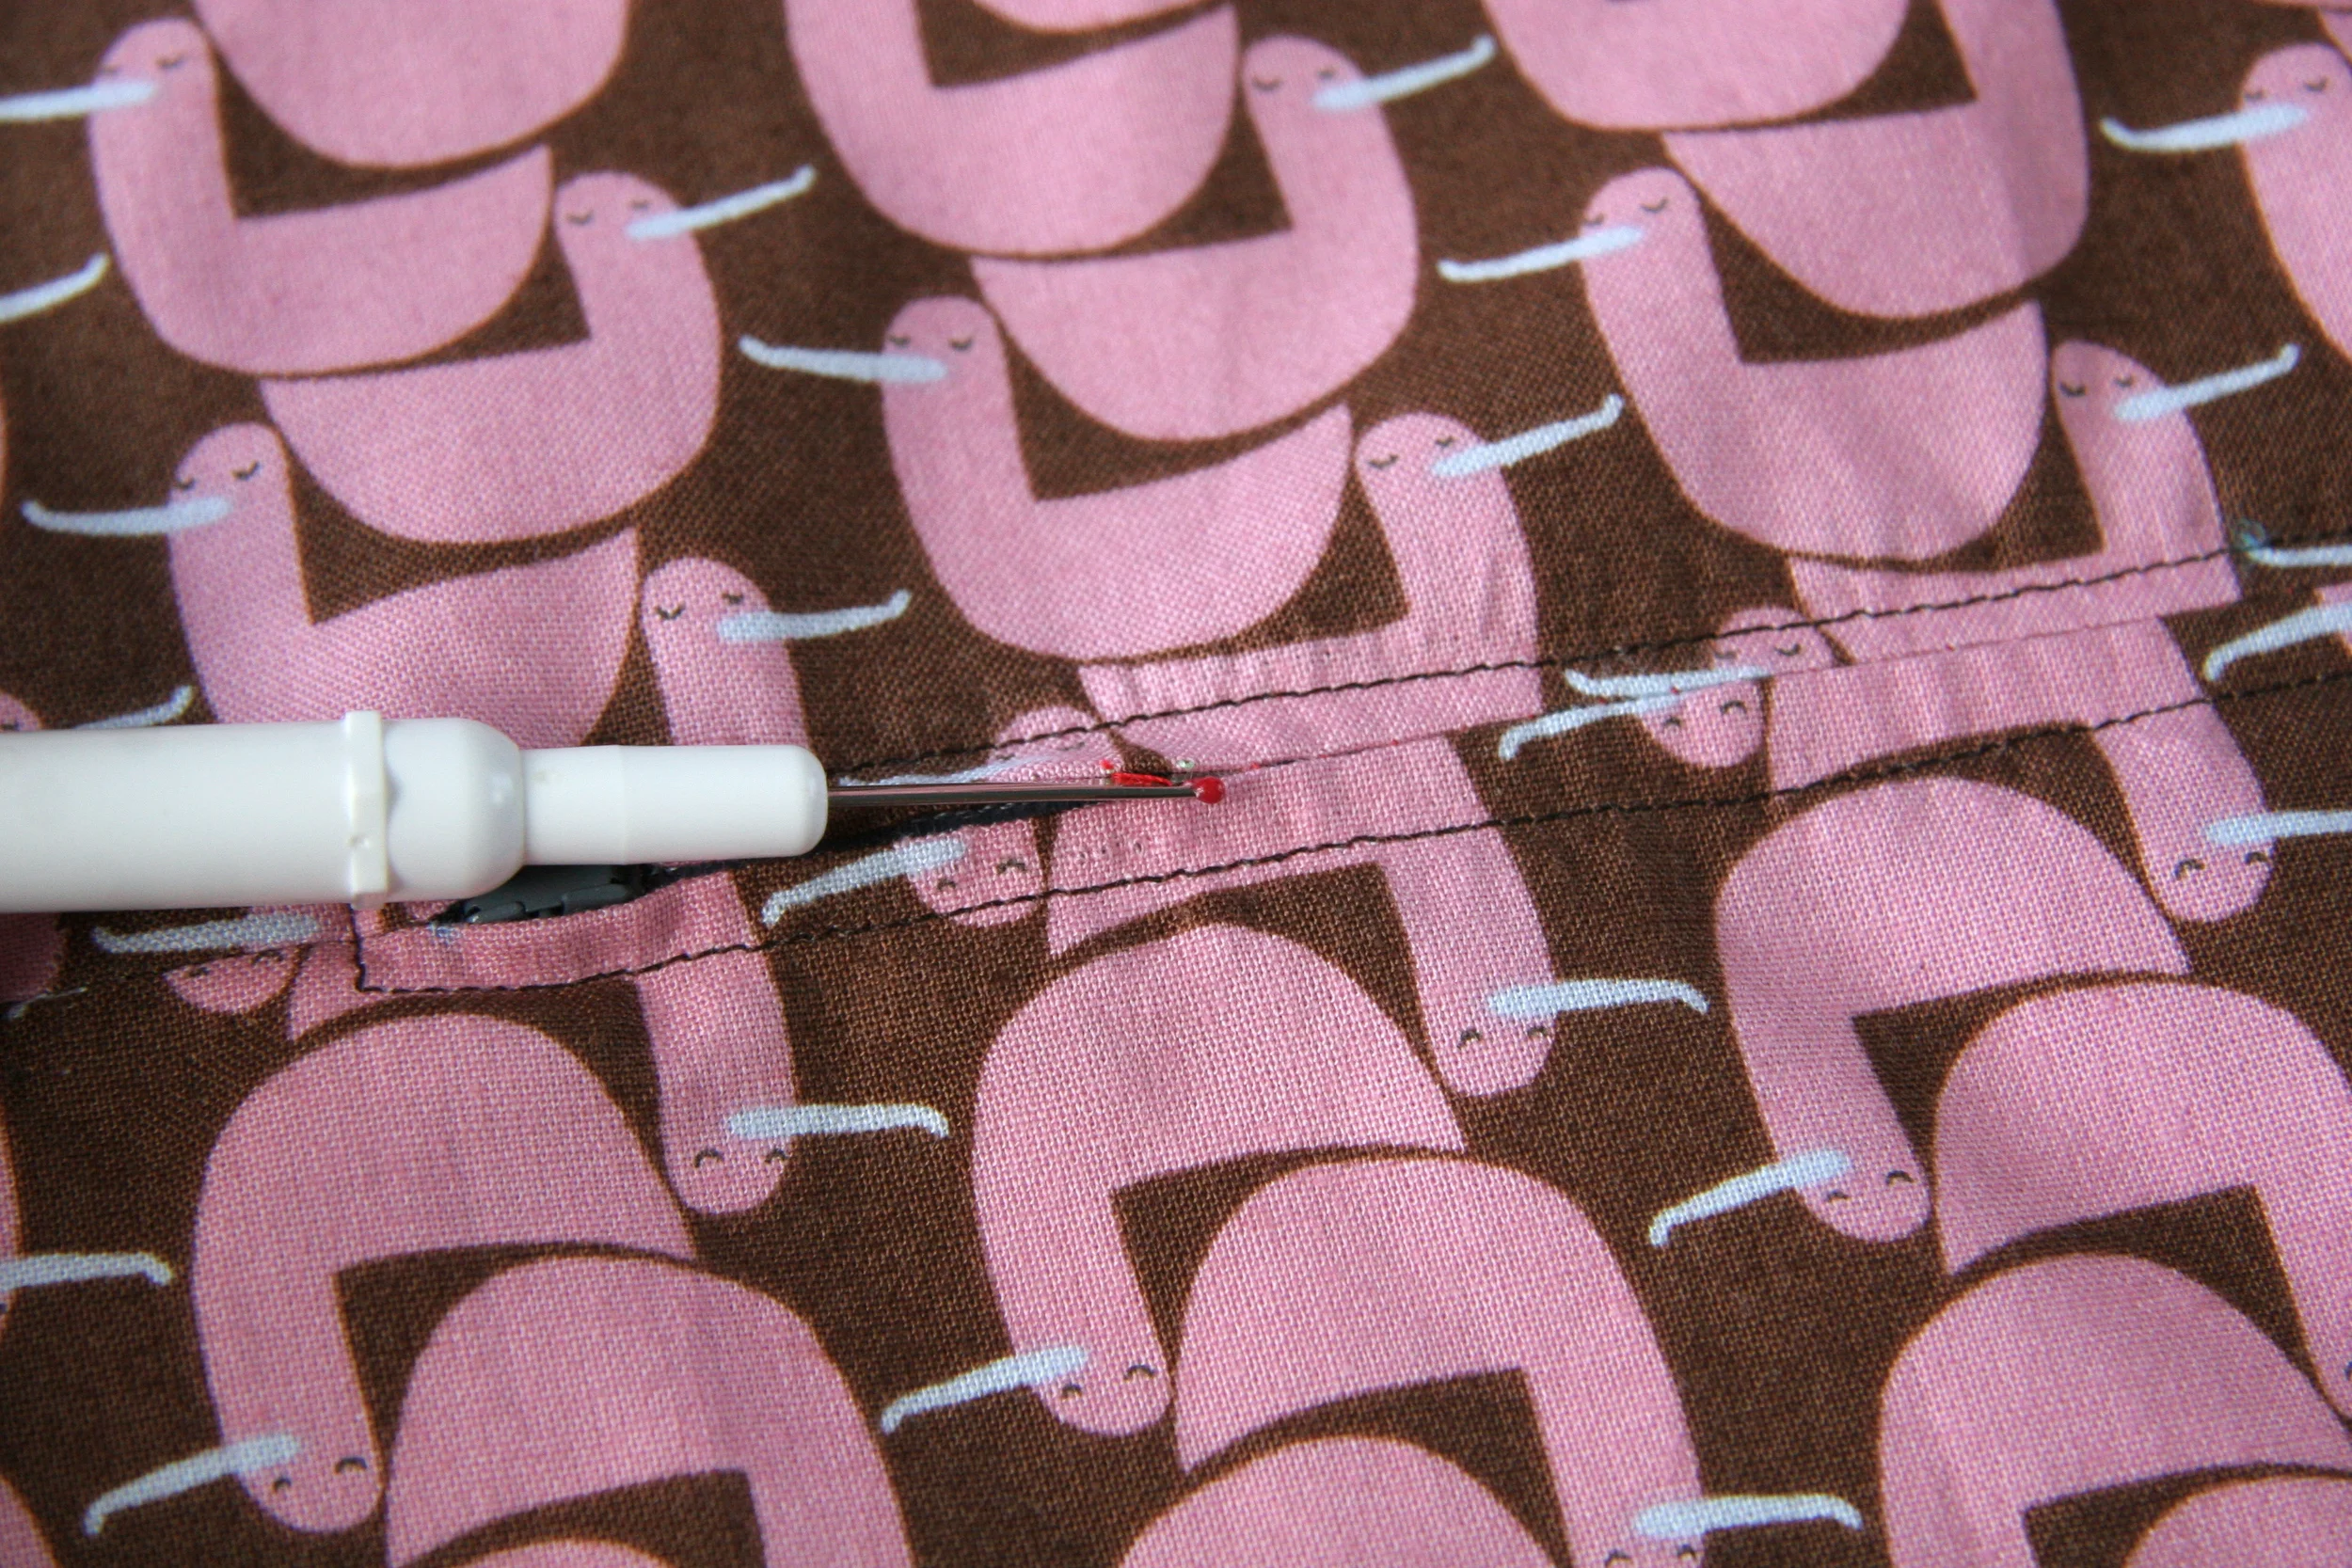
STEP 4f - Use a seam ripper to take out the basting stitches and open the seam
Hooray! You've sewn in a zip! You have permission to pause, eat a mince pie or three, enjoy a cup of tea and admire your zip for a while….
….Ok that’ll do. Back to work.
VERY IMPORTANT!
Before you sew your cushion together, make sure you OPEN YOUR ZIP. Don’t let your giddy zip success and those three brandy filled mince pies go to your head. It is immensely irritating to sew your cushion together and neaten all the seams, only to discover that your zip is closed and you can’t turn it out the right way.
Finishing Your Cushion Cover
STEP 1 - Pin Right Sides Together
So, open up your zip, then bring the right sides of the cushion pieces together, lining up all the edges. Pin and sew the remaining three sides with a standard ½” seam. Backstitch at the start and end of your seam.

Pin cushion squares together, right sides facing
STEP 2 - Finishing the Seams
Neaten the raw edges with a zigzag or overcast stitch. You can sew the seam allowances together when you neaten them; they don’t need to be pressed open. Again, if you get stuck on this point, here's a handy tutorial on seam finishes.
When I zigzag round the edges, I do a little zigzag back and forth around each corner to secure the stitching, then I can trim the corners off to remove some bulk and the seam finish won’t unravel.
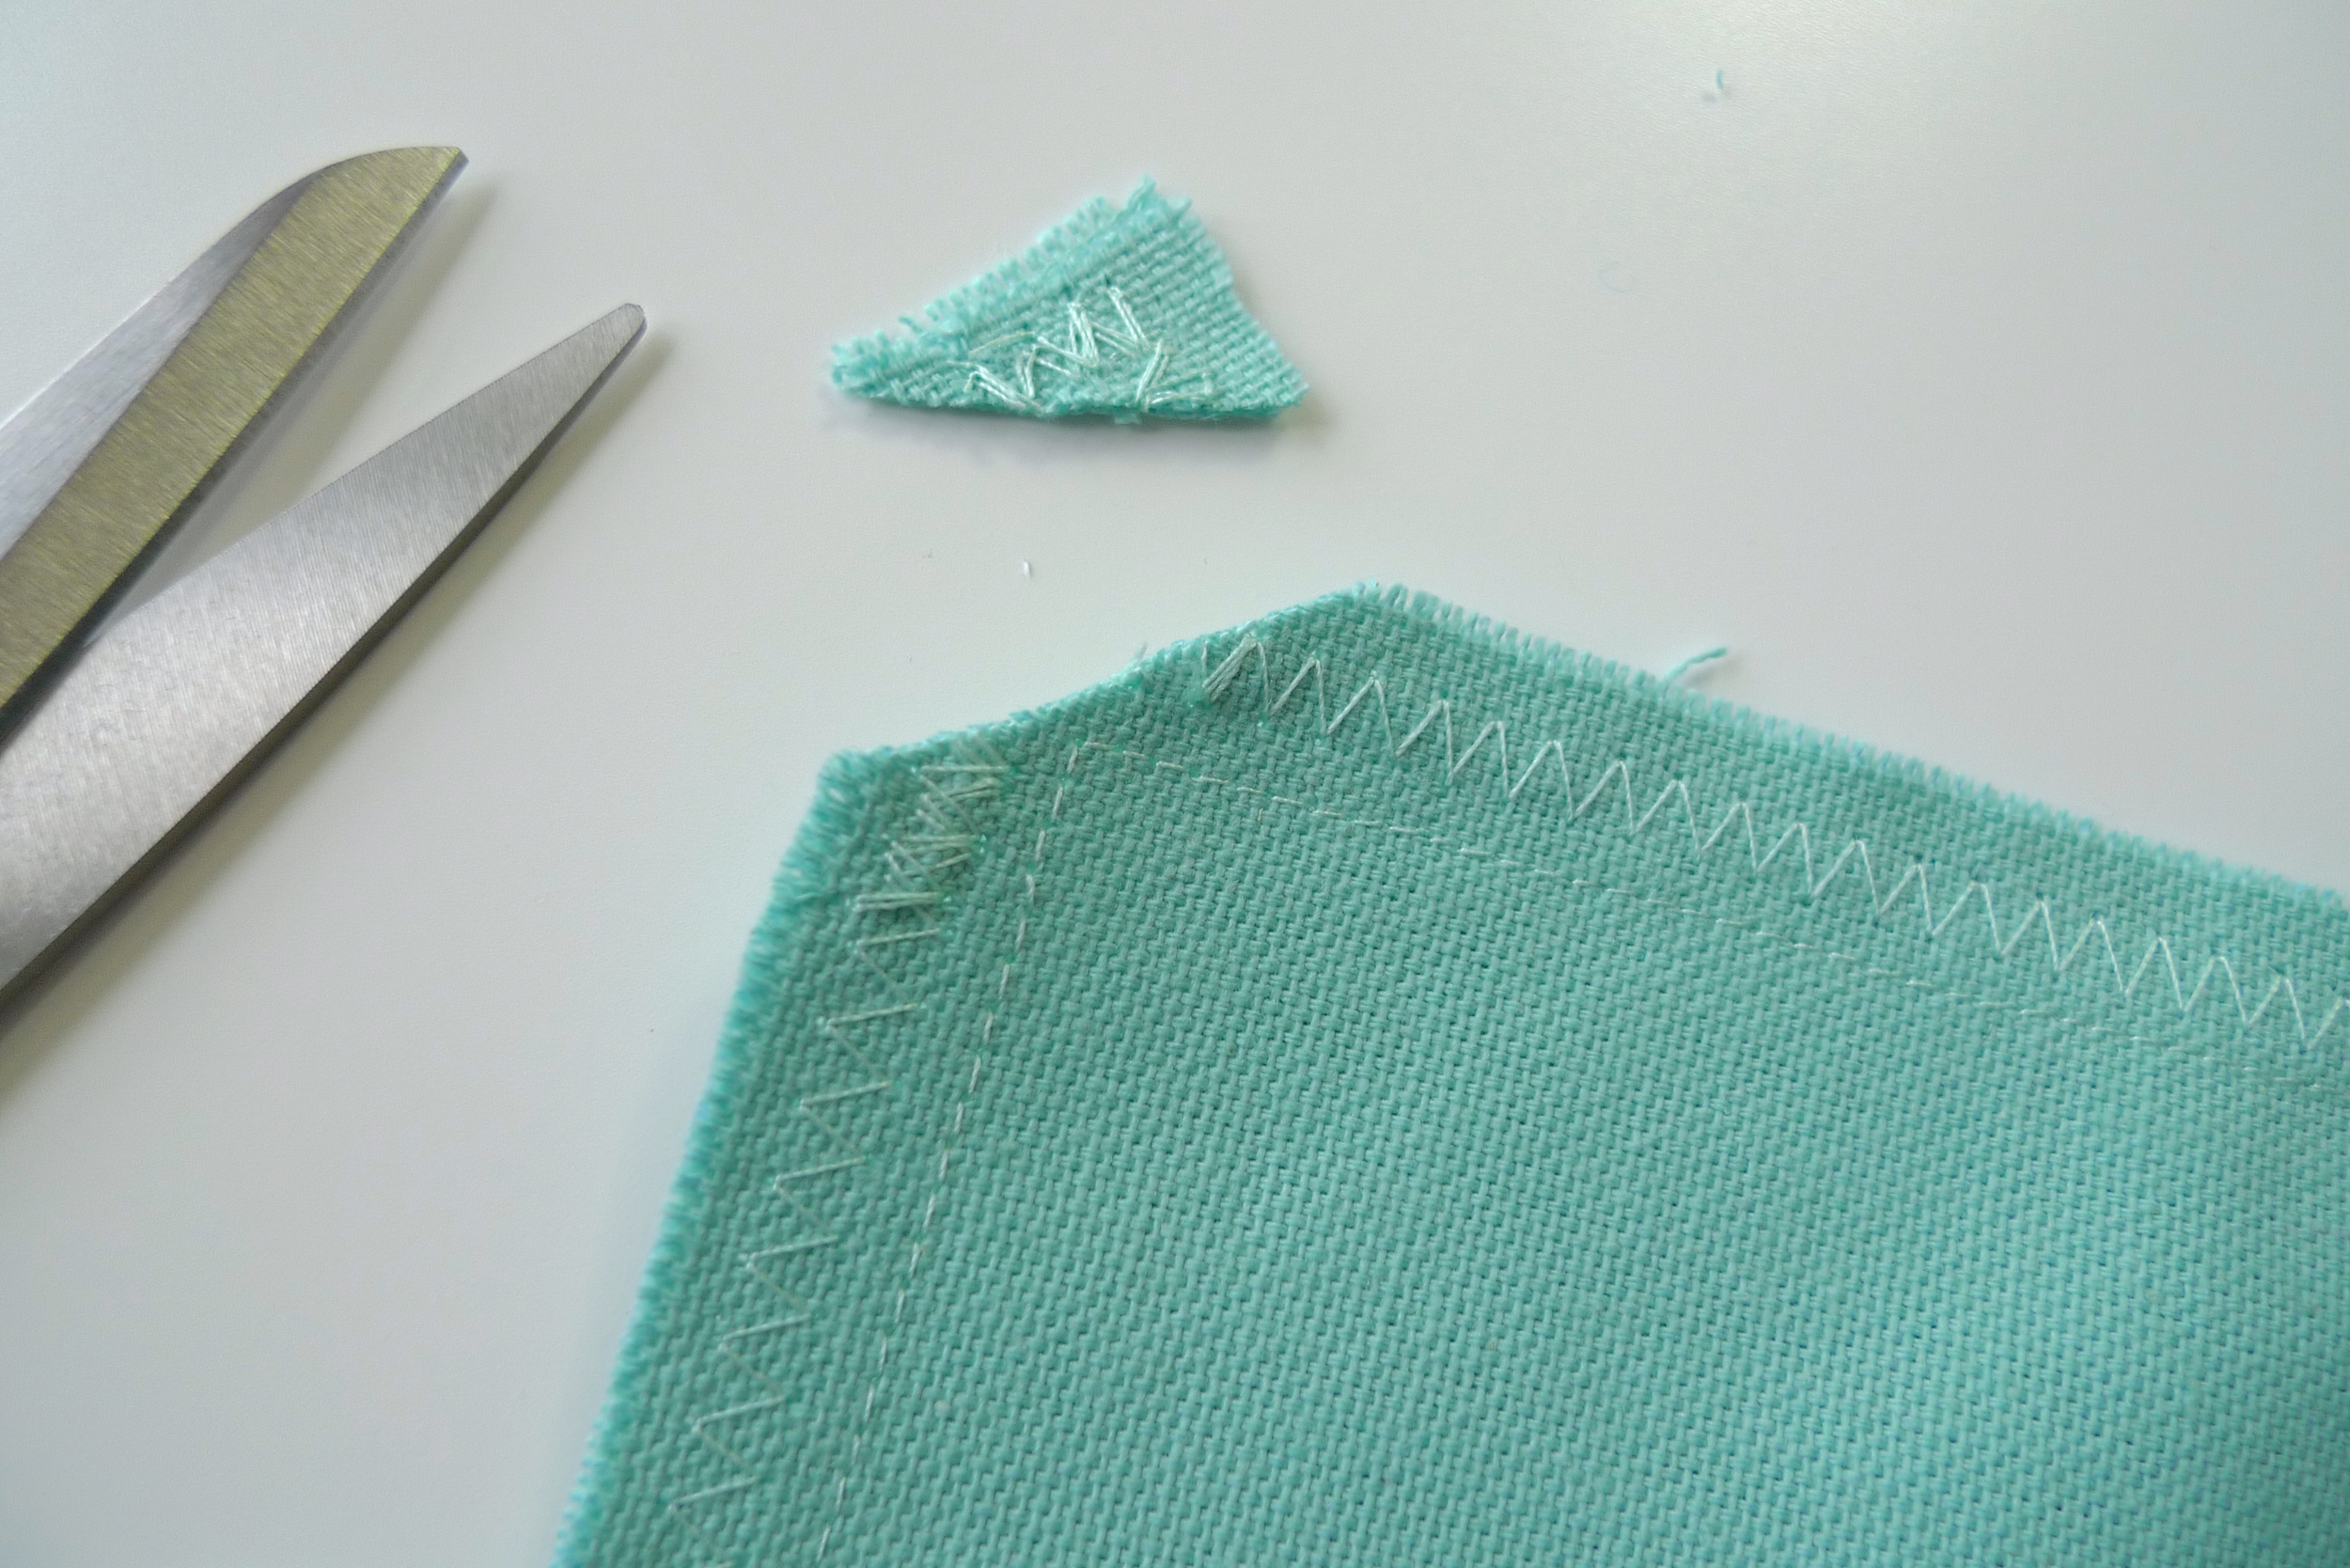
Trim the corners
STEP 3 - Pull The Cushion Through To Complete
Trim the corners, as above, and pull the cushion cover through the zip opening, so that the right side of the fabric is now on the outside.
Using a point turner, or the end of your seam gauge, push the corners out and give the whole thing a good press. Stuff with a cushion pad, zip up, then sit back and admire your handiwork!
One completed cushion with a tidy zip closure.
Next Week
I’m really looking forward to seeing your finished cushions. If you’re finding the zip tricky, leave a comment here or send me an email (sewalongs@thestitcherystudio.com) and I’ll do my best to help.
Next week, I’ll reveal my finished cushions to you and we’ll round up this little Sewalong.
If anyone wants to send me pics of the their cushion before next Friday that would be lovely too. The final deadline for all competition photo entries is noon on Monday 15th December.
Happy Sewing!